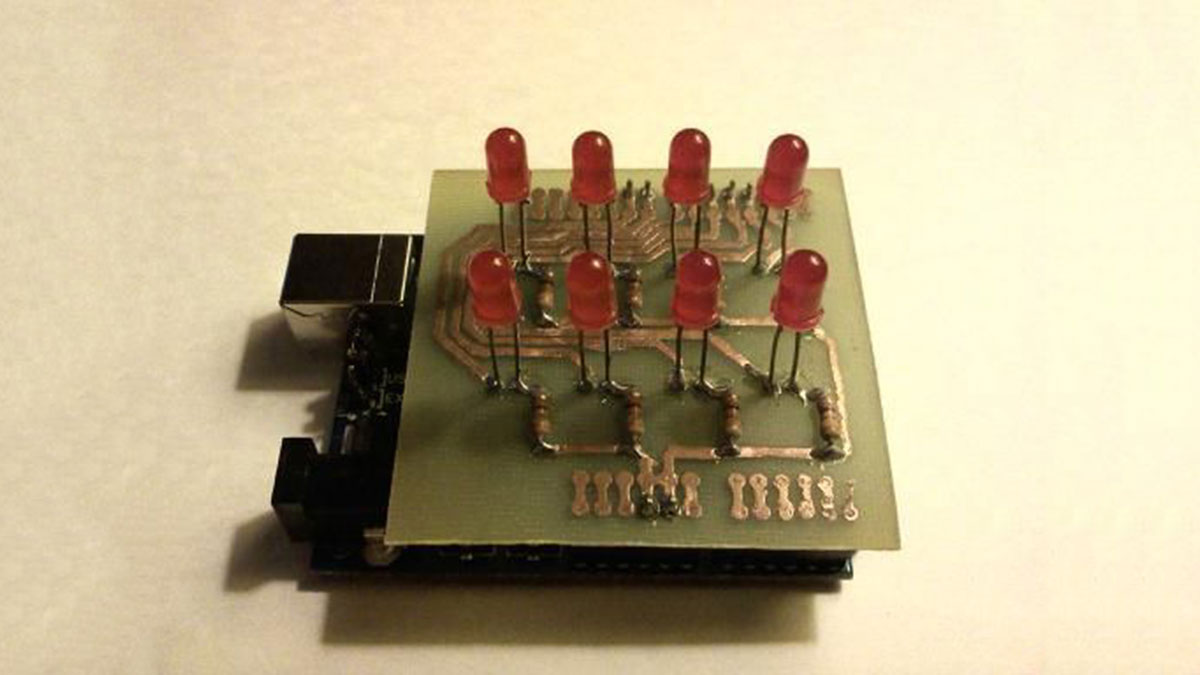
The other day I was confronted with an interesting problem, I needed to control a series of lights from an interaction on a computer screen and it had to be as inexpensive as possible. I instantly thought of an Arduino. It had everything that I needed, more than enough I/O, an integrated USB and its only $30. To communicate with the Arduino I decided to use Processing. The two work really well together because of Arduino’s close family relation to Processing.

Step 1: The Materials
Its time to gather all of the bits and pieces necessary to make this happen:
The Software:
Processing – can be found at www.processing.org
Arduino – Can be found at www.arduino.cc
The Hardware:
Arduino USB board (I used the Diecimila, because that’s what I had)
8x LEDs of your choice
8x 330ohm resistors
Break away headers
single sided copper clad
Ferric Chloride
tiny drill bit
USB cable
Step 2: The Code
This was the hard part for me. I have always been a hardware type rather than software type, so I turned to the internet. the first place that I looked was the reference section of both Processing.org and Arduino.cc, a lot of time and consideration has gone into the development of these sites and I applaud the effort, it was worth it! All the basic information that i needed was there but I was having a really hard time getting it all to work. So i turned to this tutorial to set me straight. Francesco has put together a great tutorial about Processing serial communication and the Arduino.
Once I got it all to work, it was actually very simple. Basically the Processing code will be setup like this:
import processing.serial.*;
Serial myPort;
void setup(){
println(Serial.list());
myPort = new Serial(this, Serial.list()[*X*], 9600);
myPort.buffer(1);
size(400, 400);
void draw(){
//some code goes here
}
When setting up your code make sure that your Arduino is connected to your serial port. This is important because the code is attempting to point to the specific arduino that you are using. Run your code and look at the list that will be displayed at the bottom of your Processing window and then change the variable in your code that i have indicated by the *X* to the number of the port that your arduino is connected to. Mine was the third on the list so I put 2 in place of the *X*. Keep in mind that the list is displayed as array entries, this means that the first position is indicated as 0 not 1.
The Arduino code is even simpler to setup:
void setup(){
Serial.begin(9600);
}
I have posted the completed codes for you to take and modify and play with. The arduino is saved as pdxMap.pde and the processing code is saved as serialLEDTest.pde
Step 3: Make the circuit board
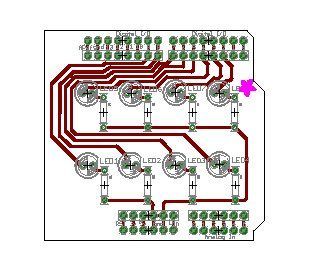
I created the circuit board using CADsoft Eagle. Since I knew that I was using an arduino I wanted to make a protoshield that would fit the odd spacing on the USB boards, So back to the internet to find the right Eagle part. I ended up using the Protoshield layout that was designed by Lady Ada. If you are not familiar with her work you should check her out. Her projects and contributions to the world of physical computing are outstanding and most of her work is open source giving people like me a chance to take their own projects to the next level.
After I found the protoshield layout, I opened it and modified it in Eagle to what you see below. The second image is a close up of the PDF that will create the final board. There are a lot of great instructables about etching your own circuit board so i will not go over all the details here. The method that I like to use is describe beautifully in TechShopJim’s instructable.
Step one: Print the PDF (found below) onto magazine paper, high gloss photo paper or a paper that is designed for PCB. Print using a laser printer. do not scale, it is layed out on a 8 1/2 by 11 piece of paper and it should print just fine with out modification
Step two: Cut out the design leaving a little bit of a boarder around the design.
Step three: Cut a piece of your copper clad that is a little bit larger then the design. the board can be cut by a bandsaw, a hack saw. But usually I will use a box cutter or Xacto knife by scoring it over and over again and then breaking it along the score line and cleaning up the edge with sand paper.
Step Four: clean the copper clad with an SOS scrub pad or steel wool until it shines, rinse it off and make sure not to touch the surface with your hands. Any grease on it will make it so the toner will not stick to the copper.
Step five: place the copper clad board onto a flat surface with the copper facing up, lay the cutout design toner side down onto the copper and tape it in place, put a paper towel over the whole thing and iron it on the the highest setting on your iron. NO STEAM! Place the iron directly on top, let the board heat up a bit before you move the iron and then take the edge of the iron and burnish the entire thing to make the toner stick to the copper. it should take about 3 min total. Remove iron and paper towel.
Step six: Soak the board in water to get the paper off. Don’t be to rough while trying to take off the paper, the toner is very fragile and can easily scrape off. (If, for what ever reason it doesn’t work, just take the SOS pad or steel wool to the board again and clean off any residual toner.)
Step six: Etch!
Arduino USB board
USB cable
Break away headers
Ferric Chloride
For more detail: How to control LED’s with Processing and Arduino

