
Summary of How to control arduino board using an android phone and a bluetooth module
This tutorial shows how to create a wireless serial link between an Android phone and an Arduino using a Bluetooth serial module and MIT App Inventor. It covers wiring, an Arduino sketch for basic command handling and sending data, and building the mobile app—including an example reading a DS18B20 temperature sensor and using text-to-speech to announce temperature every 15 seconds. Basic parts, module classes/ranges, and wiring cautions are discussed, assuming the reader knows Arduino basics.
Parts used in the Project:
- Arduino board
- Bluetooth serial module (example: BTM222 breakout with regulator)
- LED
- Resistor (100 ohm)
- Wires
- Breadboard
- DS18B20 temperature sensor (used in example)
In this tutorial you’ll learn how to use a bluetooth module and MIT’s app inventor to create a wireless serial link between an android phone and an arduino board.
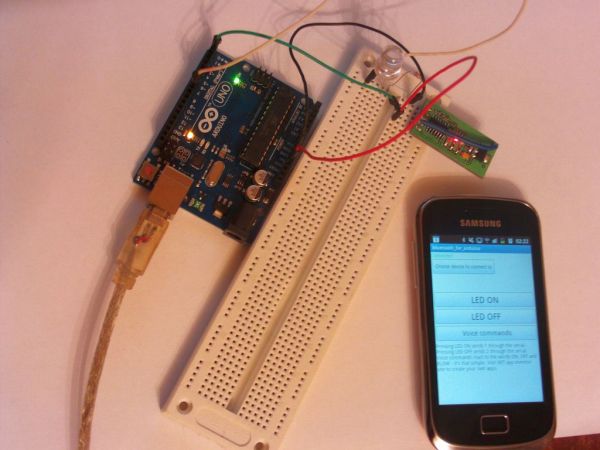
Here is a short video showing an example app I created. I’ll describe how to do the wiring, write an arduino sketch that can accept basic commands and send them and how to write the app itself. I asume you’re already familiar with some of the basics, you made a few arduino projects and are familiar with the arduino IDE. If you have attempted serial communication with the arduino board everything should be fully comprehensible. If you have any problems or questions feel free to ask them in the comments section.
…and here is an example of receiving the data from the arduino board on the mobile. The temperature sensor connected to the arduino board is a ds18b20 sensor. Just to show how awesome app inventor is I added text to speech functionality – the app says the temperature every 15 seconds. The arduino code and the app is described in more detail in steps 4,5 and 6.
Step 1: Wiring & part list
The circuit is as simple as it gets so you probably already have most of them.
You will need:
– arduino board
– bluetooth serial module (I used a btm222 module on a breakout board with an inbuilt regulator )
– an LED
– resistor (100ohm)
– wires
– breadboard
The only problematic part here is the bluetooth module. There are different modules all over the internet so be sure you check the pinout in the datasheet of the one you get as it can differ.
Also notice that there are two general classes of bluetooth modules:
Class 1 has range of about 100 meter (300 feet)
Class 2 has range of about 10meter (30 feet)
In case you’re wondering they are entirely compatible and you can only get 100 meter range if both of the devices (ie the mobile and the serial module) are class one. If one of it is class 1 the maximum range is lower.
– arduino board
– bluetooth serial module (I used a btm222 module on a breakout board with an inbuilt regulator )
– an LED
– resistor (100ohm)
– wires
– breadboard
For more detail: How to control arduino board using an android phone and a bluetooth module
- What is the project about?
Creating a wireless serial link between an Android phone and an Arduino using a Bluetooth serial module and MIT App Inventor. - What parts do I need?
You need an Arduino board, a Bluetooth serial module (example BTM222), an LED, a 100 ohm resistor, wires, a breadboard, and optionally a DS18B20 sensor used in the example. - How is the Bluetooth module variability handled?
Check the pinout in the datasheet of the specific Bluetooth module you buy, since pinouts can differ. - Can modules with different class ranges communicate?
Yes. Class 1 and Class 2 modules are compatible, but maximum range depends on the lower class device. - What range differences exist between Bluetooth classes?
Class 1 has about 100 meters range and Class 2 about 10 meters. - Does the tutorial include code and app instructions?
Yes, it describes the Arduino sketch and the MIT App Inventor app in detail (steps 4, 5 and 6) according to the article. - What sensor example is shown for receiving data on the mobile?
The example uses a DS18B20 temperature sensor connected to the Arduino. - Does the app use any special mobile features?
Yes, the example app uses text-to-speech to announce the temperature every 15 seconds.
