Summary of How to Build Your Own Anemometer Using Reed Switches, Hall Effect Sensor and Some Scraps on Nodemcu – Part 2 – Software
This article (Part 2) describes the NodeMCU anemometer software: installing Arduino IDE, ESP8266 board support, and required libraries; creating a ThingSpeak account/channel; reading wind speed via rotation counting and vane direction; displaying results on an OLED; uploading data to ThingSpeak; and using deep sleep for 15 minutes between measurements. It is intended for hobby/academic use only.
Parts used in the DIY NodeMCU Anemometer:
- NodeMCU (ESP8266)
- Reed switches
- Hall effect sensor
- Wind vane
- Anemometer rotor (cups/rotating assembly)
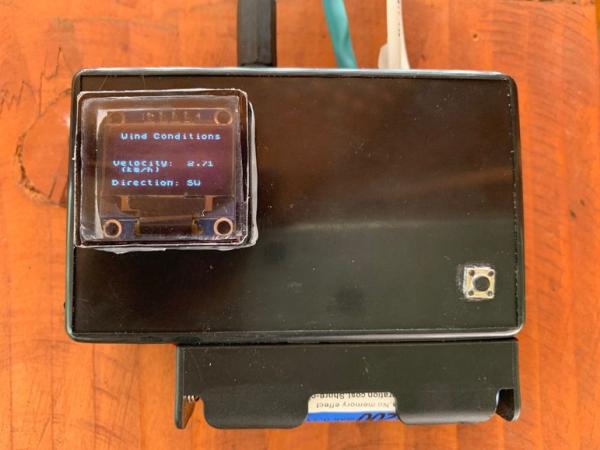
- OLED display
- Wires and connectors
- Power source (battery or USB)
- Arduino IDE (software)
- ThingSpeak account/channel (online service)
- ESP8266 and ThingSpeak libraries (software libraries)
In this post, we continue exploring the DIY NodeMCU Anemometer project by diving into Part 2 – the software. This article follows the first tutorial, How to Build Your Own Anemometer Using Reed Switches, Hall Effect Sensor and Some Scraps on Nodemcu – Part 1 – Hardware, where the wind speed and direction measurement devices were assembled. Here, we focus on the control software developed for the NodeMCU using the Arduino IDE, explaining how it manages data acquisition, sensor reading, and overall system operation.
The DIY NodeMCU Anemometer uses simple sensors connected to a NodeMCU to measure both wind speed and direction. The control software monitors the rotation of the anemometer over a fixed time interval, calculates the wind’s linear velocity, and reads the vane’s position to determine direction. It then displays the results on an OLED screen, uploads the data to ThingSpeak for online monitoring, and finally places the system into a low-power sleep mode for 15 minutes before the next measurement cycle.
How to Build Your Own Anemometer Using Reed Switches, Hall Effect Sensor and Some Scraps on Nodemcu – Part 2 – Software:
Disclaimer: This anemometer should not be used for professional purposes. It is only for academic or home use.
Note: English is not my natural language. If you find grammatical errors that prevent you from understanding the project, please let me know to correct them. Thank you so much.
Step 1: Installing Arduino IDE, ESP8266 Boards, and Libraries and Your ThingSpeak Account
Installing Arduino IDE and Nodemcu
If you have never installed the IDE the Arduino please read the tutorial in the link – How to install Arduino IDE – where you can find the complete instructions.
Next step, to install the Nodemcu board use this tutorial from the Magesh Jayakumar Instructables which is very complete. How to install Nodemcu no Arduino IDE
Installing Libraries
Next step you must install the libraries that the sketch uses. They are common and you can follow the steps shown below.
ThingSpeak Library – https://www.arduinolibraries.info/libraries/thing-speak
ESP8266 Library – https://arduino-esp8266.readthedocs.io/en/latest/esp8266wifi/readme.html
Creating a ThingSpeak Account
To use the ThingSpeak (https://thingspeak.com/) you must create an account (it is still free for a certain number of interactions) With the DIY NodeMCU Anemometer, you can store all measured wind data online and monitor real-time wind conditions at home, even from your cellphone. By using ThingSpeak, your collected data can be made public so anyone interested can view it, which is one of the platform’s greatest advantages. Simply visit the ThingSpeak homepage and follow the steps to create your account and start uploading your anemometer readings.
Once the account is created, enter this tutorial – ThingSpeak Getting Started – to create your channels. It’s pretty well explained. In summary, you must create a channel where the data will be stored. This channel has an ID and a Key API that should be referenced in the sketch each time you want to record data. ThingSpeak will store all the data in a bank and will show them every time you access your account, in the way you configured.
- How does the software measure wind speed?
It monitors anemometer rotations over a fixed interval, counts pulses from the reed switches or Hall effect sensor, and calculates linear velocity. - How is wind direction obtained?
The software reads the vane position (via the Hall effect sensor setup) to determine direction. - Can measured data be displayed locally?
Yes, the results are shown on an OLED display. - Does the project upload data online?
Yes, it uploads measurements to ThingSpeak for online monitoring. - What is the sleep strategy between measurements?
The system enters low-power deep sleep for 15 minutes before the next cycle. - What software and libraries are required?
Arduino IDE, ESP8266 board support, and the ThingSpeak and ESP8266 libraries are required. - Do I need a ThingSpeak account?
Yes, you must create a ThingSpeak account and channel to store and view uploaded data. - Is this project suitable for professional use?
No, the article states the anemometer should not be used for professional purposes; it is for academic or home use.