Recently a family member had his furnace fail while he was away from his house for a long period of time in the winter. His pipes burst and caused quite the mess. This project describes a temperature sensor that broadcasts the temperature in his house to the pachube data logging website. This allows him to check on his house from anywhere he has internet access.
What is it?
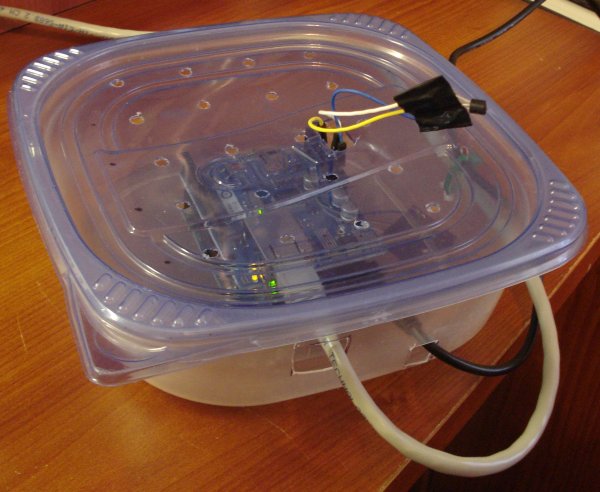
This project includes a temperature sensor and a small computer that can send the temperature readings from inside your house to the internet. This will allow you to monitor the temperature in your house and detect if there may be a problem from anywhere that you have internet access.
Setup
- Plug the wall wart into an 120V electrical outlet
- Plug the cat5 ethernet cord into the back of your router as if it was a computer
- For now, disregard the extra USB cable
- Wait 10 minutes
- Log onto https://pachube.com/feeds/42871 to see the temperature inside your house
How it Works
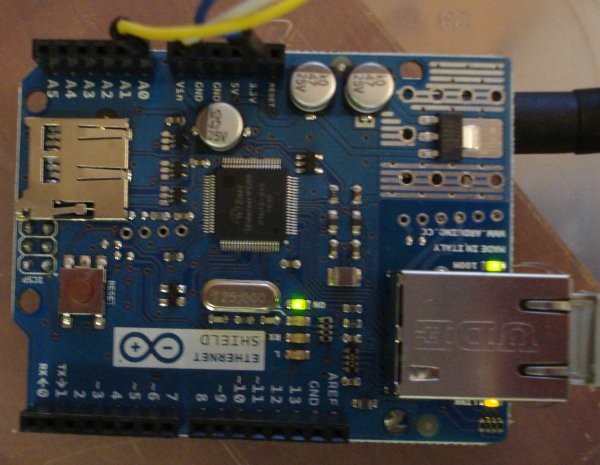
The temperature sensor (Analog Devices TMP36, source) is a small diode on an integrated circuit that outputs a voltage proportional to the temperature between -50 and 125 degrees Celsius. A small microcontroller (Arduino, lowest circuit board in the stack) reads the voltage output by the sensor. The voltage reading is converted to degrees Fahrenheit by the computer code running in the Arduino. Finally the ethernet shield (source, upper circuit board in the stack) sends the temperature in Fahrenheit to a website named pachube. The pachube website logs the data sent by the ethernet shield and presents the information in an easy to read plot. The procedure from raw temperature measurement to submission to pachube is repeated every five minutes.
Some things to note
- The Arduino uses very little power, so I would suggest leaving it pluged in all the time. After a few weeks of being without power the Arduino will “forget” the code that was installed on it.
- If the Arduino forgets its programing, the USB cord can be used to upload code to the board.
- Pachube is a free website. Therefore we have to tolerate the fact that it has an uptime of about 90%. Since I have been using the site over the past few months on a rare occasion I have seen the site go down for as long as six hours. In most cases service interruptions last less than 15 minutes.
- If for whatever reason the wires to the temperature sensor become detached, you can reconnect them to the holes labeled:
- Yellow → A0
- Blue → 3.3V
- White → GND
- If you hook them up backwards the sensor will get really hot and possibly catch on fire.
- The ethernet cord has a tendency to come loose. If the system is not working as expected try pushing the cat5 plug firmly into its connector.
For more detail: House Temperature Monitor using Arduino