Problem: my dad is registered as deaf and my mum is hearing impaired and due to this they often find it difficult to hear the doorbell. This could be a problem suffered by many others as well.
They bought a flashing light doorbell to help them with this (a small box with a light that flashes when the doorbell is pressed). But that didn’t work well enough, if they were in a different room they wouldn’t see the light flash, even if they were in the same room they wouldn’t see the light flash unless they were already looking at it!
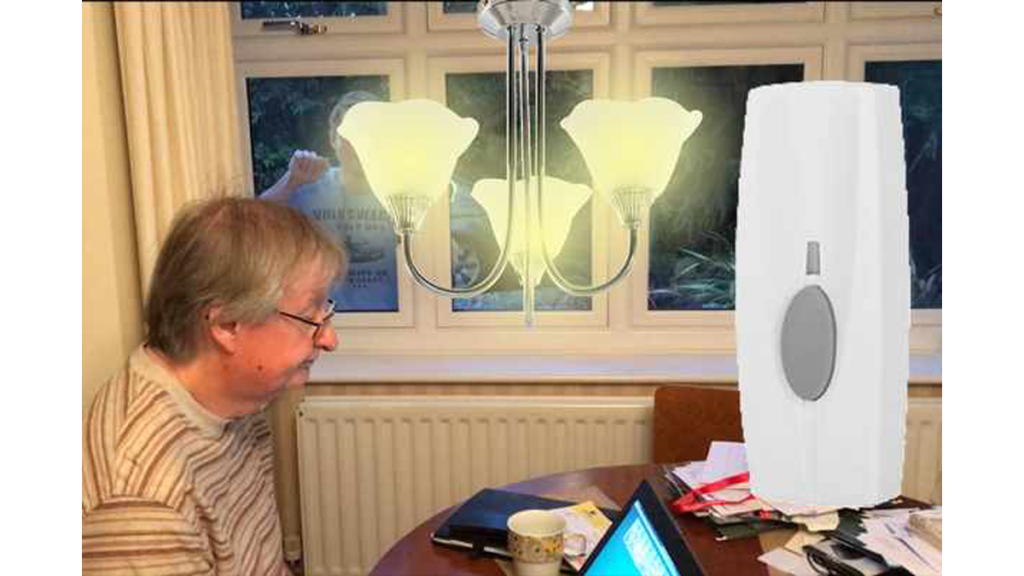
I wanted to use my engineering intuition to build something to really solve the problem!! I built a device that flashes the main room lights when the doorbell is pressed, that way wherever they are in the house, no-matter which direction they are looking in they will still see the flashing. See video above for demo.
How it works:
- Person presses doorbell
- Arduino senses doorbell press via voltage change on doorbell receiver speaker
- Arduino reacts by closing then opening the light switch 10 times to flash the room lights on and off
Step 1: Order Parts
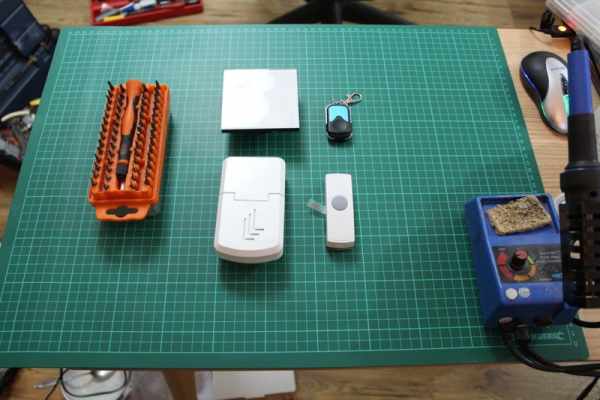
You’ll need these parts:
– RF light switch + remote (I’ve only managed to get this to work with the LightwaveRF switches, it didn’t work on a cheap Chinese one from Amazon, I explain why in a later step)
This is the that I couldn’t get to work with my system: https://www.amazon.co.uk/gp/product/B06VVHQYXQ/ref… £15
The system I installed in my parents house uses LightWaveRF light switches, one for each room I want to control. Here is an example: https://www.amazon.co.uk/LightwaveRF-JSJSLW400WH-M… £60 and you will need to buy a remote control too such as: https://www.amazon.co.uk/LIGHTWAVERF-JSJSLW101BLK-… £60
– Arduino nano about £4 for a knock off one from ebay https://www.ebay.co.uk/itm/Arduino-Nano-v3-compati…
– Any wireless doorbell. I used: https://www.amazon.co.uk/gp/product/B0063IFYB8/ref… £7
– Plastic box (or squeeze the electronics into the battery compartment of the doorbell receiver)
– Opto couplers PC123 http://www.sharp-world.com/products/device/lineup… £0.10 each
– Mains 12V power supply about £10
– 5V/3.3V voltage reg + caps if needed to power light switch remote or doorbell receiver (I didn’t need this because I ran my doorbell receiver off the 5V rail from the Arduino, this was possible because it only drew 80mA and my lightswitch remote worked off 12V from my main supply) A good option for a 5V regulator is the LM79 by ST
– RC low pass filter (resistor capacitor) to smooth out sense signal from the doorbell receiver. Exact values are not too important because we can filter in the code as well. About 1.6 Kohm resistor and 0.1uF capacitor will do. £0.pennies
– Copper matrix board
– 2x 220 ohm resistors. £0.pennies
– 1x 10K ohm resistor. £0.pennies
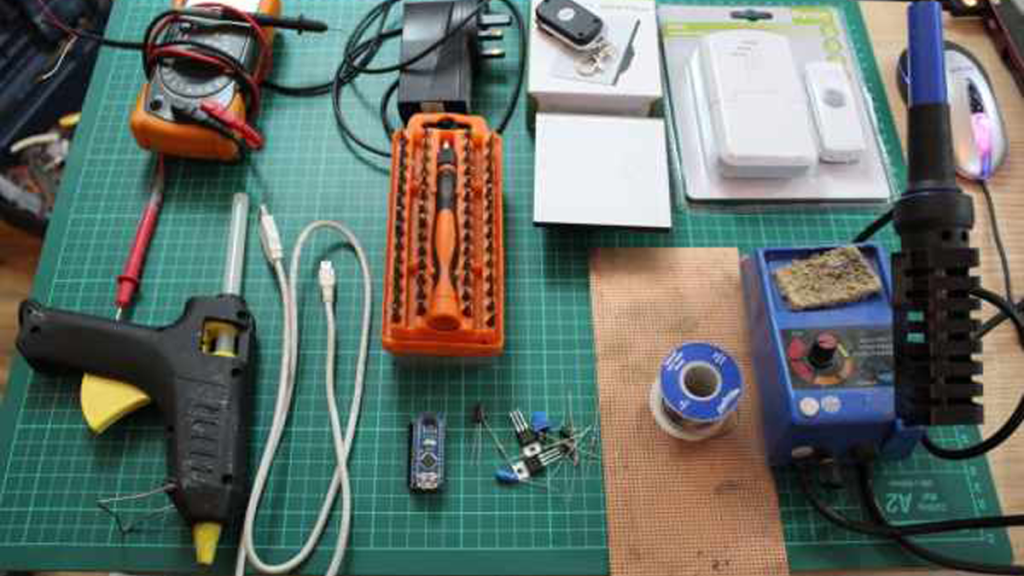
And these tools:
– Arduino nano USB cable
– Soldering iron + solder
– Glue gun
– Wire clippers and wire strippers
– Heat shrink and insulation tape
– Multimeter for debugging
Step 2: Test Wireless Lightswitch and Doorbell
Test both the wireless doorbell and the wireless light switch.
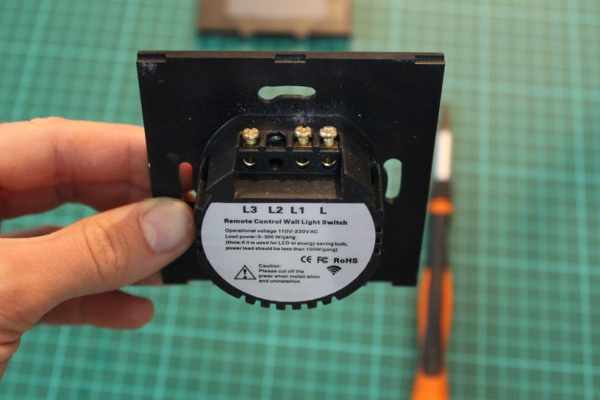
Install the wireless light switch using the connections shown below and test using the corresponding remote control. ALWAYS REMEMBER TO TURN OFF THE POWER AT THE CIRCUIT BREAKER BEFORE REMOVING OLD SWITCH.
Wireless light switch wire colour
L Brown (live)
L1 Blue with brown sleeve (live return)
Put batteries in doorbell and test.
Step 3: Take Remote Controls Apart
– Take apart the the light switch remote control and the doorbell receiver
– Then solder a red wire to the 5V input to the doorbell receiver (where the battery connected)
– And a black wire to the ground connection
Step 4: Cut Copper Matrix Board to Fit Box
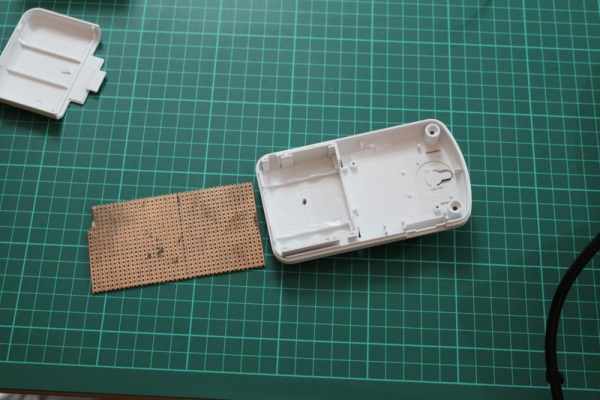
I decided to make things hard for myself and shoehorn all my electronics into the space no longer occupied by the batteries (partly because I forgot to buy a plastic project box). If you’re attempting this unnecessarily difficult task you will need to prep some matrix board to the size of your battery compartment.
An easy technique for cutting matrix board is to snap it against a sharp table edge (see pictures) and it should break cleanly along a strip of holes. Then file edges smooth
Step 5: Build the Circuit 😀
There are two main parts to this circuit to build and I would recommend building them individually and testing as you go:
1.) Sensing a doorbell press which I have done by reading the voltage of the speaker (this approach will work for any doorbell)
2.) Hacking the buttons of the lightswitch remote control so that the button is switched by the Arduino to mimic someone pressing the button
3.) Any voltage regulators that you might need to step down the 12V from the supply to a lower voltage to power either the light switch or the doorbell. In my case I didn’t need to do this: to power the doorbell receiver I was able to take 5V from the Arduino supply (I made sure the doorbell receiver was under the 200mA limit first) and the light switch remote needed 12V anyway which I gave direct from my supply
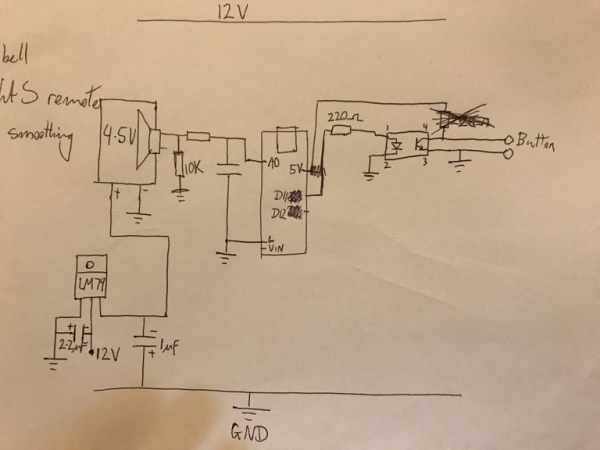
Reference my rubbish schematic drawing (sorry for it being rubbish) and:
Solder up the RC low pass filter and the 10 Kohm pull down resistor, then use the Arduino example code “AnalogReadSerial” to sense a doorbell press (remember to connect the grounds together). The serial terminal should read numbers above 50 when the speaker is sounding and should read 0 when the speaker is off.
Solder up the PC123 opto-couplers with a 220 ohm resister to the LED side and direct connection from the output to the light switch remote. Test by adapting the Arduino example code called “Blink” to use your output pins instead of pin 13. Test to see if you can get the Arduino to switch the lights on and off. This is the bit that I couldn’t get to work with the cheaper Chinese light switch but did work with the LightWaveRF switches.
Once you know everything works, mount stuff in your box and use hot-melt to tension the mains cable so if it gets snagged it won’t rip out of the terminal blocks.
Step 6: Code
Full Arduino code is attached. You may need to change the pin number for the ones you’re using, other than that you’re all set! Enjoy!
Source: Hearing Impaired Doorbell Room Light Hack