
Summary of Getting Started with Arty
This tutorial guides users in operating the Digilent Arty FPGA board with its pre-loaded MicroBlaze design using Xilinx Vivado. It details the necessary hardware and software setup, including connecting via USB, configuring TeraTerm serial settings, and navigating the onboard demo menu to access PWM, Cylon, and scrolling LED modes.
Parts used in the Arty Project:
- Arty FPGA Board
- USB A to USB B micro cable
- TeraTerm Software
- Xilinx Vivado (WebPack version)
- Jumper for power configuration
Digilent recently released a new FPGA development board. The Arty board. The Arty is designed to be used exclusively with Xilinx Vivado, and designed specifically for use with microblaze.
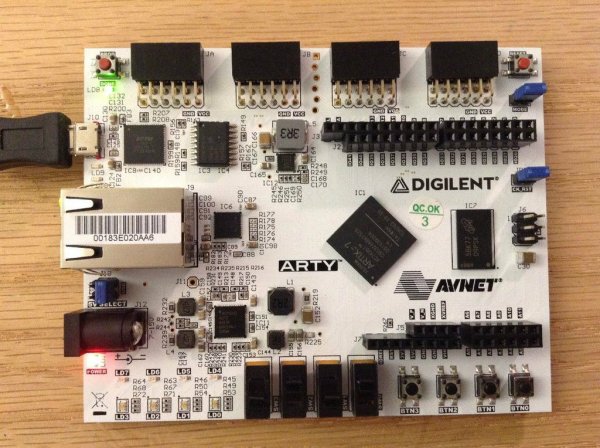
This tutorial covers how to use the out of he box design that ships loaded into Arty’s Quad-SPI Flash, with I/O and UART.
To view the reference material and other demo projects for Arty, go to the Arty resource center.
For this Tutorial you will need:
– Arty
– TeraTerm Software installed
– Xilinx Vivado (The free Webpack will work) installed and licensed
Step 1: Plug in and Power on Arty
Using the USB A to USB B micro, plug the Arty into your computer. Make sure the jumper between the ethernet and female barrel jack connector is configured for USB power.
Step 2: Open TeraTerm
Open TeraTerm and select USB the radio button for Serial. If this window does not automatically appear, you may need to go to File -> New Connection. Click OK.
Step 3: Open the Serial Port Setup
Go to Setup -> Serial Port…
Step 4: Enter the Correct Settings
Enter the correct Port, Baud Rate of 115200, 8 data bits, no parity bit, 1 stop bit, and no flow control. Hit OK.
Step 5: Open the Menu for the Demo
Right now you probably see gibberish in the TerraTerm window.
Press any button, and then press button 3 to get to the menu. From this point on anytime you want to get to the menu shown in this image, you press button 3.
As you can see in the menu, this demo features three modes; PWM, Cylon, and scrolling LEDS.
I will go through each with what is shown from the serial port and on the board.
Read more: Getting Started with Arty
-
What is the Arty board designed for?
The Arty board is designed exclusively for use with Xilinx Vivado and specifically for use with MicroBlaze. -
How do I connect the Arty to my computer?
Use a USB A to USB B micro cable to plug the Arty into your computer. -
Which software is required to run this tutorial?
You need TeraTerm Software installed and Xilinx Vivado installed and licensed. -
How should I configure the jumper for power?
Configure the jumper between the ethernet and female barrel jack connector for USB power. -
What are the correct serial port settings?
Set the Baud Rate to 115200, 8 data bits, no parity bit, 1 stop bit, and no flow control. -
How do I access the demo menu on the board?
Press button 3 after pressing any button to get to the menu. -
What modes are available in the demo menu?
The demo features three modes: PWM, Cylon, and scrolling LEDs. -
Where can I find reference material for the Arty?
Go to the Arty resource center to view reference material and other demo projects.
