Summary of Generic STM32 board with Arduino
This article outlines a method to program an STM32 board without its default bootloader by using a USB-to-Serial adapter. It details the necessary hardware connections, software installation steps for the Arduino IDE including the "Arduino_STM32" library, and specific jumper settings (BOOT0) required to upload code via USART. Once programmed with the STM32duino bootloader, the board can subsequently be used via its onboard USB interface.
Parts used in the STM32 Bootloader Flashing Project:
- STM32 board
- USB to Serial/UART/TTL adapter (3.3V level)
- USB port or power supply
- Onboard BOOT0 jumper
- Reset button
- Arduino IDE
- Arduino_STM32 library
Described here is a simple way to load a program without bootloader. An additional thing needed is a USB to Serial/UART/TTL adapter (3.3V level). Connect the USB to Serial board as follows, and power up the STM32 board from a USB port/power supply.
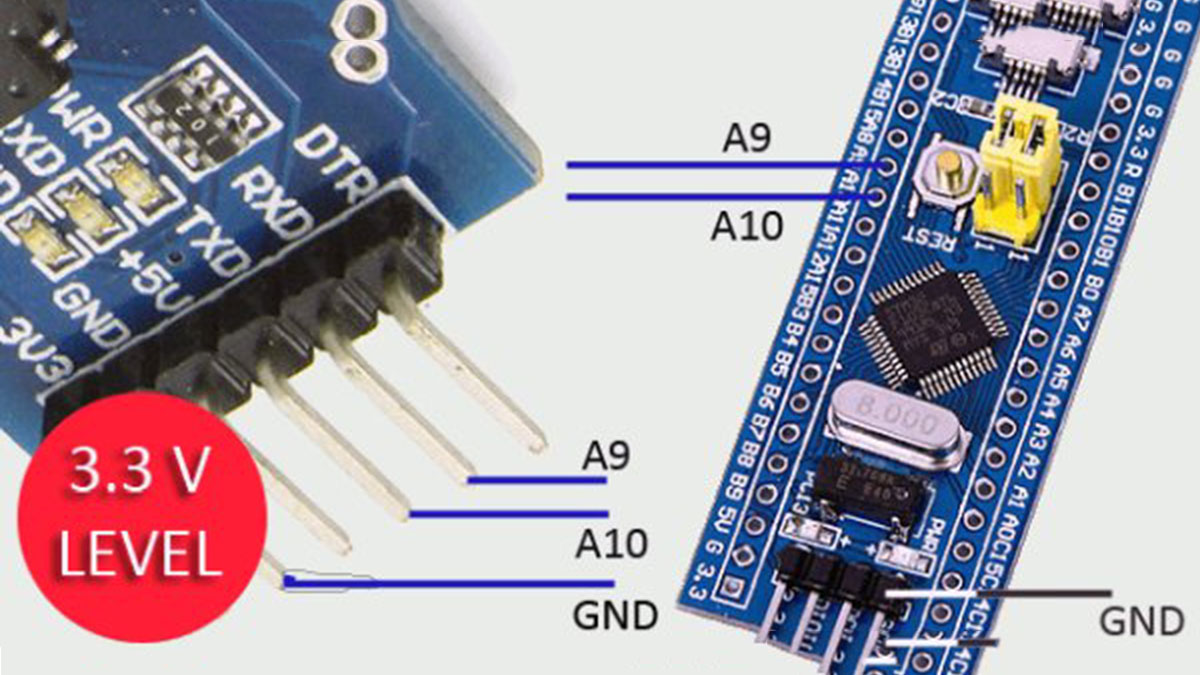
• RXD – A9
• TXD – A10
• GND – GND
I assume you have already installed the Arduino IDE. Next, you need to go to ‘Board Manager’ under ‘Tools’ and install the support for SAM boards. Download the necessary files as well as the “Arduino_STM32’ (from the link). Extract “Arduino_STM32’ and copy the folder ‘Arduino_STM32-master’ to your Arduino ‘Hardware’ folder. Finally, restart the Arduino IDE, choose correct board settings, compile the given sketch, and upload it. Before uploading, set the onboard ‘BOOT0’ jumper to 1, and press ‘reset’ button. After upload completed, the sketch will run. If you want the uploaded sketch to run automatically after next power on/reset, set ‘BOOT0‘ jumper back to 0.
#define pinLED PC13
void setup() {
Serial.begin(9600);
pinMode(pinLED, OUTPUT);
Serial.println(“START”);
}
void loop() {
digitalWrite(pinLED, HIGH);
delay(1000);
digitalWrite(pinLED, LOW);
Serial.println(“Hello World”);
}
How to use the onboard USB interface?
While the STM32F103 board is very popular and inexpensive, getting up and running is a knotty task. Since, the generic STM32 board comes only with the default USART boot loader, you cannot use its onboard USB interface to program it. However, if you are ready to program the board with a USB boot loader via USART, you can program it directly through the USB interface thereafter!
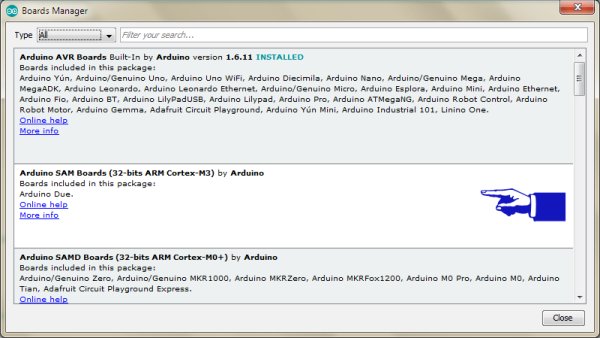
Board Manager Window
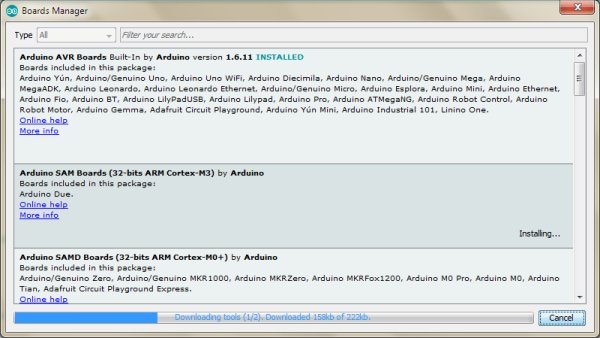
Arduino SAM Board download progress window
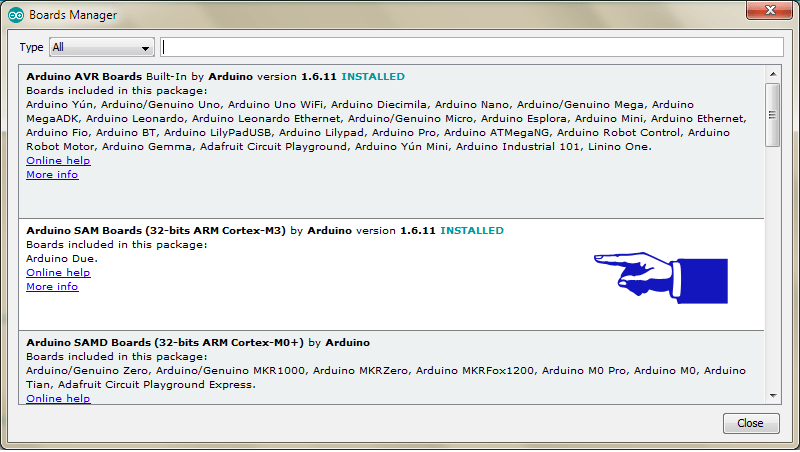
Fully installed Arduino SAM board notification window
The ‘STM32duino bootloader’, is an experimental bootloader, based on the Maple bootloader (developed by LeafLabs), however it also works with most Generic STM32 board. There are 2 main versions of the bootloader, and within the generic bootloaders (versions starting with the word “generic”) there are different versions depending on the location of the LED on the generic board. For example, ‘generic_boot20_pc13.bin’ is suitable for the most common generic boards with an LED on pin PC13. Note that there is already a page in the wiki about the bootloader which includes how to flash it – link. Also refer this link
Read More Detail:Generic STM32 board with Arduino
- What is needed to load a program without a bootloader?
A USB to Serial/UART/TTL adapter operating at 3.3V levels. - How do you connect the RXD pin on the adapter?
Connect the RXD pin to A9 on the STM32 board. - Does the generic STM32 board support onboard USB programming by default?
No, it comes with a default USART boot loader that prevents direct USB programming. - Can you use the onboard USB interface after installing a new bootloader?
Yes, once programmed with a USB boot loader via USART, you can program directly through the USB interface. - Which file should be installed in the Board Manager for SAM boards?
You need to install the support for SAM boards and download the Arduino_STM32 files. - Where should the Arduino_STM32-master folder be copied?
The folder must be copied to your Arduino Hardware folder. - What is the best way to make the sketch run automatically after reset?
Set the BOOT0 jumper back to 0 after the upload is completed. - Which version of the bootloader is suitable for boards with an LED on PC13?
The generic_boot20_pc13.bin version is suitable for most common generic boards with an LED on pin PC13.