Summary of ESP8266 Weather Widget
This article details a DIY ESP8266-based weather widget that fetches localized data from Weather Underground via WLAN and displays it on an OLED screen. The device shows current time, daily metrics (temperature, pressure, humidity, rainfall), and a 3-day forecast. While the author built a prototype circuit, updated PCB files are available for easier assembly.
Parts used in the ESP8266 Weather Widget:
- ESP8266 -01 module
- NodeMCU ESP8266-12 (Optional)
- OLED Display
- Voltage Regulator AMS1117
- Tactile Switch
- Slide Switch
- Resistors (10K and 330R)
- Female Double Row Straight Pin Header
- Male Double Row Right Angle Pin Header
- Jumper Wires
- Prototype Board
Welcome to my new Weather Widget Project.
A weather widget is a application that can be downloaded on your PC, laptop or a mobile device and perform the job of providing easy access to weather information.But I was always trying to make something different.So I go through the internet to get some ideas.After few days of my work, finally I made it.I am sharing this so that any one can make it easily.
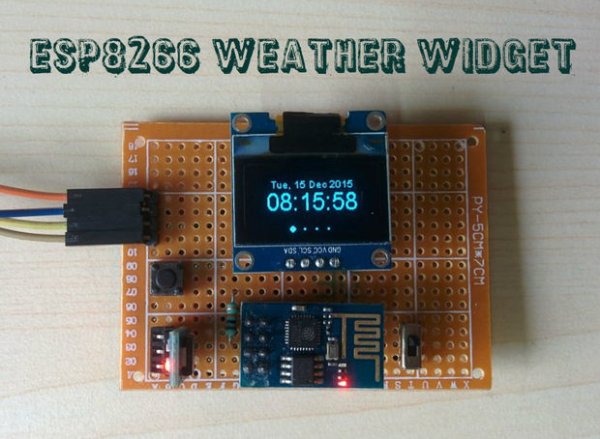
This is an ESP8266 based Weather Display unit which retrieve localized weather information from http://www.wunderground.com/ by WLAN and display it on a 128×64 OLED Display.
The Widget display following things
1. Current Time with Date
2. Current Day Weather Information like Temperature,Pressure,Humidity and Rain fall.
3. Future forecasting for 3 days
I would like to give credit to my friend Dani Eichhorn who did all of the programming parts.He is updating the software on his Github page regularly with new features.You can visit SquixTechBlog to see more projects on ESP8266.
Step 1: Parts and Tools Required
Parts Required :
1. ESP8266 -01 (eBay )
2. Optional NodeMCU ESP8266-12 ( eBay )
3. OLED Display (eBay )
4. Voltage Regulator AMS1117 ( eBay )
5.Tactile Switch (eBay )
6.Slide Switch ( eBay )
7.Resistors ( 10K and 330R )
8.Female Double Row Straight Pin Header ( eBay )
9. Male Double Row Right Angle Pin Header ( eBay )
9.Jumper Wires ( eBay )
10.Prototype Board ( eBay )
Tools Required :
1. Soldering Iron
2.Wire Cutter
3.Wire Stripper
4.Nipper
Step 2: Making the Circuit
Make the circuit on a prototype board as per the schematic shown above.
Important thing is that this Board can be used for programming the ESP8266 -01 module from Arduino IDE. You can use it for any of your project.
The whole Circuit is consists of ESP8266-01 module, OLED Display and few other components
1. AMS1117 : This is a voltage regulator which convert 5V to 3.3V required for ESP8266 module.
2. Tactile Switch ( S1) : Used for Resetting the ESP8266
3.Slide Switch (S2) : Used for changing the mode of ESP8266. There are two modes Normal and Program Mode.
4. Resistors : R1 is a pull up resistor and R2 is current limiting resistor.
5. Header CP2102 : Used for programming
6.Header Power : Provide power from a LiPo Battery.This is optional, because you can use the programming port’s two pin for power.
7. Header OLED : Connection for OLED Display
Update as on 13/03/2016 : New PCB files
Thanks to my friend spilz who put his effort to make this nice PCB.Now you can make it by downloading the gerber files attached below.
Read more: ESP8266 Weather Widget
- What does this weather widget display?
The widget displays current time with date, current day weather information including temperature, pressure, humidity, and rainfall, plus a future forecasting for 3 days. - How does the device retrieve weather data?
The unit retrieves localized weather information from http://www.wunderground.com/ by WLAN. - Can I use the NodeMCU instead of the ESP8266-01?
Yes, the NodeMCU ESP8266-12 is listed as an optional part alongside the ESP8266-01. - What is the function of the Slide Switch?
The slide switch is used for changing the mode of the ESP8266 between Normal and Program Mode. - How is the voltage regulated for the ESP8266 module?
An AMS1117 voltage regulator converts 5V to the required 3.3V for the ESP8266 module. - Is there an alternative way to power the device besides a LiPo battery?
Yes, you can use the two pins on the programming port for power instead of using a LiPo battery. - Where can I find the software updates?
The programming parts were done by Dani Eichhorn, who updates the software regularly on his Github page. - Are there ready-made PCB options available?
Yes, new PCB files and gerber files are available thanks to spilz for easier construction.