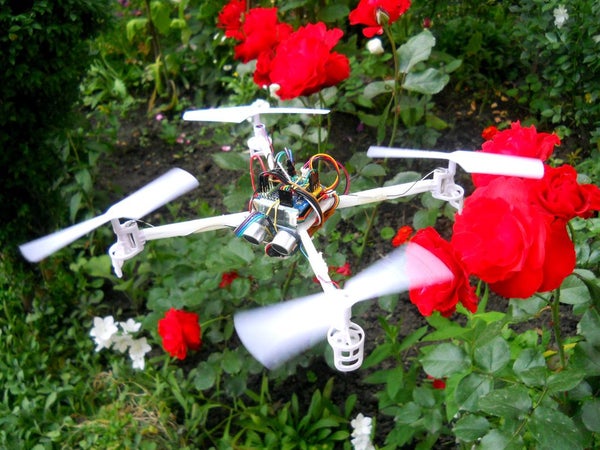
Drones are very popular toys and tools these days. You can find professional and even beginner drones and flying gadgets in the market. I have four drones (quadcopters and hexcopters), because I love everything that flies, but the 200th flight isn’t so interesting and starts to be boring, so I decided that I will build my own drone with some extra feutures. I like to program Arduino and design circuits and gadgets so I started to build it. I used the MultiWii flight controller that is based on the ATMega328 chip that is also used in the Arduino UNO, so programming was pretty simple. This drone can be connected to an Android smartphone that sends its GPS data to the drone, that compares to its own GPS signal, then starts to follow phone, so if I move on the street the drone follows me. Of course has many failings yet, because I wasn’t able to make a proffesional filming drone, but follows the phone, makes a video and also has a ultrasonic distance sensor to avoid the obstacles in the air. I think this is pretty much features from a homemade drone. As soon as possible I will load up a video about a flight, but it is hard to make good quality records with an always moving drone.
Step 1: Main Properties
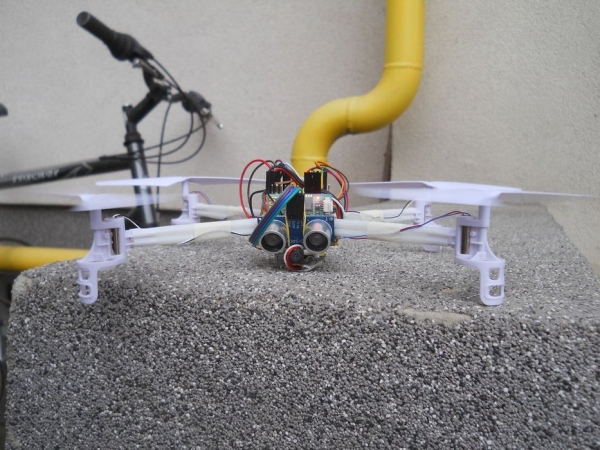
The drone is almost fully automatically, you don’t have to control it, because follows your phone that is usually in your bike, The ultrasonic sensor helps to bypass trees, buildings and other obstacles and the GPS gives a very accurate position data, but let’s see what do we have in total:
- 1000mAh battery, enough for 16-18 minutes of continous flying
- ultrasonic sensor to avoid obstacles in the air
- Bluetooth module to recieve data from the phone
- Arduino based microcontroller
- build-in gyroscope
- regulated maximum height (5 meters)
- when battery is low automatically lands on the phone (hopefully in your hands)
- costs about $100 to build
- can be programmed to anything
- with the help of the GPS you can send the drone to any coordinates
- quadcopter desing
- equipped with a 2MP 720p HQ videocamera
- weighs 109 grams (3.84 ounces)
So that is all that the first version can do, of course I want to develop it. During the summer I want to hack my bigger drone with this software.
Step 2: Flight Test Video
I asked two good friends of me to walk in the front of the drone, while I was under the drone, to save it if falls down. But the test succeeded, and as you can see the drone still is not very stable, but worked. The left guy in a yellow T-shirt held the phone, that transmitted the GPS data. The video quality with this camera is not the best, but I didn’t find low weight 1080p cameras.
Step 3: Gathering Parts and Tools
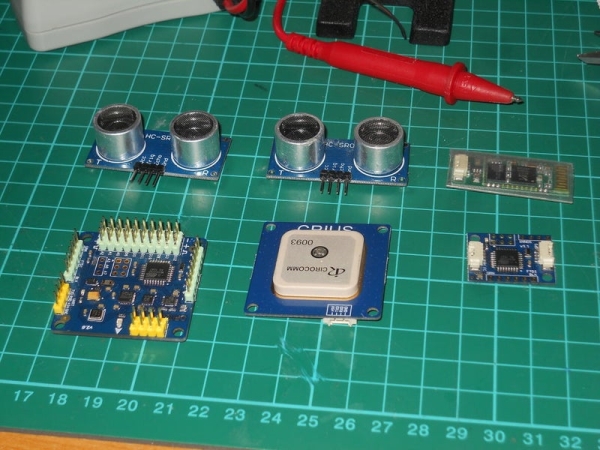
For this project you need some new and unusual parts. I designed from low wieght and recycled parts to reduce the cost, and succeded I got very good materials for the frame. But let’s see what we need! I bought the Crius brand of the flight controller from Amazon.com and worked
Tools:
- Soldering Iron
- Glue Gun
- Cutter
- Wire Cutter
- Rotary Tool
- Super Glue
- Ductape
- Rubberband
Parts:
- MultiWii 32kB Flight Conroller
- Serial GPS Module
- Serial to I2C Converter
- Bluetooth Module
- Ultrasonic Sensor
- Straws
- Plastic Piece
- Gearing
- Motors
- Propellers
- Screws
- L293D Motor Driver (it was a bad choice, I will correct in the second version)
- 1000mAh Lithium Ion Battery
Step 4: Assembe the Propellers
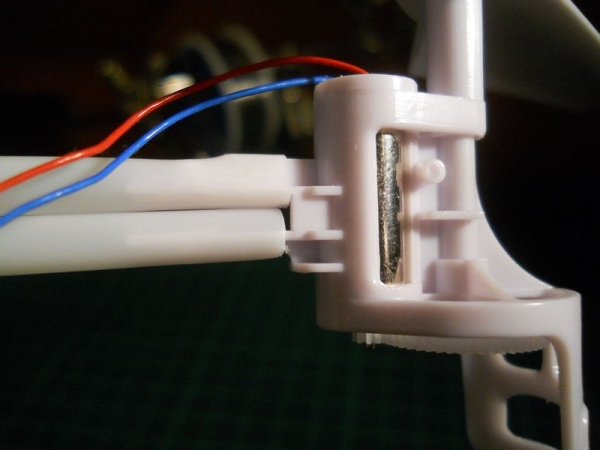
I bought these proppellers with motors from the Amazon.com for 18 bucks, they are spare parts for the Syma S5X drone, but they seemed useful so I ordered them, and worked fine. You just have to put the motor in its hole, and attach the props to the gearing.
Step 5: Circuit Schemantic

Always look at the schemantic while working and be careful with the connections.
Step 6: Soldering Motors to the Driver
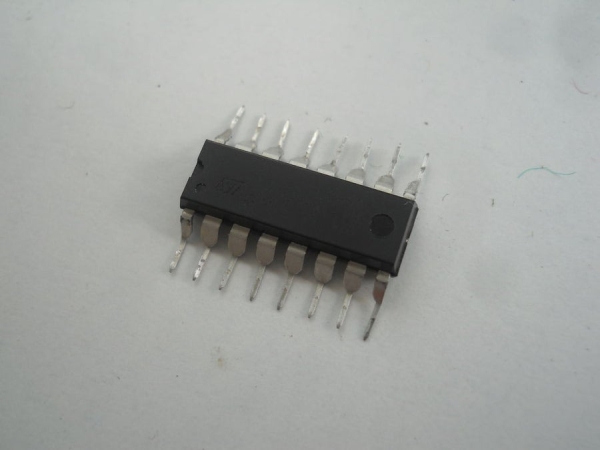
Now you have to solder all cables from the motors to the L293D motor driver IC. Look at the pictures, they say much more, you have to connect black and blue wires to the GND and positive wires to the Outputs 1-4, just like me. The L293D can drive these motors, but I recommend to use some power transistors because this chip cannot handle all the four motors at high power (more than 2 Ampers). After this cut 15 cm straws these will hold the motors in place. I used extra strong straws that I got from a local bakery and cafe. Put these straws gently on the motors’s gearings.
Read more: DIY Smart Follow Me Drone With Camera (Arduino Based)