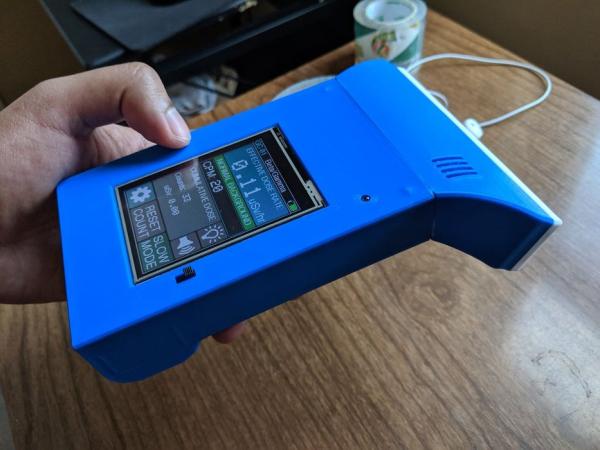
I designed and built a Geiger Counter – a device that can detect ionizing radiation and warn its user of dangerous ambient radiation levels with the all-too-familiar clicking noise. It can also be used when scouting for minerals to see if the rock you found has Uranium Ore in it!
There are many existing kits and tutorials available online to make your own Geiger Counter, but I wanted to make one that is unique – I designed a GUI display with touch controls so the information is displayed in a pretty way.
Step 1: Basic Theory
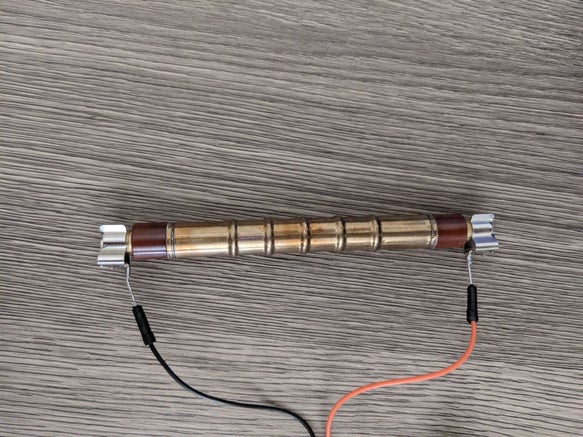
The working principle of a Geiger Counter is simple. A thin-walled tube with a low pressure gas inside (called a Geiger-Muller Tube) is energized with a high voltage across its two electrodes. The electric field that’s created is not enough to cause dielectric breakdown – so no current flows through the tube. That is until a particle or photon of ionizing radiation goes through it.
When beta or gamma radiation passes through, it can ionize some of the gas molecules inside, creating free electrons and positive ions. These particles start moving due to the presence of the electric field, and the electrons actually pick up enough speed that they end up ionizing other molecules, creating a cascade of charged particles which momentarily conduct electricity. This brief pulse of current can be detected by the circuit shown in the schematic, which can then be used to create the clicking sound, or in this case, fed to the microcontroller that can do calculations with it.
I’m using the SBM-20 Geiger tube since it is easy to find on eBay, and quite sensitive to beta and gamma radiation.
Step 2: Parts and Construction
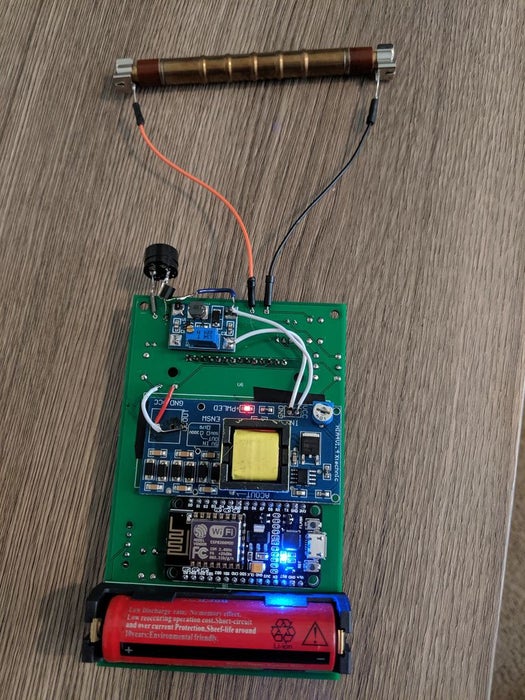
I used the NodeMCU board based on the ESP8266 microcontroller as the brains for this project. I wanted something that can be programmed like an Arduino but is fast enough to drive the display without too much lag.
For the high voltage supply, I used this HV DC-DC boost converter from Aliexpress to supply 400V to the Geiger tube. Just keep in mind that when testing the output voltage, you can’t measure it directly with a multimeter – the impedance is too low and it will drop the voltage so the reading will be inaccurate. Create a voltage divider with at least 100 MOhms in series with the multimeter and measure the voltage that way.
The device is powered by an 18650 battery that feeds into another boost converter that supplies a constant 4.2V for the rest of the circuit.
Here are all of the components needed for the circuit:
- SBM-20 GM tube (many sellers on eBay)
- High Voltage Boost Converter (AliExpress)
- Boost Converter for 4.2V (AliExpress)
- NodeMCU esp8266 board (Amazon)
- 2.8″ SPI Touchscreen (Amazon)
- 18650 Li-ion cell (Amazon) OR Any 3.7 V LiPo battery (500+ mAh)
- 18650 cell holder (Amazon) Note: this battery holder turned out to be a little too big for the PCB and I had to bend the pins inward to be able to solder it. I would recommend using a smaller LiPo battery and soldering JST leads to the battery pads on the PCB instead.
Miscellaneous electronic components needed (you might have some of these already):
- Resistors (Ohms): 330, 1K, 10K, 22K, 100K, 1.8M, 3M. Recommend getting 10M resistors for making voltage divider needed to measure high voltage output.
- Capacitors: 220 pF
- Transistors: 2N3904
- LED: 3mm
- Buzzer: Any 12-17 mm piezo buzzer
- Fuse holder 6.5*32 (to attach Geiger tube securely)
- Toggle switch 12 mm
Please refer to the PDF schematic in my GitHub to see where all the components go. It’s usually cheaper to order these components from a bulk distributor like DigiKey or LCSC. You’ll find a spreadsheet with my order list from LCSC in the GitHub page that contains most of the components shown above.
While a PCB is not needed, it can help make the circuit assembly easy and make it look neat. The Gerber files for PCB manufacturing can be found in my GitHub as well. I have made a few fixes to the PCB design since I got mine, so the additional jumpers should not be needed with the new design. This has not been tested, however.
The case is 3D printed out of PLA and the parts can be found here. I have made changes to the CAD files to reflect the drill location changes in the PCB. It should work, but please note that this has not been tested.
Step 3: Code and UI
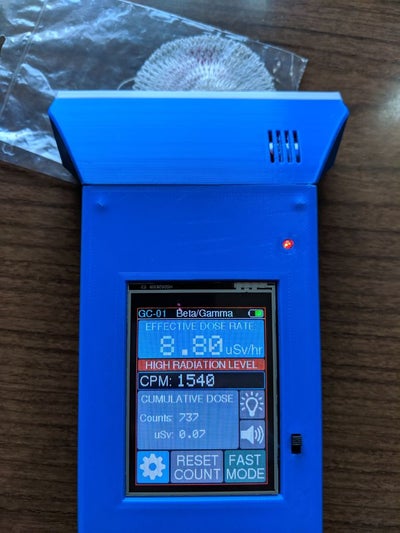
I used the Adafruit GFX library to create the user interface for the display. The code can be found in my GitHub account here.
The home page shows the dose rate, counts per minute, and the total accumulated dose since the device was turned on. The user can choose a slow or fast integration mode which changes the rolling sum interval to either 60 seconds or 3 seconds. The buzzer and LED can be toggled on or off individually.
There is a basic settings menu that allows the user to change the dose units, the alert threshold, and the calibration factor that relates the CPM to dose rate. All settings are saved in the EEPROM so they can be retrieved when the device is reset.
Step 4: Testing and Conclusion
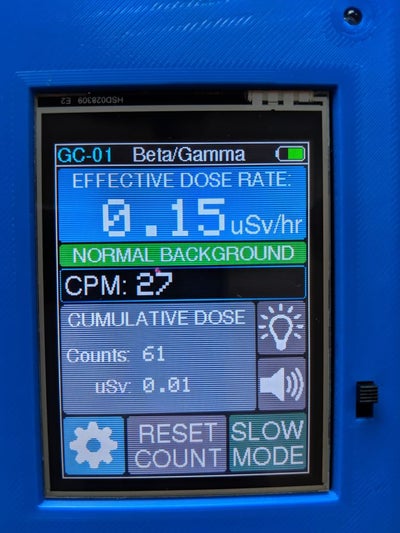
The Geiger Counter measures a click rate of 15 – 30 counts per minute from natural background radiation, which is about what’s expected from an SBM-20 tube. A small sample of Uranium Ore registers as moderately radioactive, at around 400 CPM, but a thoriated lantern mantle can make it click faster than 5000 CPM when held up against the tube!
The Geiger counter draws around 180 mA at 3.7V, so a 2000 mAh battery should last around 11 hours on a charge.
I plan to properly calibrate the tube with a standard source of Cesium-137, which will make the dose readings more accurate. For future improvements, I could also add WiFi capability and data logging functionality since the ESP8266 already comes with WiFi built in.
I hope you found this project interesting! Please share your build if you end up making something similar!
Read more: DIY Geiger Counter With an ESP8266 and a Touchscreen
