
Summary of DIY Arduino Soldering Station
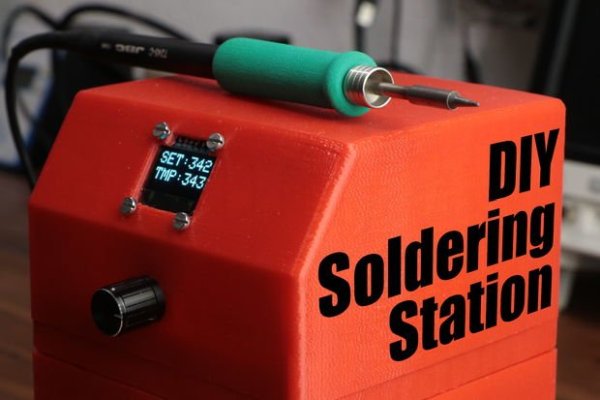
This project shows how to build an Arduino-based soldering station for a standard JBC soldering iron, covering thermocouples, AC power control, zero-cross detection, parts sourcing, and a 3-part 3D-printable enclosure. A companion video provides core instructions and the article supplies extra details and component links.
Parts used in the Arduino based soldering station:
- Toroidal Transformer
- 2x 2W10 Full Bridge Rectifier
- BTB26 Triac
- MOC3020 Optocoupler
- 4N25 Optocoupler
- Arduino Pro Mini
- SPI OLED LCD
- MAX6675 thermocouple amplifier
- 2x 1000µF Capacitor
- 3x 100Ω Resistor
- 1x 330Ω Resistor
- 1x 2kΩ Resistor
- 50kΩ Potentiometer
- 3-part 3D printed enclosure (123D Design file)
In this project I will show you how to create an Arduino based soldering station for a standard JBC soldering iron. During the build I will talk about thermocouples, AC power control and zero point detection. Let’s get started!
Step 1: Watch the Video!
The video gives you all the basic information you need to build a soldering station. In the next steps though I will present you additional, helpful information.
Step 2: Order Your Components!
Here you can find a parts list with example seller:
Amazon.com:
1x Toroidal Transformer: –
2x 2W10 Full Bridge Rectifier: http://amzn.to/2oOZEB3
1x BTB26 Triac: http://amzn.to/2nXQv5f
1x MOC3020 Optocoupler: http://amzn.to/2oSyn0i
1x 4N25 Optocoupler: http://amzn.to/2oSIySu
1x Arduino Pro Mini: http://amzn.to/2nXvY0K
1x SPI OLED LCD: http://amzn.to/2oVBQbx
1x MAX6675: http://amzn.to/2nueIUu
2x 1000µF Capacitor: http://amzn.to/2omfjXL
3x 100Ω, 1x 330Ω, 1x 2kΩ Resistor: http://amzn.to/2odSJOJ
1x 50kΩ Potentiometer: http://amzn.to/2oml73s
Ebay:
1x Toroidal Transformer: http://rover.ebay.com/rover/1/711-53200-19255-0/1?…
2x 2W10 Full Bridge Rectifier: http://rover.ebay.com/rover/1/711-53200-19255-0/1?…
1x BTB26 Triac: http://rover.ebay.com/rover/1/711-53200-19255-0/1?…
1x MOC3020 Optocoupler: http://rover.ebay.com/rover/1/711-53200-19255-0/1?…
1x 4N25 Optocoupler: http://rover.ebay.com/rover/1/711-53200-19255-0/1?…
1x Arduino Pro Mini: http://rover.ebay.com/rover/1/711-53200-19255-0/1?…
1x SPI OLED LCD: http://rover.ebay.com/rover/1/711-53200-19255-0/1?…
1x MAX6675: http://rover.ebay.com/rover/1/711-53200-19255-0/1?…
2x 1000µF Capacitor: http://rover.ebay.com/rover/1/711-53200-19255-0/1?…
3x 100Ω, 1x 330Ω, 1x 2kΩ Resistor: http://rover.ebay.com/rover/1/711-53200-19255-0/1?…
1x 50kΩ Potentiometer: http://rover.ebay.com/rover/1/711-53200-19255-0/1?…
Amazon.de:
1x Toroidal Transformer: http://amzn.to/2oVuJA6
2x 2W10 Full Bridge Rectifier: http://amzn.to/2om5usC
1x BTB26 Triac: http://amzn.to/2oVvitI
1x MOC3020 Optocoupler: http://amzn.to/2oVkDyT
1x 4N25 Optocoupler: http://amzn.to/2omdI3V
1x Arduino Pro Mini: http://amzn.to/2g6Ujjr
1x SPI OLED LCD: http://amzn.to/2omdKc2
1x MAX6675: http://amzn.to/2omcLcb
2x 1000µF Capacitor: http://amzn.to/2oVnrfx
3x 100Ω, 1x 330Ω, 1x 2kΩ Resistor: http://amzn.to/2aAsWdV
1x 50kΩ Potentiometer: http://amzn.to/2n2cd7e
Step 3: Print Your Enclosure!
Here you can download the 123D Design file of my enclosure. Make sure to print it as three seperate pieces.
Read more: DIY Arduino Soldering Station
- What soldering iron is this station designed for?
The project is designed for a standard JBC soldering iron. - Does the project explain thermocouples?
Yes, the build discusses thermocouples. - How is AC power controlled in the project?
The article covers AC power control, including components like a triac and optocoupler for switching. - Is zero-cross detection covered?
Yes, zero point detection (zero-cross detection) is discussed during the build. - Where can I get the parts?
The article provides example seller links for Amazon, eBay, and Amazon.de for each part. - What microcontroller is used?
The project uses an Arduino Pro Mini. - Which temperature sensing module is used?
The MAX6675 thermocouple amplifier is used for temperature measurement. - Is a display included in the parts list?
Yes, an SPI OLED LCD is included in the parts list. - Are there instructions for the enclosure?
Yes, a 123D Design file for a three-piece enclosure is available to download and print. - Does the video contain all build information?
The video gives all basic information, while the article provides additional helpful details.
