
Summary of Digital I/O with Arduino Boards
Readings in Physical Computing covers Arduino PWM and serial communication; the lab builds on a prior Blink exercise to demonstrate Pulse Width Modulation for analog-like LED fading and introduces serial communication. Students move an LED from pin 13 to a PWM pin, load the Fading example, then expand the circuit to fade three LEDs on PWM pins 9, 10, and 11 using provided example code and a DimmingLEDs sketch.
Parts used in the Fading LEDs Project:
- Arduino board (with PWM-capable digital pins 9, 10, 11)
- USB cable to connect Arduino to laptop
- 3 LEDs
- 3 current-limiting resistors (appropriate value for the LEDs)
- Breadboard
- Jumper wires
- Laptop with Arduino IDE installed
Readings in Physical Computing
- Ch 6. pgs 87-136 (this week and next week)
- Ch 7: Serial Communication [137-143; 149-150; 153-161]
Before the lab
You should have already successfully installed the Arduino environment on your laptop, built the LED circuit, and successfully load/run the “blink” program to make the LED blink. Congratulations!
In lab exercise
Objective
In this lab, we explore some of the digital features of the Arduino Board. Specifically, we’ll be looking at:
- Pulse Width Modulation (PWM) which “fakes” analog behavior using digital signals
- Serial communication with the laptop allowing for greater design flexibility
In exploring these features, we will use Arduino to not just blink a single LED, but to control and fade several LEDs at once.
Activity
Part 1: From blinking to fading
1. Start with the LED circuit you built for the “Blinking LED” Assignment. For that assignment, we used pin 13 to control the LED and make it blink. Ardiuno has several pins marked PWM which support Pulse Width Modulation. The example code uses Pin 9, so simply move the controlling wire from Pin 13 to Pin 9. 2. Load the example code from the Arduino Sketchbook (File‐>Examples‐>Analog‐>Fading). Load this onto the Arduino and watch the LED Fade.
Part 2: Fading 3 LEDs
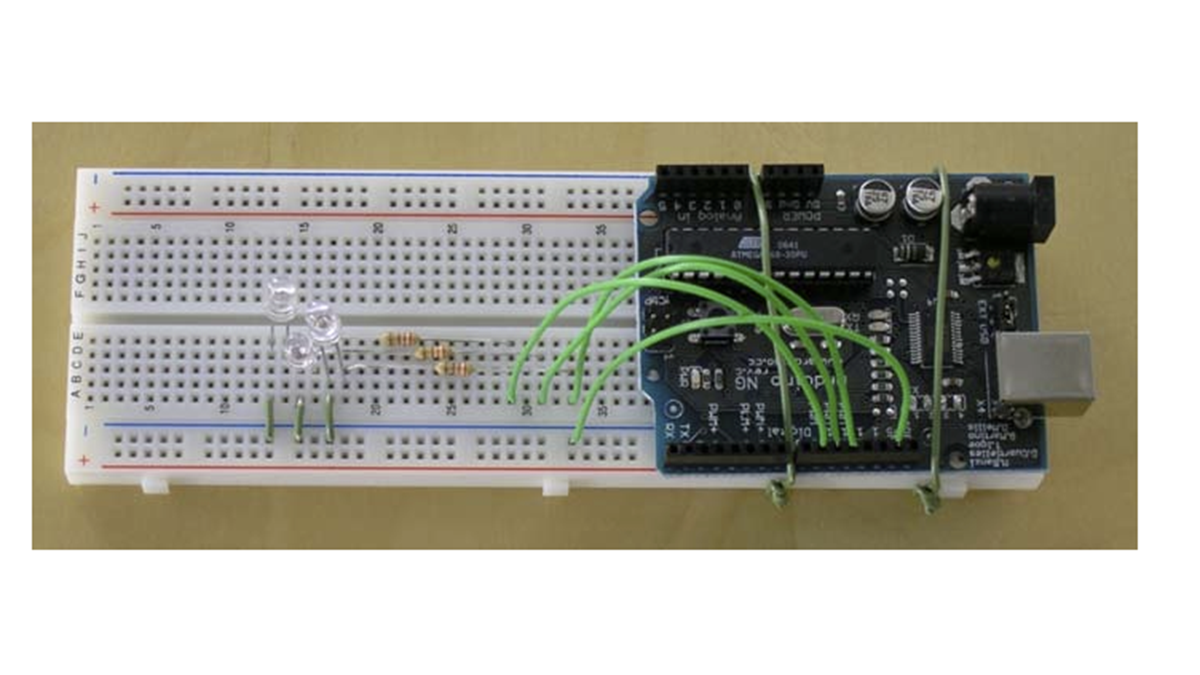
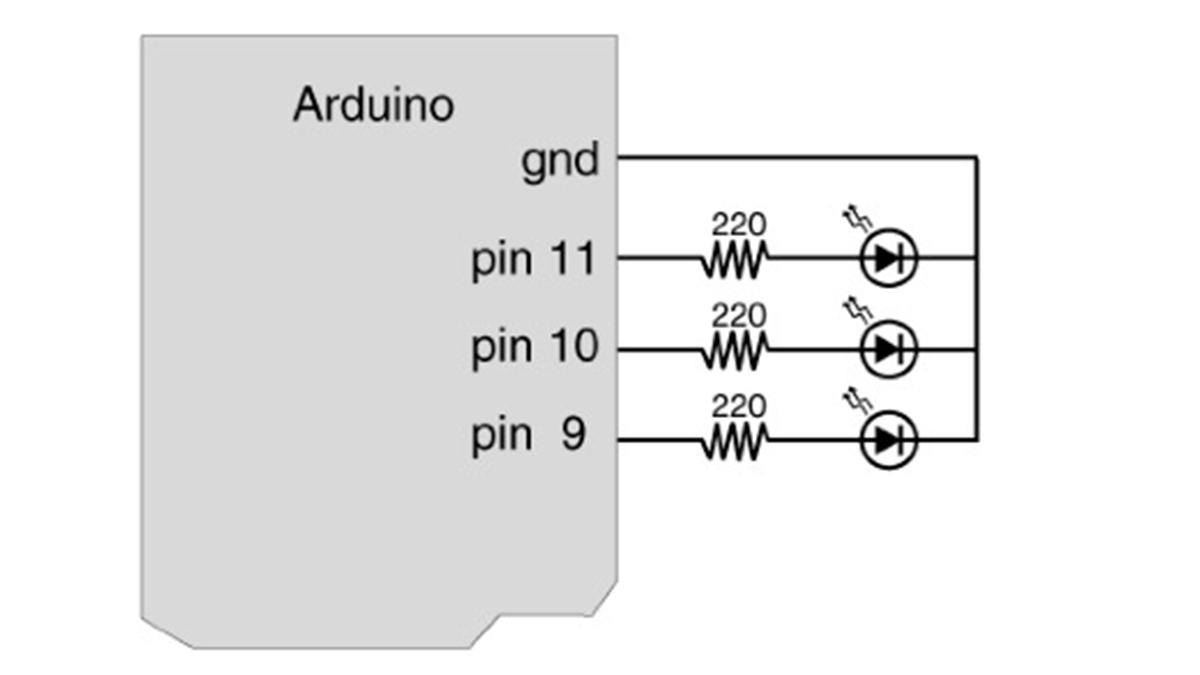
3. Extend your circuit so that it includes 3 LEDs according to the diagrams below. Notice Pins 9, 10, and 11 are all marked PWM.
4. The following code dims the 3 LEDs according to a pattern. For your convenience, a copy of the code can be downloaded here (DimmingLEDs.txt). Look at the code and make sure you know what each line does.
For more detail: Digital I/O with Arduino Boards
- How do you make a single LED fade instead of blink?
Move the LED control wire from pin 13 to a PWM pin (example uses pin 9) and load the Analog -> Fading example sketch. - Can multiple LEDs be faded simultaneously?
Yes; extend the circuit to include three LEDs on PWM pins 9, 10, and 11 and use the provided dimming code. - What Arduino pins support PWM for this lab?
Pins 9, 10, and 11 are marked PWM and used in the exercise. - Where do I find the example fading code?
Load File -> Examples -> Analog -> Fading in the Arduino Sketchbook or use the provided DimmingLEDs.txt example. - Do I need to change the hardware from the Blinking LED assignment?
Yes; move the control wire from pin 13 to a PWM pin and add the additional LEDs, resistors, and wiring as shown in the diagrams. - What is PWM used for in this lab?
PWM fakes analog behavior using digital signals to dim LEDs. - Is serial communication used in the fading LEDs activity?
The lab description includes serial communication as an objective, but the fading LEDs activity focuses on PWM; serial is covered elsewhere in the readings.
