When the Nintendo Wii was launched players were encouraged, nay required, to leave the sofa and jump, dance, and jiggle in order to score points in their game of choice. While there is a steep learning curve in building for the Wii, it is easy to build a custom device that lets you control a game by physically jumping on pressure pads at the appropriate time.
This instructable shows how I adapted the game ‘Space Bounce’ (playable live at https://marquisdegeek.com/spacebounce/ with the source at https://github.com/MarquisdeGeek/SpaceBounce) to use a physical controller.
Supplies:
- Arduino
- Two pressure mats (mine were from Maplin
- Two resistors, for the pressure mat (100 K, but most are fine)
- Two LEDs (optional)
- Two resistors, for the LEDs (100 K, but most are fine. Also optional)
- Laptop
Step 1: Jump Around!
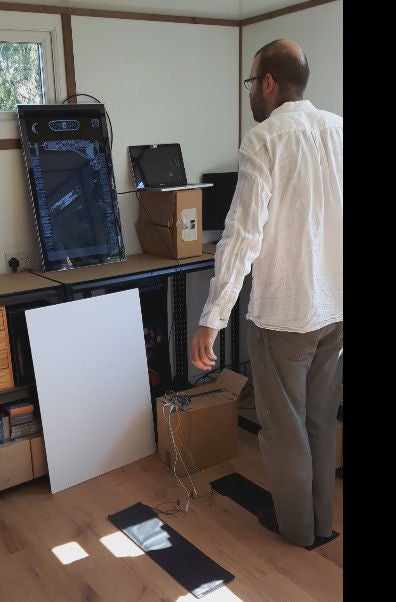
I began by designing the jumping interface and, on review of the game, realised that having two mats would best express its core idea. That is, you stand on the left mat to simulate the feeling of holding onto the left wall and, at the appropriate moment, jump across to the right mat, and your on-screen character would do the same.
Step 2: Connecting the Pads
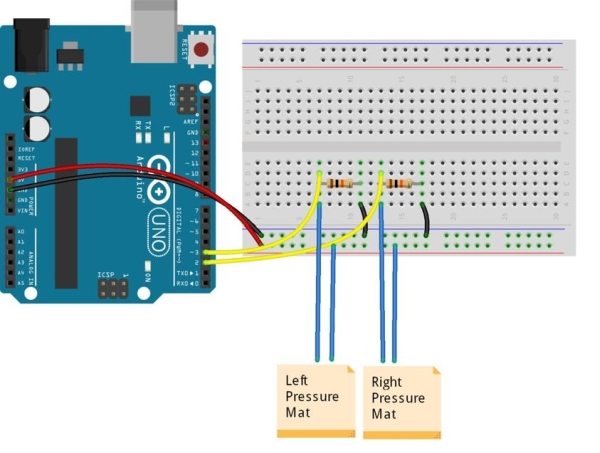
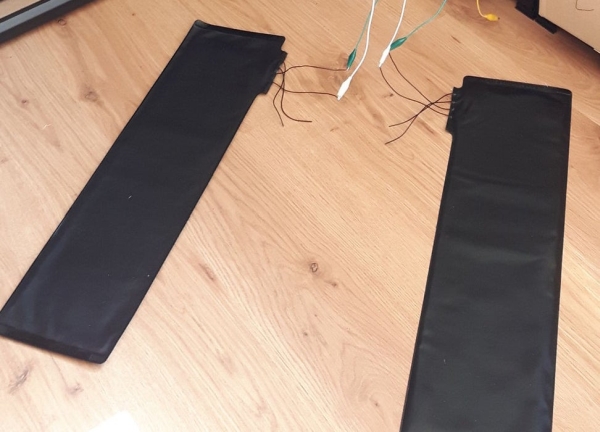
So I bought two mats, and got to work. The pressure mats shown here are the simplest (and cheapest!) I found, at £10 each. They have four wires, two of which act like a simple switch: when you stand on the mat, a connection is made, and when you jump up it is broken. I fed this into an Arduino with this basic circuit.
Step 3: Tripping the Light Fantastic
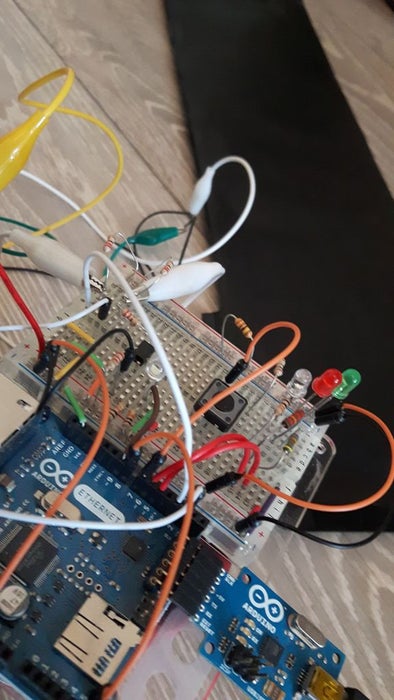
It worked, but wasn’t very inspiring. So, I added some LEDs to indicate the state of each pressure mat.
The LEDs are not required to play the game, but by adding them to the circuit I could easily see what the circuit thought was the current state. Therefore, if the game didn’t react correctly, I could work out if the problem was with the circuit, Arduino software, or the game logic.
Step 4: Starting to Code
Given the original game was in JavaScript, decided to I write a NodeJS program which listens for changes in the pressure mat state, and sends the data via websockets to the game client.
First, install the standard firmata onto your Arduino so that we can run a Node server on the PC and use the Johnny Five library to listen for the state changes from the Arduino. Then add Express to serve up the game content.
The entire server code looks like this:
const express = require('express');
const app = express();
const http = require('http');
const server = http.createServer(app);
const io = require('socket.io').listen(server);

const arduino = require('arduino-controller');

server.listen(3000, function() {
  console.log('Express server listening...');
});

app.use('/', express.static('app'));

const five = require("johnny-five");
const board = new five.Board({
  repl: false
});

board.on("ready", function() {
  let green = new five.Led(5);
  let red = new five.Led(6);
  let left = new five.Pin(2);
  let right = new five.Pin(3);

  io.on('connect', function(socket) {
    console.log('We are connected!');
    let lastLeft = false;
    let lastRight = false;

    five.Pin.read(left, (err, val) => {
      if (val) {
        green.on();
      } else {
        green.off();
      }

      if (val !== lastLeft) {
        lastLeft = val;
        let state = {
          side: 'left',
          state: val ? 'down' : 'up'
        }
        socket.emit('arduino::state', JSON.stringify(state), {
          for: 'everyone'
        });
      }

    })

    five.Pin.read(right, (err, val) => {
      if (val) {
        red.on();
      } else {
        red.off();
      }
      //
      if (val !== lastRight) {
        lastRight = val;
        let state = {
          side: 'right',
          state: val ? 'down' : 'up'
        }
        socket.emit('arduino::state', JSON.stringify(state), {
          for: 'everyone'
        });

      }
    })
  });

});
And is run with:
node server.js
Step 5: Adapting the Game
The first problem was the interface; how do you ‘click’ on the play button when all you can do is jump? I solved this by eliminating all the other buttons! I can then trigger the remaining button whenever the player jumps, by listening for either ‘up’ event.
Read more: Creating a Physical Game Controller