Create Mobile Apps for Android and iOS Connecting to the MKR

This simple project shows how to make an app that controls an Arduino MKR1000 board with Evothings Studio by communicating over the TCP.

Create Mobile Apps for Android and iOS Connecting to the MKR

Things used in this project

Hardware components

Arduino MKR1000
Arduino MKR1000
× 1
LED (generic)
LED (generic)
× 1
Resistor 100 ohm
Resistor 100 ohm
× 1
Jumper wires (generic)
× 1
Breadboard (generic)
× 1

Software apps and online services

Evothings Studio
Evothings Studio
Arduino IDE
Arduino IDE

Story

3.       Enter the name and password for your WiFi network in arduinowifi.ino.

// Your network SSID (network name).
// TODO: Enter the name of your wifi network here.
char ssid[] = "wifi name";
// Your network password.
// TODO: Enter the password of your wifi network here.
char pass[] = "wifi password";

4.       Upload the program to the MKR1000.

5.       Open the Serial Monitor Window and look for the IP address of the MKR1000. (If the IP address is not displayed, check your WiFi network name and password.)

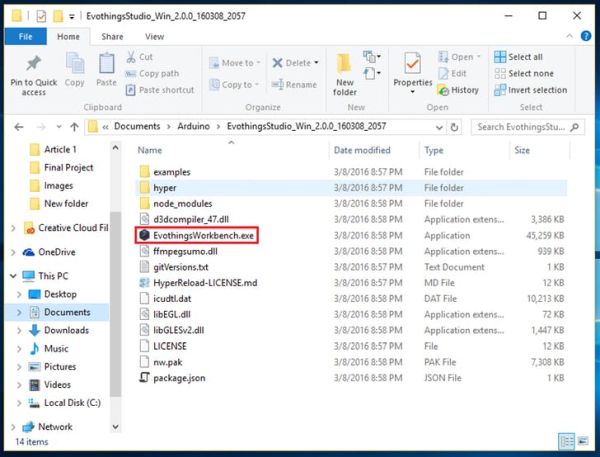
6.       Run Evothings Workbench on your desktop/laptop computer. (If you not install Evothings Workbench, to download click here.)
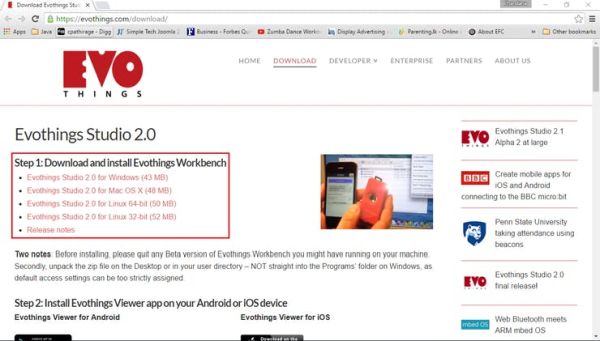
7.       Run Evothings Viewer on an iOS or Android mobile device and connect to the Workbench.

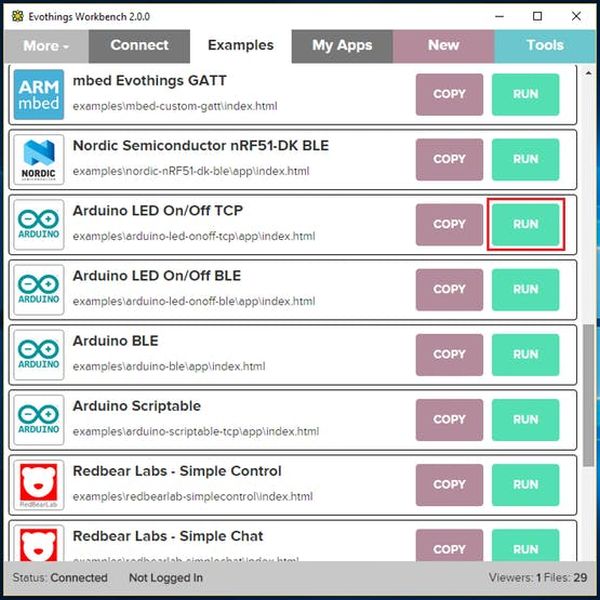
8.       Launch the example “Arduino LED On/Off TCP” from the Workbench window.
Schematics

Code

/*
  Arduino WiFi Script Server

  Created October 20, 2013
  Mikael Kindborg, Evothings AB

  TCP socket server that accept commands for basic scripting
  of the Arduino board.

  This example is written for a network using WPA encryption.
  For WEP or WPA, change the Wifi.begin() call accordingly.

  The API consists of the requests listed below.

  Requests and responses end with a new line.

  The input parameter n is a pin number ranging from 2 to 9.

  The response is always a 4-character string with a
  hex encoded number ranging from 0 to FFFF.

  Possible response string values:

  H (result from digital read)
  L (result from digital read)
  0 to 1023 - Analog value (result from analog read)

  Set pin mode to OUTPUT for pin n: On
  Response: None
  Example: O5
  Note: O is upper case letter o, not digit zero (0).

  Set pin mode to INPUT for pin n: In
  Response: None
  Example: I5

  Write LOW to pin n: Ln
  Response: None
  Example: L5

  Write HIGH to pin n: Hn
  Response: None
  Example: H5

  READ pin n: Rn
  Response: "H" (HIGH) or "L" (LOW)
  Example: R5 -> H

  ANALOG read pin n: An
  Response: int value as string (range "0" to "1023")
  Example: A5 -> 42
*/

// Include files.
#include <SPI.h>
#include <WiFi101.h>

// Your network SSID (network name).
// TODO: Enter the name of your wifi network here.
char ssid[] = "wifi name";

// Your network password.
// TODO: Enter the password of your wifi network here.
char pass[] = "wifi password";

// Your network key Index number (needed only for WEP).
int keyIndex = 0;

// Server status flag.
int status = WL_IDLE_STATUS;

// Create WiFi server listening on the given port.
WiFiServer server(3300);

void setup() {
  // Start serial communication with the given baud rate.
  // NOTE: Remember to set the baud rate in the Serial
  // monitor to the same value.
  Serial.begin(9600);

  // Wait for serial port to connect. Needed for Leonardo only
  while (!Serial) {
    ;
  }

  // Check for the presence of the WiFi shield.
  if (WiFi.status() == WL_NO_SHIELD) {
    // If no shield, print message and exit setup.
    Serial.println("WiFi shield not present");
    status = WL_NO_SHIELD;
    return;
  }

  // Connect to Wifi network.
  while (status != WL_CONNECTED) {
    Serial.print("Connecting to Network named: ");
    Serial.println(ssid);

    // Connect to WPA/WPA2 network. Update this line if
    // using open or WEP network.
    status = WiFi.begin(ssid, pass);

    // wait 10 seconds for connection:
    delay(10000);
  }

  // Start the server.
  server.begin();

  // Print WiFi status.
  printWifiStatus();
}

void loop() {
  // Check that we are connected.
  if (status != WL_CONNECTED) {
    return;
  }

  // Listen for incoming client requests.
  WiFiClient client = server.available();
  if (!client) {
    return;
  }

  Serial.println("Client connected");

  String request = readRequest(&client);
  executeRequest(&client, &request);

  // Close the connection.
  //client.stop();

  Serial.println("Client disonnected");
}

// Read the request line. The string from the JavaScript client ends with a newline.
String readRequest(WiFiClient* client) {
  String request = "";

  // Loop while the client is connected.
  while (client->connected()) {
    // Read available bytes.
    while (client->available()) {
      // Read a byte.
      char c = client->read();

      // Print the value (for debugging).
      Serial.write(c);

      // Exit loop if end of line.
      if ('\n' == c) {
        return request;
      }

      // Add byte to request line.
      request += c;
    }
  }
  return request;
}

void executeRequest(WiFiClient* client, String* request) {
  char command = readCommand(request);
  int n = readParam(request);
  if ('O' == command) {
    pinMode(n, OUTPUT);
  } else if ('I' == command) {
    pinMode(n, INPUT);
  } else if ('L' == command) {
    digitalWrite(n, LOW);
  } else if ('H' == command) {
    digitalWrite(n, HIGH);
  } else if ('R' == command) {
    sendResponse(client, String(digitalRead(n)));
  } else if ('A' == command) {
    sendResponse(client, String(analogRead(n)));
  }
}

// Read the command from the request string.
char readCommand(String* request) {
  String commandString = request->substring(0, 1);
  return commandString.charAt(0);
}

// Read the parameter from the request string.
int readParam(String* request) {
  // This handles a hex digit 0 to F (0 to 15).
  char buffer[2];
  buffer[0] = request->charAt(1);
  buffer[1] = 0;
  return (int) strtol(buffer, NULL, 16);
}

void sendResponse(WiFiClient* client, String response) {
  // Send response to client.
  client->println(response);

  // Debug print.
  Serial.println("sendResponse:");
  Serial.println(response);
}

void printWifiStatus() {
  Serial.println("WiFi status");

  // Print network name.
  Serial.print("  SSID: ");
  Serial.println(WiFi.SSID());

  // Print WiFi shield IP address.
  IPAddress ip = WiFi.localIP();
  Serial.print("  IP Address: ");
  Serial.println(ip);

  // Print the signal strength.
  long rssi = WiFi.RSSI();
  Serial.print("  Signal strength (RSSI):");
  Serial.print(rssi);
  Serial.println(" dBm");
}

Source : Create Mobile Apps for Android and iOS Connecting to the MKR


About The Author

Ibrar Ayyub

I am an experienced technical writer with a Master's degree in computer science from BZU Multan University. I have written for various industries, mainly home automation and engineering. My writing style is clear and simple, and I am skilled in using infographics and diagrams. I am a great researcher and am able to present information in a well-organized and logical manner.

Follow Us:
LinkedinTwitter
Scroll to Top