
Summary of Controlling Patient’s Fever with Artik & Arduino
This project utilizes two Arduino MKR1000 devices to monitor patient temperature and automatically control a cooler. One wearable device reads data via a DHT11 sensor and uploads it to Samsung ARTIK Cloud. The second device receives cloud commands to activate a relay connected to a cooling unit, ensuring patient safety during fever spikes.
Parts used in Controlling Patient's Fever with Artik & Arduino:
- Arduino MKR1000
- SparkFun Logic Level Converter - Bi-Directional
- Li-Ion Battery 1000mAh
- RGB Diffused Common Cathode LED
- DHT11 Temperature & Humidity Sensor
- Relay Module
- Resistor 1k ohm
This project consists of 2 devices. the first one is wearable and monitors temperature, second one will control the temperature.
Things used in this project
Hardware components |
||||||
 |
|
× | 2 | |||
 |
|
× | 1 | |||
 |
|
× | 1 | |||
 |
|
× | 1 | |||
 |
|
× | 1 | |||
|
× | 1 | ||||
 |
|
× | 2 | |||
Software apps and online services |
||||||
 |
|
|||||
 |
|
|||||
Story
Introduction
This project consists of 2 devices, the first one is wearable mkr1000 with battery and temperature and humidity sensor, the mkr1000 send temperature and humidity to Artik cloud. Now doctors can observe patient’s fever and sweating of patient, and if temperature goes too high or low. Artik will send email to doctor and send action to second device! Second device is a mkr1000 that control cooler with relay!
how it works
Adding libraries to Arduino
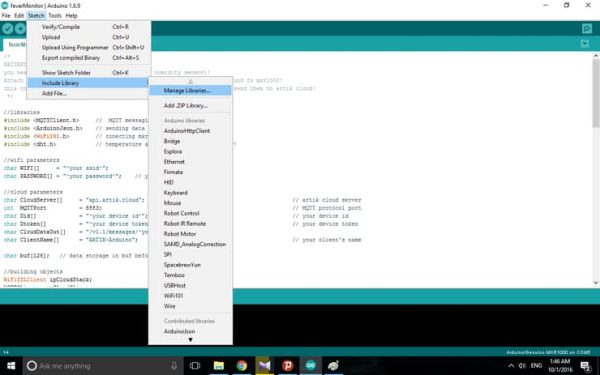
Open Arduino ide go to sketch>>include library>>manage libraries.
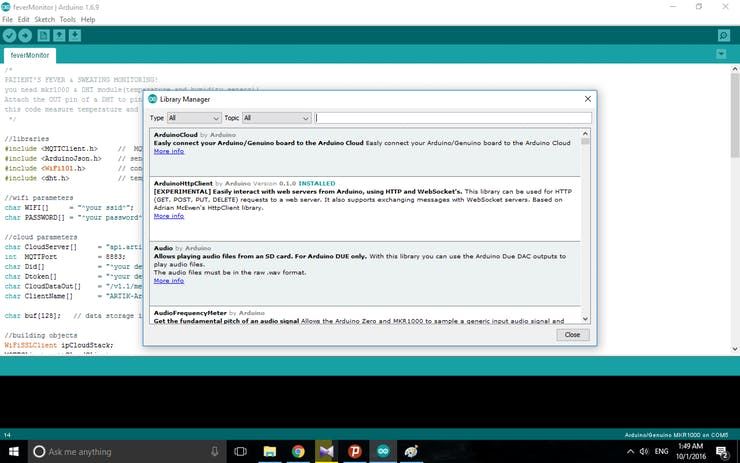
Now search and install MQTTClient.h, ArduinoJson.h, WiFi101.h, dht.h.
Making cloud ready!
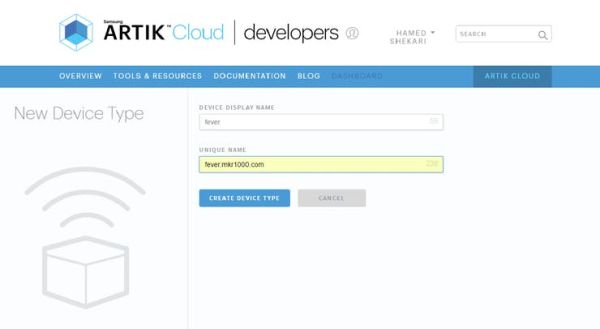
Go to https://developer.artik.cloud/dashboard/devicetypes and click on +new device type.

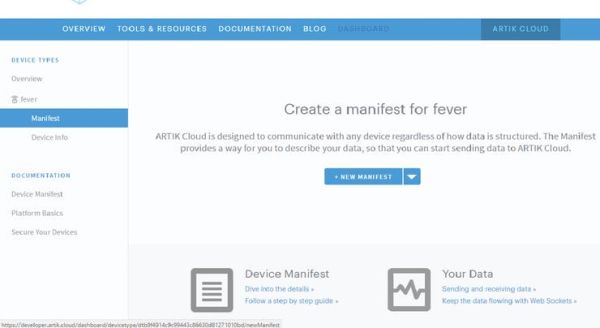
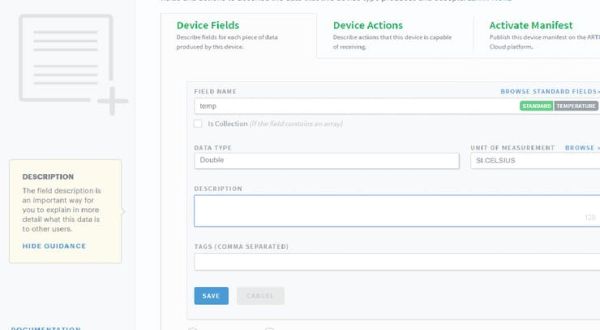
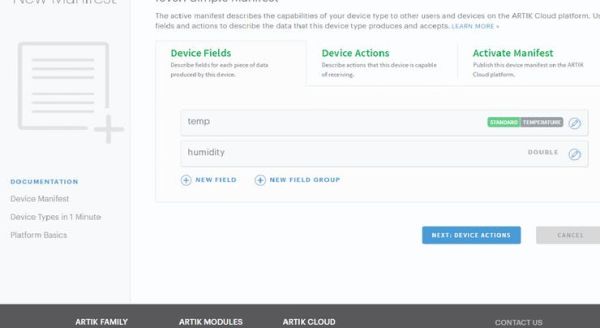
now go to https://artik.cloud/my/devices
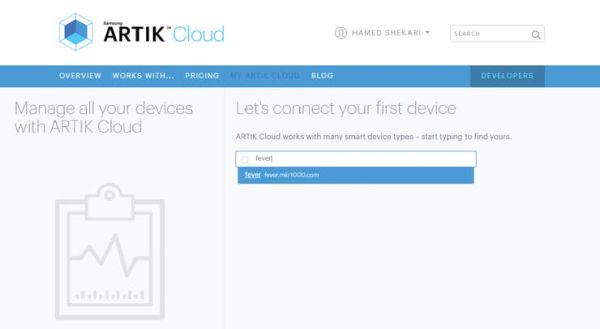
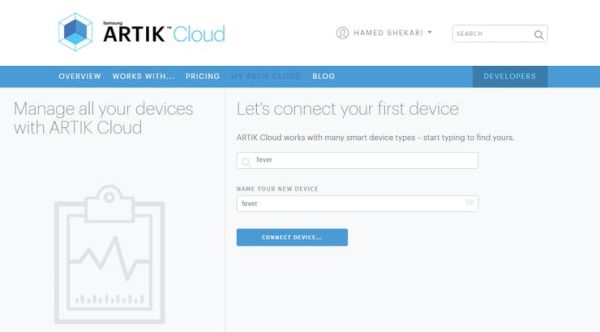
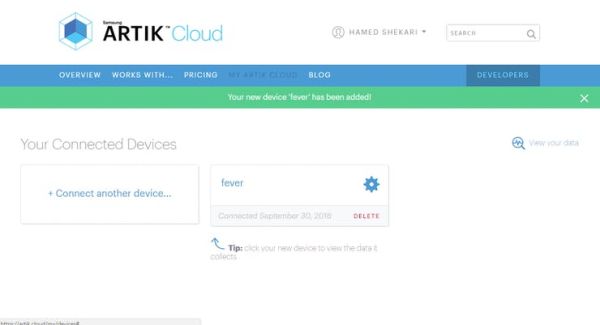 click on gear
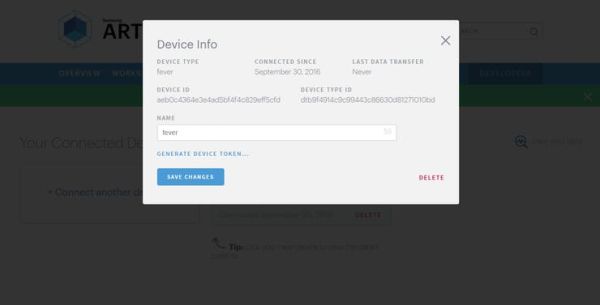 generate device token
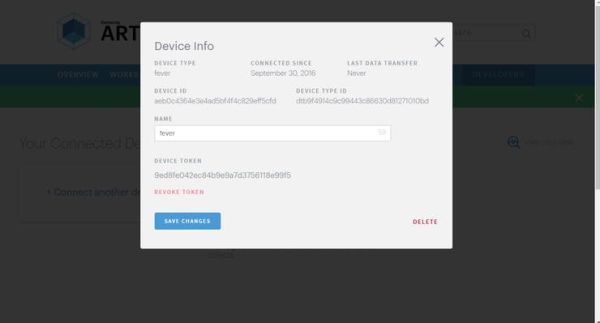 now save changes and remember device id & token
go to https://developer.artik.cloud/dashboard/devicetypes again and create new device.
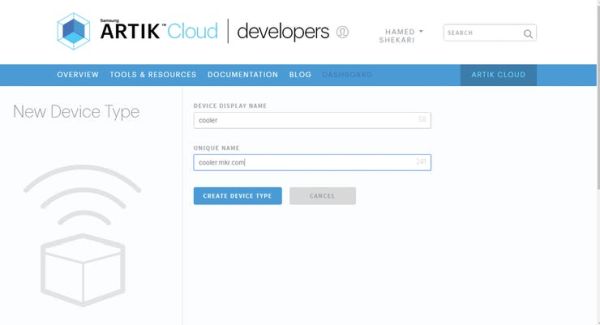 now build a new device type again.
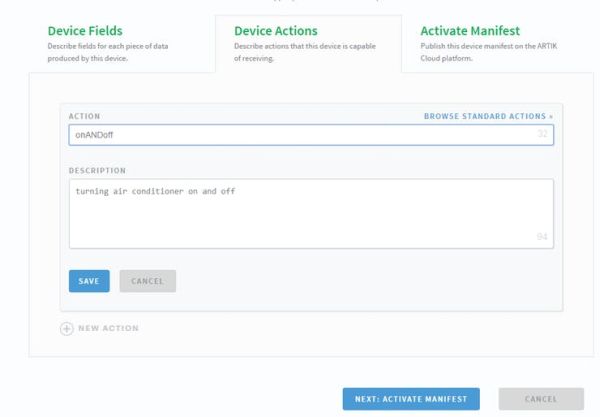 leave device fields and go to device actions and add an action
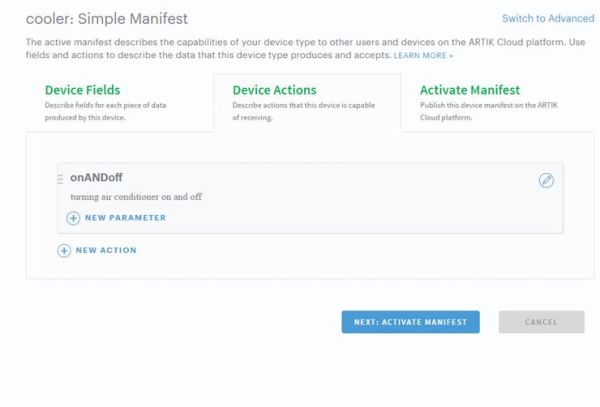 now click on new parameter
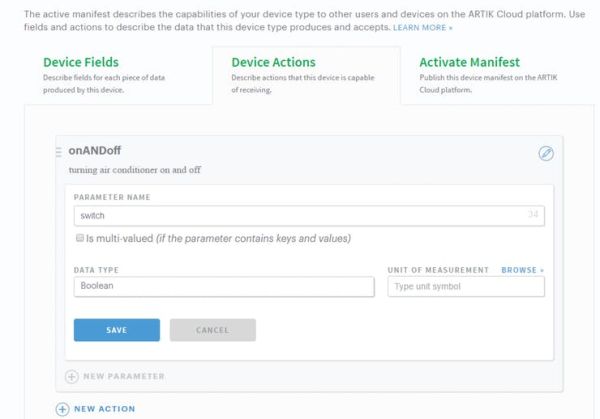 name it and choose data type
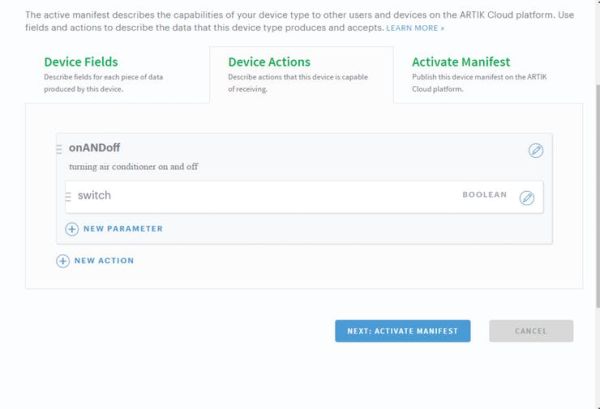 now activate manifest.
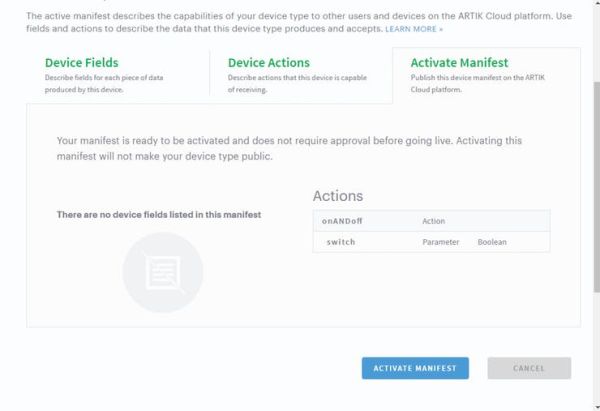 activate manifest.
now go back to https://artik.cloud/my/devices
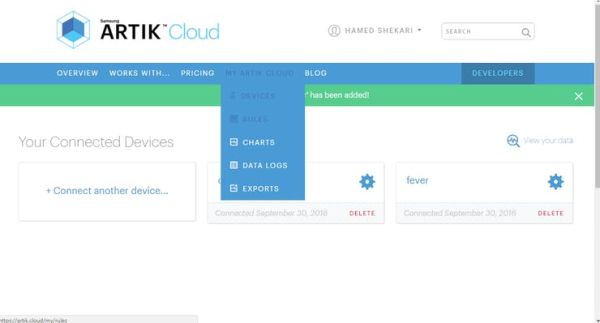 generate device token for your new device and then go to rules.
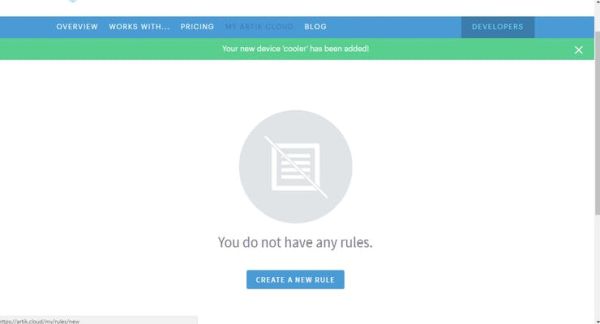 create new rule
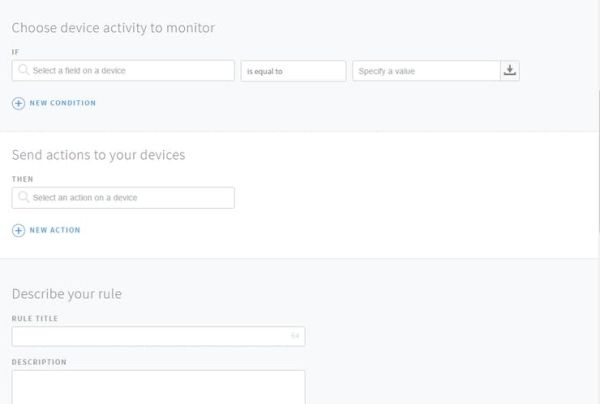 (^.^)
(^.^)
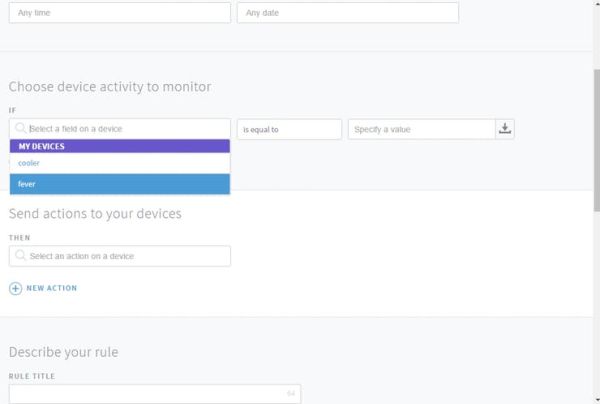 select your device
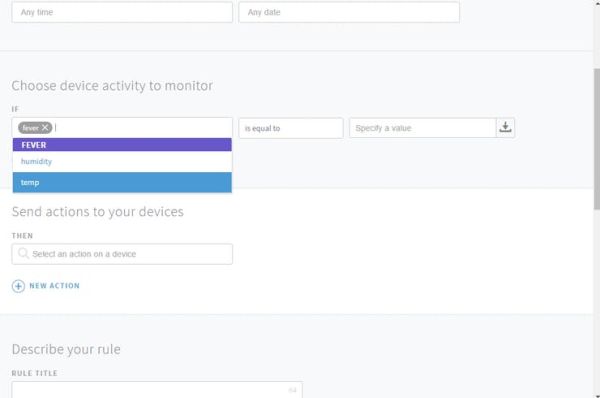 then choose parameter
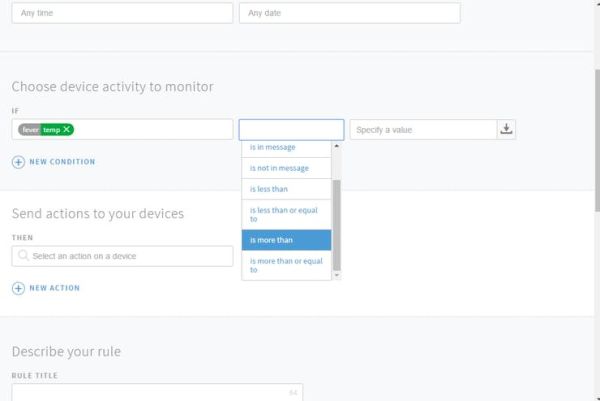 choose (is more than)
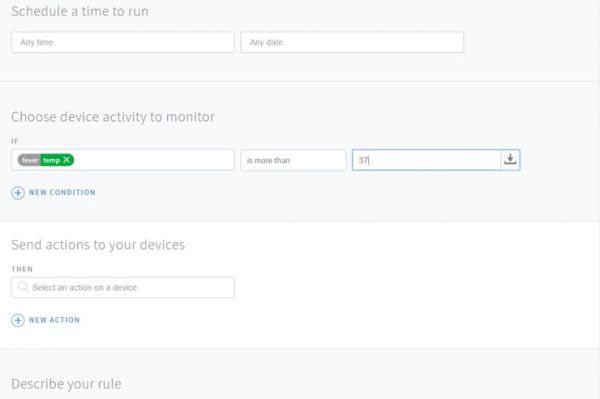 human body 37 degrees
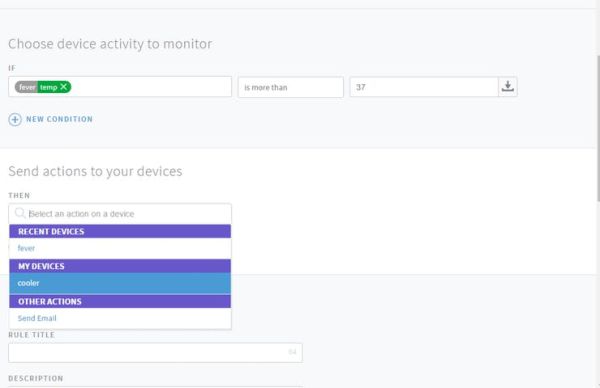 choose device that you want to send actions to.
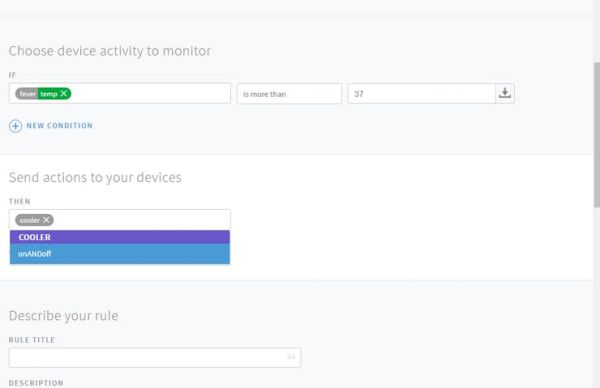 choose device that you want to send actions to.
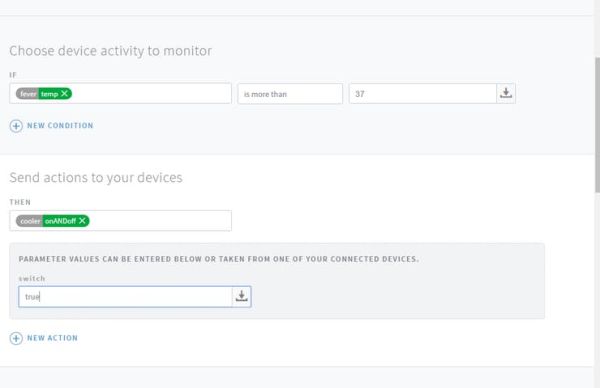 add value to action. cooler controller turn on the cooler by receiving true amount.
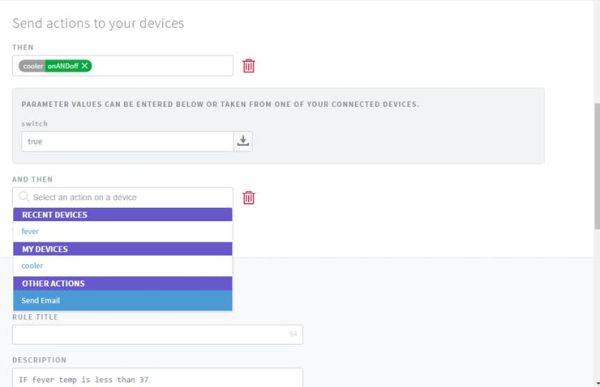 add new action(sending email)
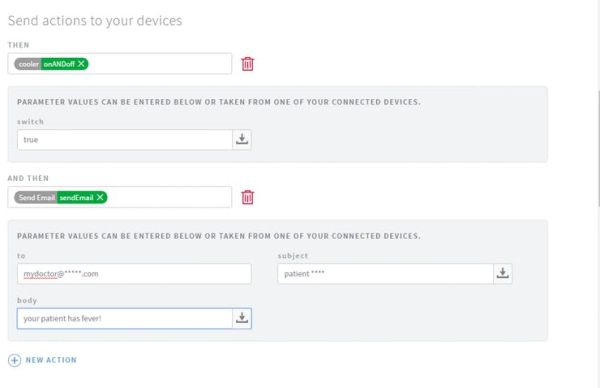 create email
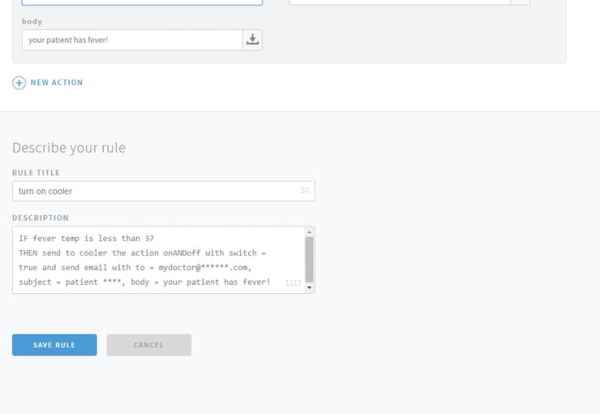 now save the rule! when patient has fever this action will turn on cooler, and cool down the body.
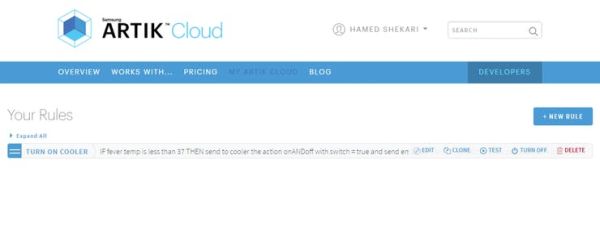 now you can see your rule.add another rule that turn off the cooler by sending action switch(false) to cooler controller device.
Wearable device
The wearable device is the simple part! you just connect your DHT module to mkr1000 and power it with battery or power bank. Connect the +&- of DHT to 5V & GND and connect out pin to the A0 of mkr1000.
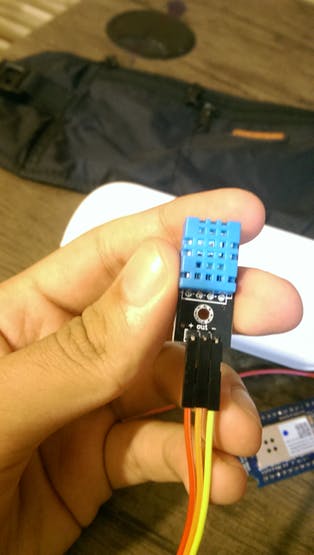
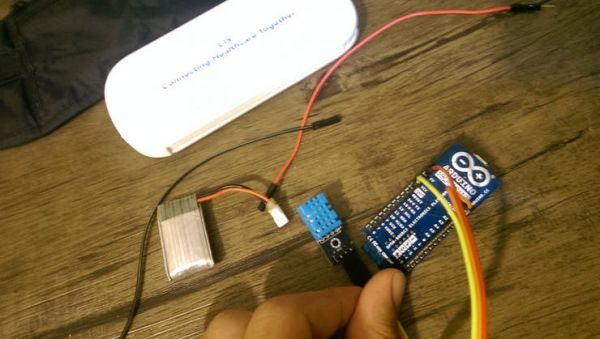
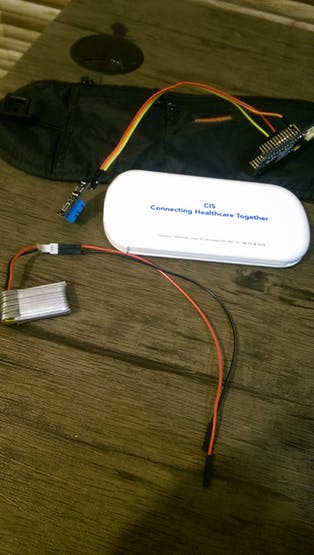
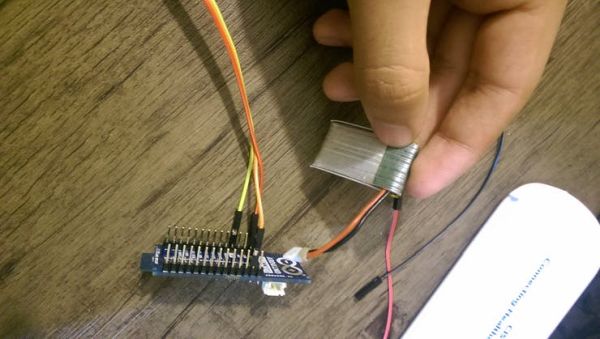
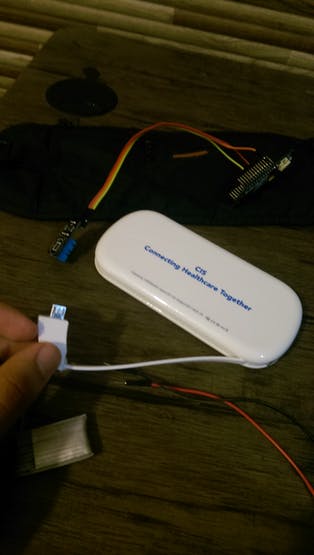
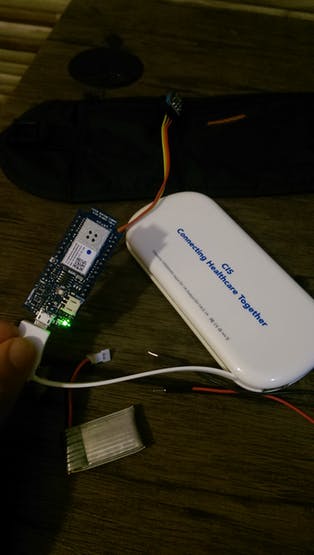
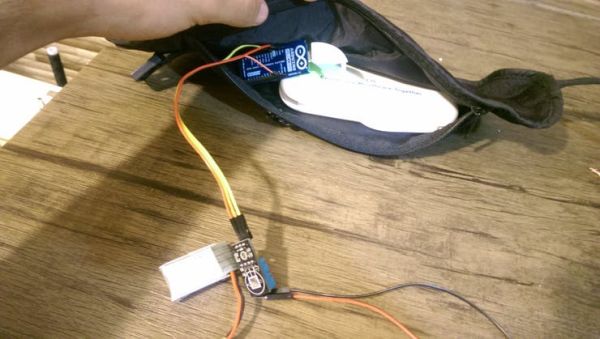

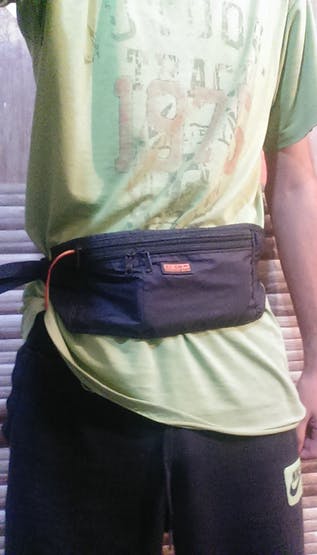
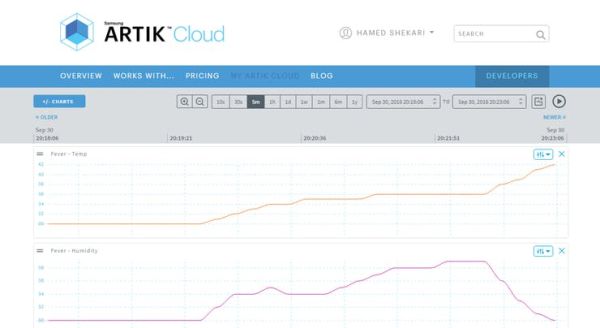
these data is my body’s. I put DHT in front of laptop fan to activate action!
Cooler controller
Open the cooler controller code and replace wifi name and password, device id and device token. upload it to mkr1000.
I use a voltage protector to connect relay to cooler because it is more safe!
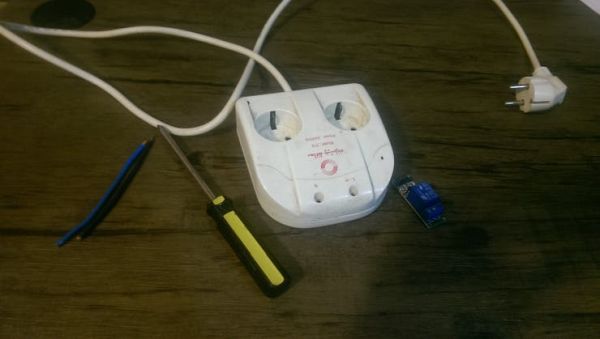
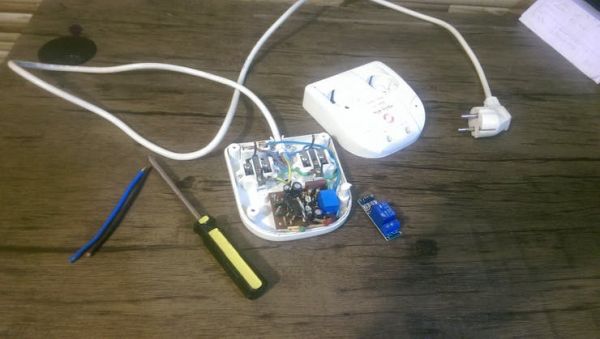 open it
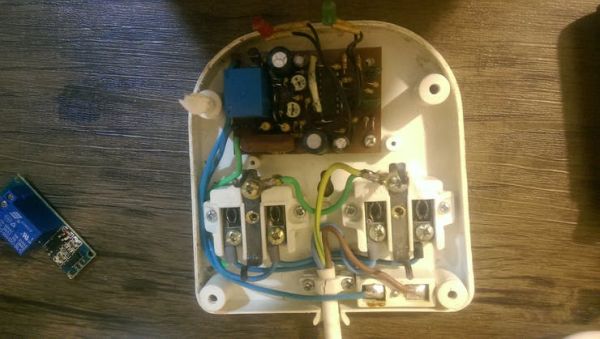
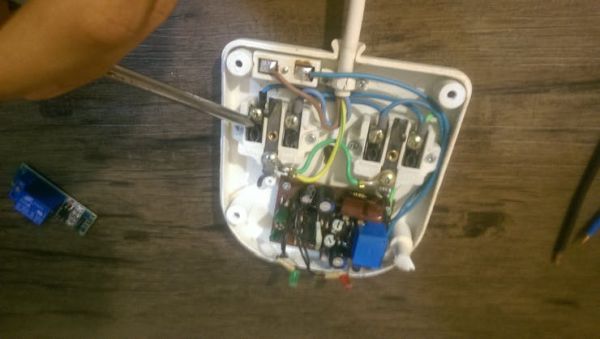 disconnect one of outlet wires
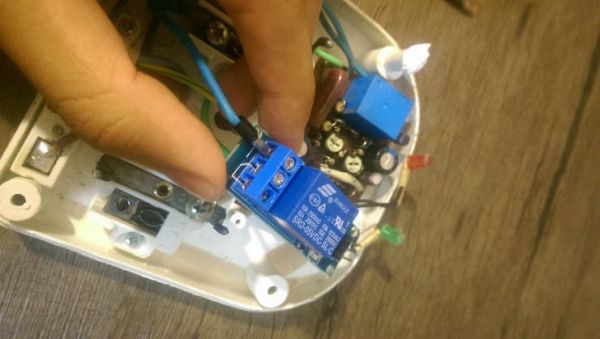 connect the disconnected wires to the relay
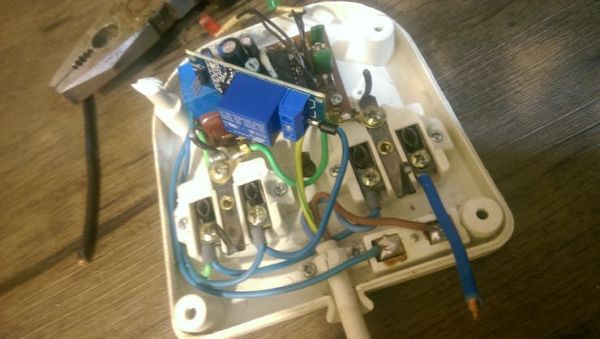 attach shot wire to outlet
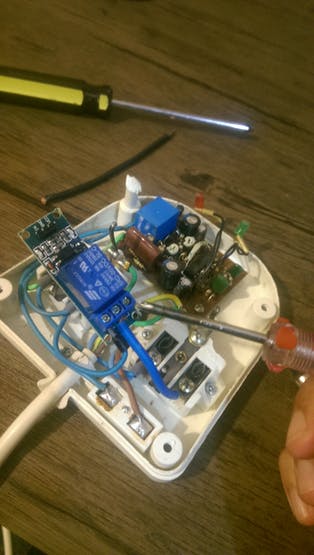 now connect outlet to relay
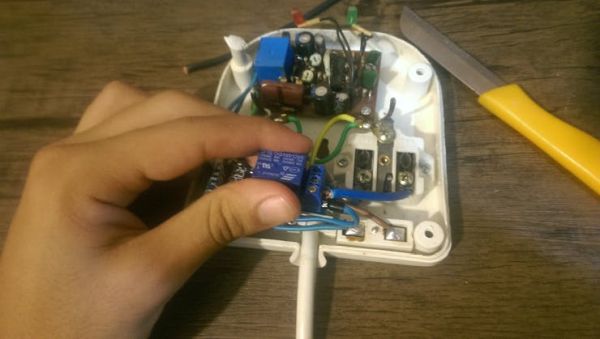
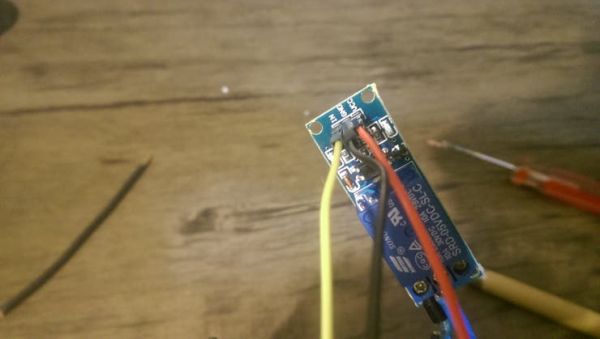 connect jumper wires to relay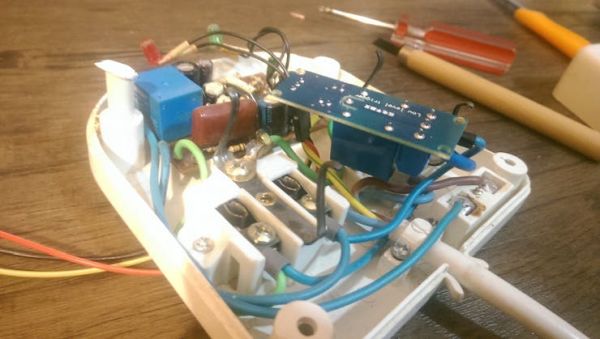
Relay work’s with 5V, but mkr1000’s digital write is 3.3V. so we need logic level converter.
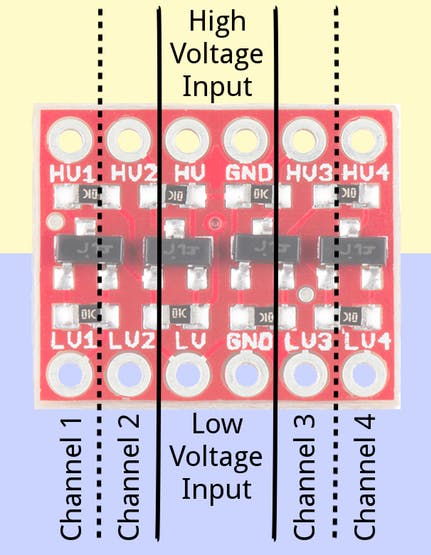
At first we connect 5V to HV and GND to GND. Then we connect 6 pin of mkr1000 to LV (because we have digital write, high to 6 pin and it’s voltage is 3.3 like our signal voltage).vNow we send signals through one of logic level converter’s channels.
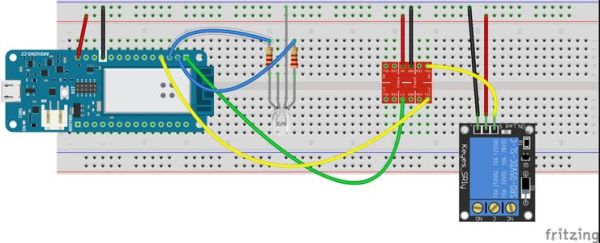
RGB led show’s the status. Green means that cooler is on and red means off!
Now every thing is OK! You can sit and enjoy your fever while Artik is controlling your body temperature.
Schematics
Code
cooler controller
C/C++
/*
 controling cooler with artik actions!
 connect relay to digital 9 pin!
 */
//libraries
#include <MQTTClient.h>     //  MQTT messaging protocol library!
#include <ArduinoJson.h>    // sending data with Json format library!
#include <WiFi101.h>        // conecting mkr1000 to internet library!

//wifi parameters
char WIFI[]     = "^your ssid^";            // your wifi name
char PASSWORD[] = "^your password^";    // your wifi password


//cloud parameters
char CloudServer[]     = "api.artik.cloud";                             // artik cloud server
int  MQTTPort          = 8883;                                          // MQTT protocol port
char Did[]             = "^your device id^";                            // your device id
char Dtoken[]          = "^your device token^";                         // your device token
char CloudDataOut[]    = "/v1.1/messages/^your device id^";
char ClientName[]      = "ARTIK-Arduino";
char CloudActionsIn[] = "/v1.1/actions/^your device id^";               // (/v1.1/actions/"DEVICE ID")


char buf[200]; // Json Data to Artik Cloud

//building ubjects
WiFiSSLClient ipCloudStack;
MQTTClient mqttCloudClient; // MQTT Protocol


int relayPIN=9;
int redled=7;
int greenled=8;


void setup()
{
  pinMode(relayPIN,OUTPUT);
  pinMode(redled,OUTPUT);
  pinMode(greenled,OUTPUT);
  //providing low 3.3V for logic level converter
  pinMode(6,OUTPUT);
  digitalWrite(6,HIGH);
  Serial.begin(9600);
  WiFi.begin(WIFI, PASSWORD);                                 //connecting to wifi
  while (WiFi.status() != WL_CONNECTED) {
    delay(500);
    Serial.print("attempting connect to : ");
    Serial.println(WIFI);
  }
  Serial.println();
  Serial.println("WiFi connected");

  mqttCloudClient.begin(CloudServer, MQTTPort, ipCloudStack); // Connecting to Artik cloud
  while (!mqttCloudClient.connect(ClientName, Did, Dtoken))   // connecting to device
  {
    Serial.print("not connected to device");
    delay(1000);
  }
mqttCloudClient.subscribe(CloudActionsIn);

}


void loop()
{

  //waiting for actions
  Serial.println("listening...");
  mqttCloudClient.loop();
  delay(10000);
}


void messageReceived(String topic, String payload, char * bytes, unsigned int length) {
  Serial.print("data from artik cloud:");
  Serial.println(payload);
  parseBuffer(payload);

}


void parseBuffer(String _payload)     //translating data from Json format
{

StaticJsonBuffer<200> jsonBuffer;
String json = _payload;
JsonObject& root = jsonBuffer.parseObject(json);
boolean ACS = root["actions"][0]["parameters"]["sw"];   //ACS = order from Artik

if (ACS)                         //turning on
{
  digitalWrite(relayPIN,LOW);
  digitalWrite(greenled,HIGH);
  digitalWrite(redled,LOW);
}
else                            //turning off
{
  digitalWrite(relayPIN,HIGH);
  digitalWrite(greenled,LOW);
  digitalWrite(redled,HIGH);
}

}
- How does the system detect high body temperature?
The wearable MKR1000 uses a DHT11 sensor to read temperature and humidity from the patient's skin. - Can doctors observe patient data remotely?
Yes, the device sends temperature and humidity data to Samsung ARTIK Cloud for doctors to observe. - What happens if the patient has a fever?
The cloud sends an action to turn on the cooler and emails the doctor. - Why is a logic level converter needed?
The relay works at 5V while the MKR1000 digital output is 3.3V, requiring conversion. - How does the cooler controller know when to turn on?
It listens for actions from ARTIK Cloud where a rule triggers if temperature exceeds 37 degrees. - What do the RGB LED colors indicate?
Green means the cooler is on and red means it is off. - Which libraries are required for the code?
The project requires MQTTClient.h, ArduinoJson.h, WiFi101.h, and dht.h. - How is the cooler physically connected to power?
A voltage protector connects the outlet wires to the relay module safely. - What protocol is used for cloud communication?
The system uses the MQTT protocol over port 8883 to connect to the ARTIK cloud server.
