Hello everyone, In this instructables we will control LED using IR remote.
Step 1: Gather the Parts
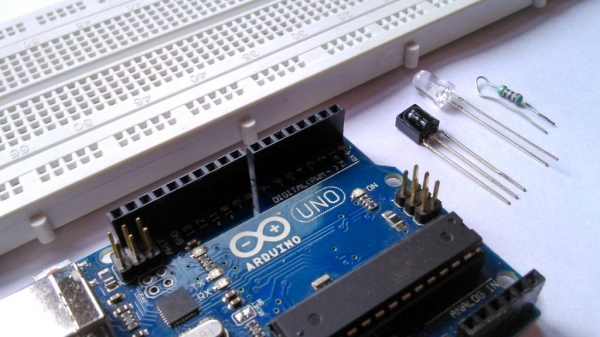
- A breadboard
- A LED
- A 220ohm resistor
- An Arduino UNO
- A TSOP382 IR receiver
- Some jumper or hookup wires
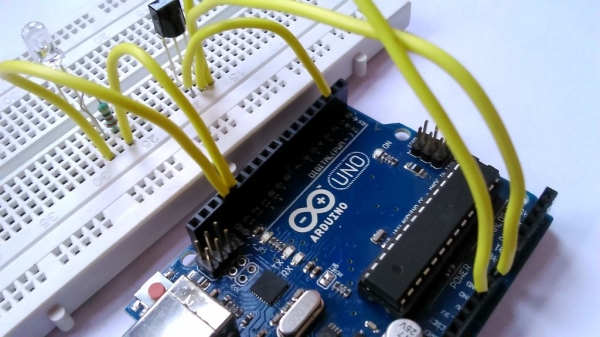
Step 2: Wiring
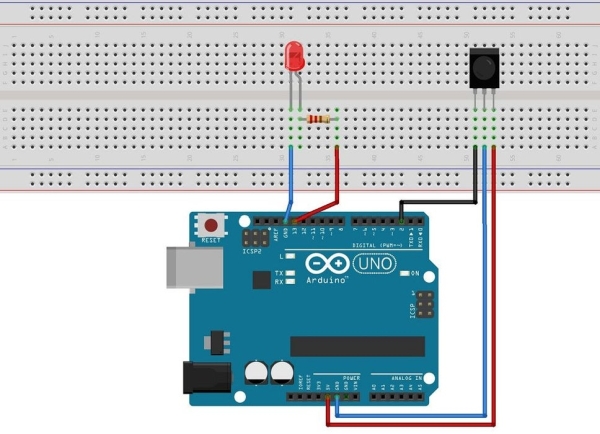
Hookup all the components according to the circuit diagram shown above.
Step 3: Receive the IR Signals From the Remote
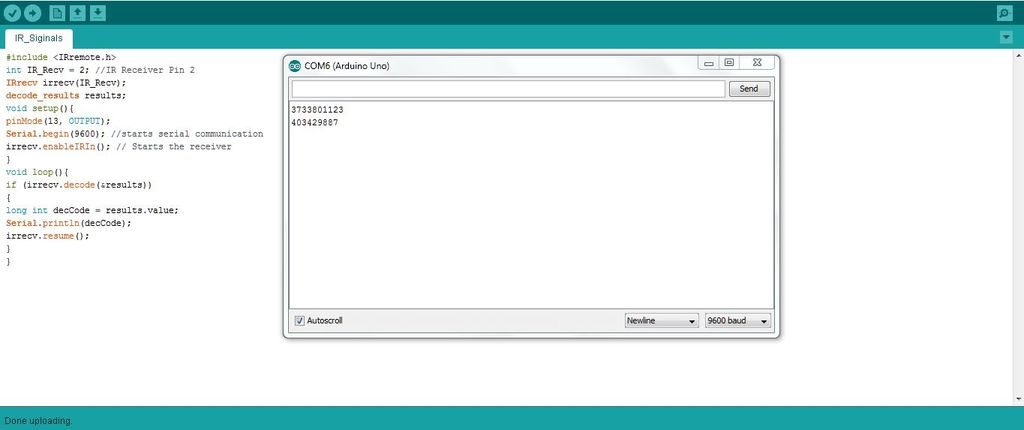
Download Ken Shirriffs IR library from github then add the library to “Arduino installation location\libraries\”
Upload the following code to your arduino:
#include <IRremote.h
int IR_Recv = 2; //IR Receiver Pin 2
IRrecv irrecv(IR_Recv);
decode_results results;
void setup(){
pinMode(13, OUTPUT);
Serial.begin(9600); //starts serial communication
irrecv.enableIRIn(); // Starts the receiver
}
void loop(){
if (irrecv.decode(&results))
{
long int decCode = results.value;
Serial.println(decCode);
irrecv.resume();
}
}
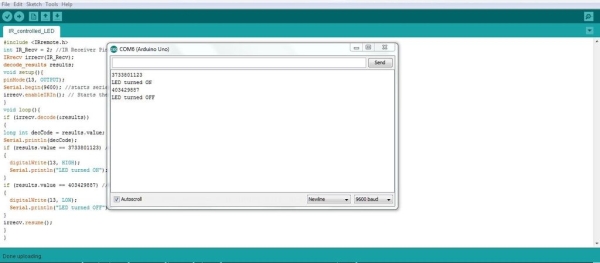
Then open the serial monitor on your arduino IDE and receive IR decimal signals by pressing buttons on your remote for this project we’ll need two IR decimal signals.
For me the IR decimal values are “3733801123” and “403429887” for Select and Power button respectively.
Step 4: The Final Code

Upload the following code to your arduino after replacing 3733801123 and 403429887 with your IR remote decimal code:
#include <IRremote.h>
int IR_Recv = 2; //IR Receiver Pin 2
IRrecv irrecv(IR_Recv);
decode_results results;
void setup(){
pinMode(13, OUTPUT);
Serial.begin(9600); //starts serial communication
irrecv.enableIRIn(); // Starts the receiver
}
void loop(){
if (irrecv.decode(&results))
{
long int decCode = results.value;
Serial.println(decCode);
if (results.value == 3733801123) //Select button
{
digitalWrite(13, HIGH);
Serial.println(“LED turned ON”);
}
if (results.value == 403429887) //Power button
{
digitalWrite(13, LOW);
Serial.println(“LED turned OFF”);
}
irrecv.resume();
}
}
Step 5: Done
Now just press the button of the remote whose code you assigned to your arduino to see your LED turning on and off.
Thanks for viewing.
Please write your questions or suggestions below.
Source: