Hey Everyone,
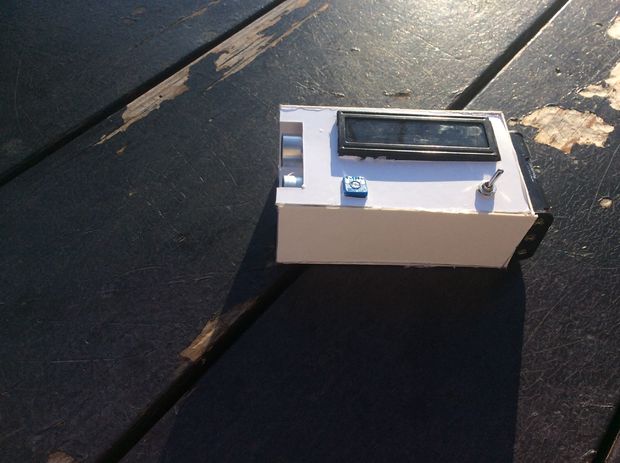
Today I hope to teach you all about ultrasonic sensors and hopefully by the end you’ll have a nice little digital tape measure of your own to use as you please.
Enjoy
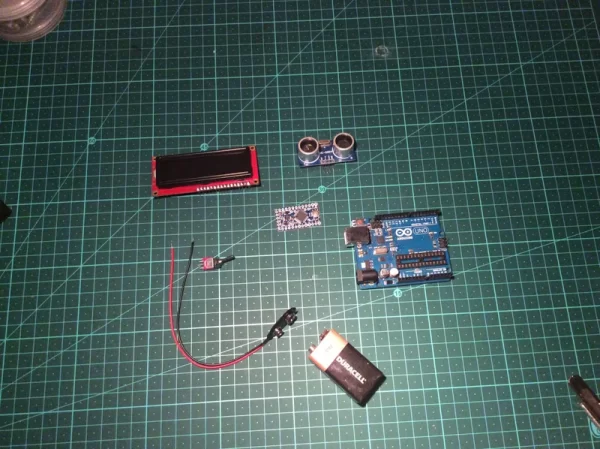
Step 1: Parts List
This is my second version of this project so if you can get it as small or just don’t feel like dealing with the Arduino Pro mini feel free to change it in any way you want.
To start off we will need:
- An Arduino (I’m using the Pro Mini but any will do)
- A 10K potentiometer
- A 16×2 LCD
- A Ultrasonic sensor
- A battery and battery connector (I originally used a 9v but it proved to much for the Pro mini so i switched to 4.5V)
- Wire
- A Switch
The Tools you’ll need:
- Soldering Iron and solder
- Wire cutters/strippers
- breadboard (for testing)
- Something to make you case out of (I used flat cardboard)
- Glue gun and glue sticks
- Cutting Knife
For more Details: Build A DIY Digital Tape Measure Using Arduino