Summary of Build a Car With Touch Sensitive Steering for Your Rat
This article details a DIY project to build a touch-sensitive car for rats, inspired by a 2019 neuroscience study. The author recreates the vehicle using an Arduino Uno, motor shield, and capacitive touch sensors to allow rats to steer by touching copper wires positioned at windows on a plastic container. The guide covers assembling the chassis, wiring electronics, coding the controller, and training the rats using positive reinforcement with treats like Froot Loops.
Parts used in the Rat Car Project:
- Arduino software
- Arduino Code
- 1-gallon clear plastic Container
- Car Chassis Kit (or equivalent parts)
- Extra pivoting wheel
- Hard plastic or board similar in size to the chassis base
- AA batteries x 4
- 9 volt battery
- 9 volt battery connector
- Electrical wire
- Soldering iron
- Hot knife
- Needlenose pliers
- Breadboard jumper wires
- Thin but sturdy copper wire
- Adafruit Motor Shield v2.3
- Arduino Uno
- Capacitive Touch Sensor
- Switch
- Sticky velcro
- Double-sided tape
- Zip ties
- Sheet of acrylic
- Long bolts and nuts
In 2019 Professor of Behavioral Neuroscience Kelly Lambert and her research colleagues published a journal article called “Enriched Environment Exposure Accelerates Rodent Driving Skills.”
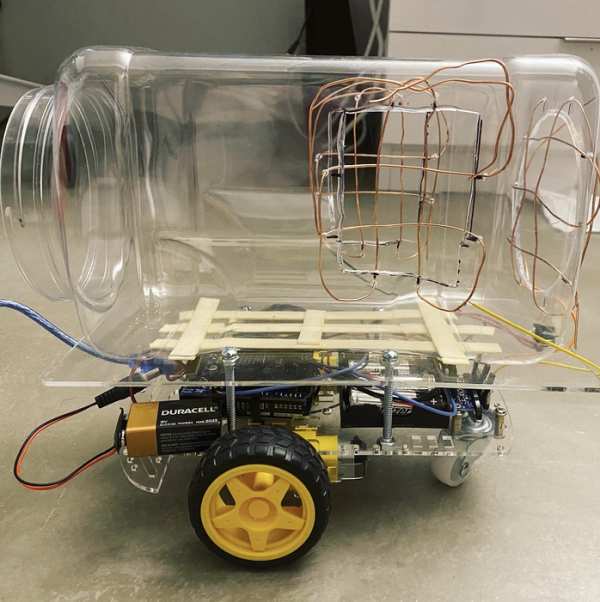
This article explains “The research team built a tiny car for the rats out of a clear plastic food container on wheels, with an aluminum floor and three copper bars functioning as a steering wheel. A total of 17 rats were trained to drive in rectangular arenas. Rats who passed their driver’s education were rewarded with Froot Loops.” Incredibly, the study actually found that rats enjoyed learning how to drive!
Now I don’t particularly like driving but who am I to deprive my pet rats of that experience? In my senior year of high school, I set out on a quest to recreate the rat car using only the limited information and photos in the scientific article, my nonexistent knowledge of electronics and coding, and a lot of help from my teacher.
Now, this was over a year ago and I don’t remember everything I did or how I did most of it. Hopefully the info I’ve compiled here is enough of a guideline for you to improve on my trial and error project and make your very own rat car.
Supplies
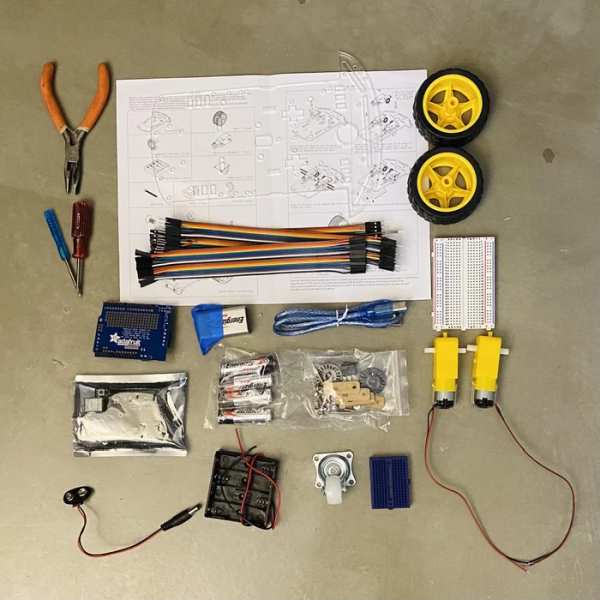
- Arduino software (Download)
- Arduino Code (Download)
- 1-gallon clear plastic Container (Amazon)
- Car Chassis Kit (Amazon) (or equivalent parts)
- Extra pivoting wheel
- Hard plastic or board similar in size to the chassis base
- AA batteries x 4
- 9 volt battery
- 9 volt battery connector
- Electrical wire
- Soldering iron
- Hot knife
- Needlenose pliers
- Breadboard jumper wires
- Thin but sturdy copper wire
- Adafruit Motor Shield v2.3 (Link) (Amazon)
- Arduino Uno (Link)
- Capacitive Touch Sensor (Amazon)
Step 1: Assemble Chassis
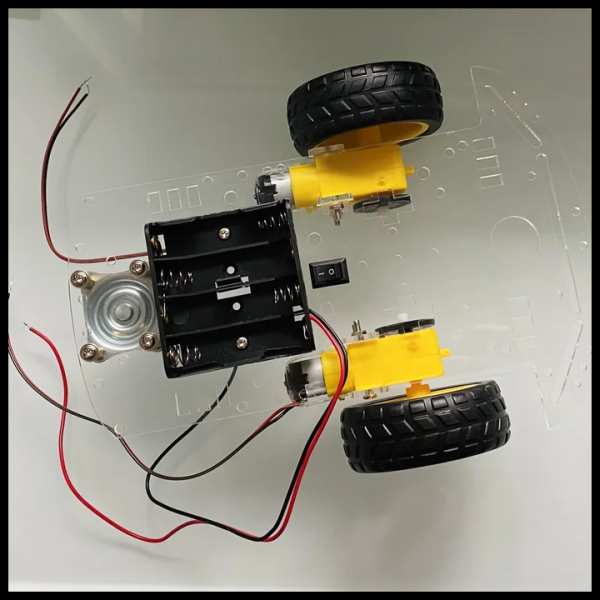
If you’re using the same kit I used follow the instructions to assemble to pieces. Add a fourth wheel to the back of the chassis. If you’re making this from scratch (you’re braver than me) make sure your wheels are attached to the gear motors, and your speed encoders are attached to the motors.
Note: I used a basic kit from amazon for the chassis of my car. If I had the skills, making it from scratch would have probably been better as there were a few things about the kit that didn’t work great for me; for instance, I would have preferred a base with 4 wheels as only having three wheels led to tipping when the rat got into the car later on which is why we have to supplement with a fourth small wheel.
Step 2: Assemble Motor Shield and Arduino Uno
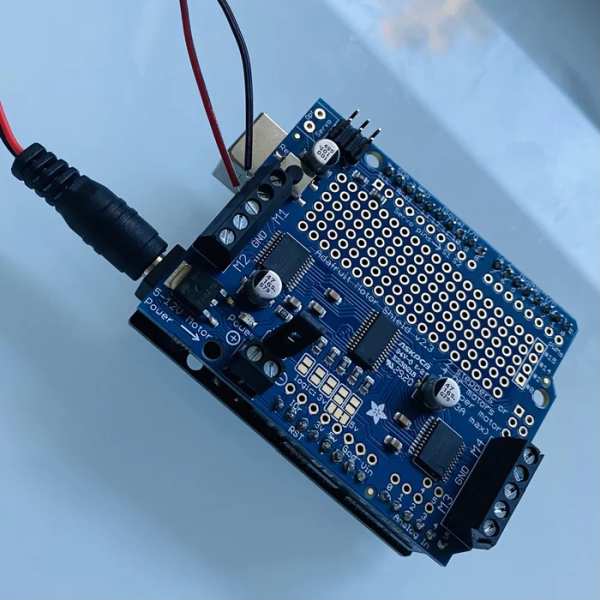
If assembly is required for either board solder the pegs on now if you haven’t already. Attach Arduino Uno to motor shield.
You will use your 9-volt battery to power your boards, so use your battery connector and plug it in (you should see a green light on the board).
Each gear motor should have a red and a black wire sticking out. Insert the red lead from one pair of wires into the outside receptor of M1 on your motor shield, and the black lead into the receptor immediately next to the first one. Do the same with the pair of wires from the other motor but into M2. No wires should be in the center (grnd) receptor. Once tightened, the order should be Red – Black – Empty – Black – Red. Refer to diagram.
Step 3: Attach Switch to AA Batteries
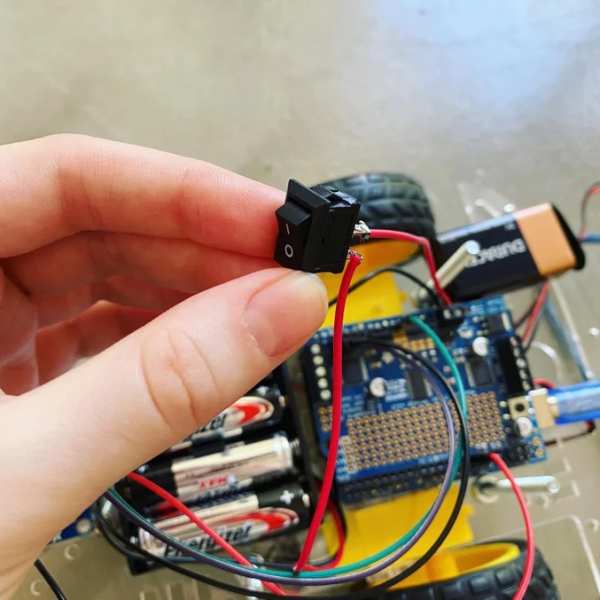
Insert a switch into the red wire between the AA battery pack and the board. In the video you can see an example of how the board should turn on and off (indicated by a green light) when you use the switch. Solder the wires to the switch pegs. This will allow you to disconnect power without popping the batteries out. Make the wires on either side of the switch long enough to put the switch in a convenient spot.
Step 4: Attach Your Capacitive Touch Sensor

Attach your boards to your capacitive touch sensor using breadboard jumper cables. Refer to the images and diagram for placement.
Step 5: Upload Your Code
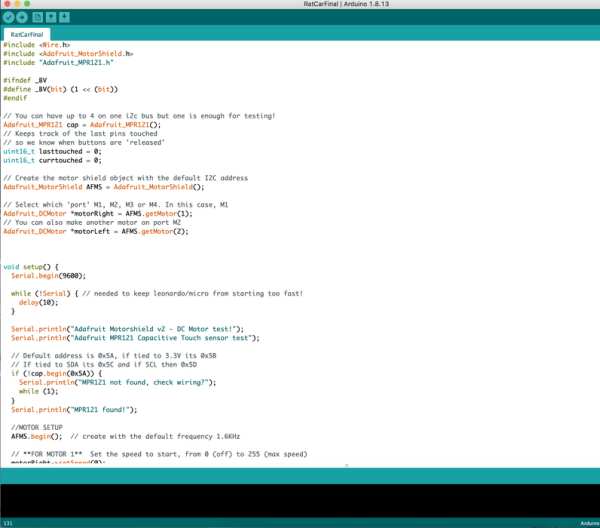
Download the Arduino Software for your computer (it’s free), then copy and paste my code into your Arduino window. Once you use a cable to upload this to your Uno you should be able to activate the wheels by touching certain pegs on the touch sensor. You can disconnect the cable once your code is uploaded. Attach breadboard jumper cables to the pegs shown in the image (color doesn’t matter). You should now be able to activate the wheels by touching the ends of these new jumper cables.
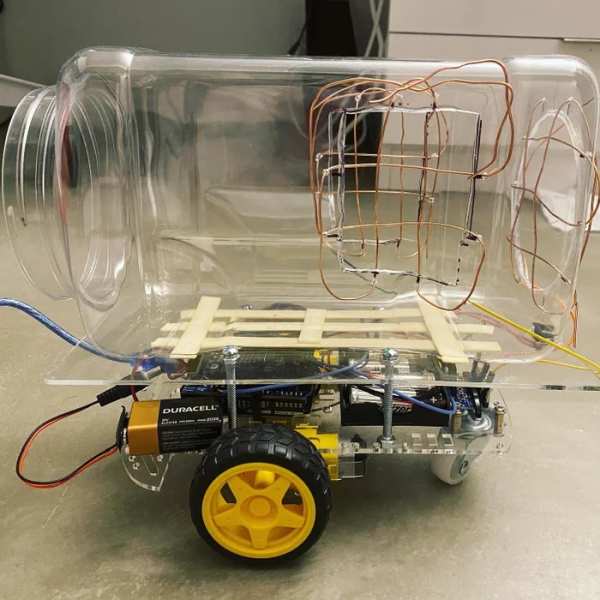
Step 6: Assemble Base of Car
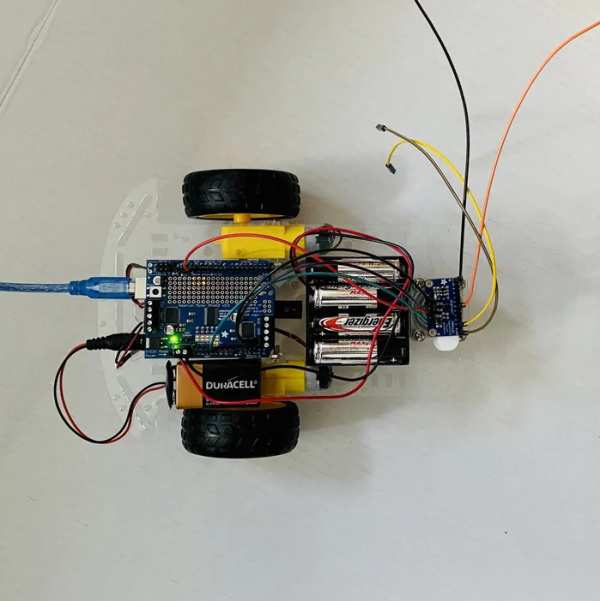
Once you’ve done any troubleshooting assemble all of your pieces. The base of the car should look approximately like the images (mine did not have a switch yet), or you can refer to the diagrams in this or previous steps. I used sticky velcro, double-sided tape, and zip ties to keep all of my components in place.
Step 7: Prepare Plastic Container
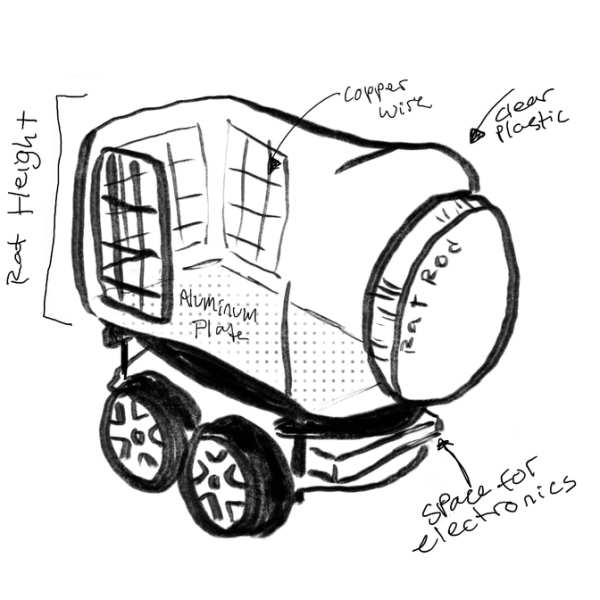
Now you will use a hot knife or whatever tool you prefer for cutting plastic to cut out three windows in your plastic container. The container will be the driver’s seat and the car will steer in a direction corresponding to the window the rat touches (left, center, or right). Around the windows, you will cut holes or slits big enough for you to thread your wire through. I made two holes on each side of my window.
Next, take your copper wire (if it’s too thick, the electronics get kind of haunted but if it’s too thin your rat will be able to bend it or chew it too easily) and thread it through the holes you’ve cut to make a grid. Mine was not cute, but it’s alright as long as it’s not dangerous to the rodent driving.
Step 8: Connecting the Touch Sensor
To connect the touch sensor to the windows you’re going to want to solder the corresponding wire to the correct window. By this, I mean make sure your right window turns the car right, and your left turns it left, etc. To attach the jumper wires simply strip the end and solder the exposed wire to any point of the copper wire covering the window. Do this for all three windows.
Step 9: The Platform
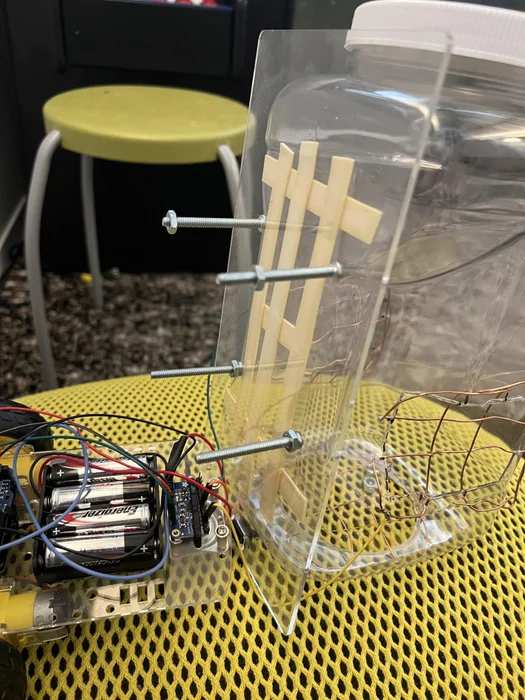
You’re going to need some sort of raised platform so that the container can sit above all of the electronics. I used a sheet of acrylic with a hole cut out for the battery switch but I think any sturdy foam core or similar material would do the trick. My container is attached to the platform with extra strong double-sided tape.
To raise the platform I used long bolts attached to the base with nuts. This is not the most sturdy option but it works, especially since you need to be able to remove the top platform to mess with the electronics sometimes.
Step 10: Testing and Training Your Drivers
Positive reinforcement is key. Never harm or punish your animal for any reason! Allow your pet to acclimate to the car while it’s off as the sound it makes can be frightening at first. If your pet seems uncomfortable in any way do not force them to interact with the car. Never shut your pet into the container unless they seem very comfortable (you know your animal best) and never leave them unattended (this is a homemade item and they could get stuck in the wires or chew on electronics).
I trained my rats by holding treats in the direction I wanted them to go and luring them to grab the copper wire (this does not shock or hurt them don’t worry!). They were always free to leave if they lost interest. After all, the study proved that rats enjoy driving so in the end we want this to be an enjoyable experience for them!
Source: Build a Car With Touch Sensitive Steering for Your Rat
- How can I power the Arduino boards?
You will use a 9-volt battery connected via a 9 volt battery connector to power the boards. - What is the best way to control the steering direction?
The car steers in the direction corresponding to the window the rat touches, which activates the copper wire grid. - Can I make the chassis from scratch instead of buying a kit?
Yes, you can make it from scratch if you ensure wheels are attached to gear motors and speed encoders are attached to the motors. - Why did the author add a fourth wheel to the chassis?
A fourth small wheel was added because having only three wheels led to tipping when the rat got into the car. - How do I connect the copper wires to the touch sensor?
You must strip the end of the jumper wires and solder the exposed wire to any point of the copper wire covering the specific window. - What tool should I use to cut the plastic container?
You should use a hot knife or another preferred tool to cut out three windows in the plastic container. - How do I train the rats to drive the car?
You can train them by holding treats in the desired direction to lure them to grab the copper wire. - Is it safe to leave the rat unattended in the car?
No, you should never leave them unattended as they could get stuck in the wires or chew on electronics.