
Summary of Bluetooth Basics: How to Control an LED Using a SmartPhone and Arduino
This tutorial demonstrates how to control an LED using an Android smartphone and an Arduino via Bluetooth. The system uses an HC-05/06 module for serial communication, where the app sends data (1 or 0) to turn the LED on or off. The Arduino receives this data through its RX pin and processes it to control the connected LED.
Parts used in the Smartphone Controlled LED Project:
- Bluetooth Module HC 05/06
- Arduino
- Battery with cable
- LED
- 220Ω Resistor
- Android device
- Android application (.apk file)
Ever thought of controlling any of your electronic devices with your smart phone? How about a robot or any other device? Wouldn’t it be cool to control them with your smartphone? Here is a simple tutorial for interfacing an Android Smartphone with Arduino via Bluetooth!
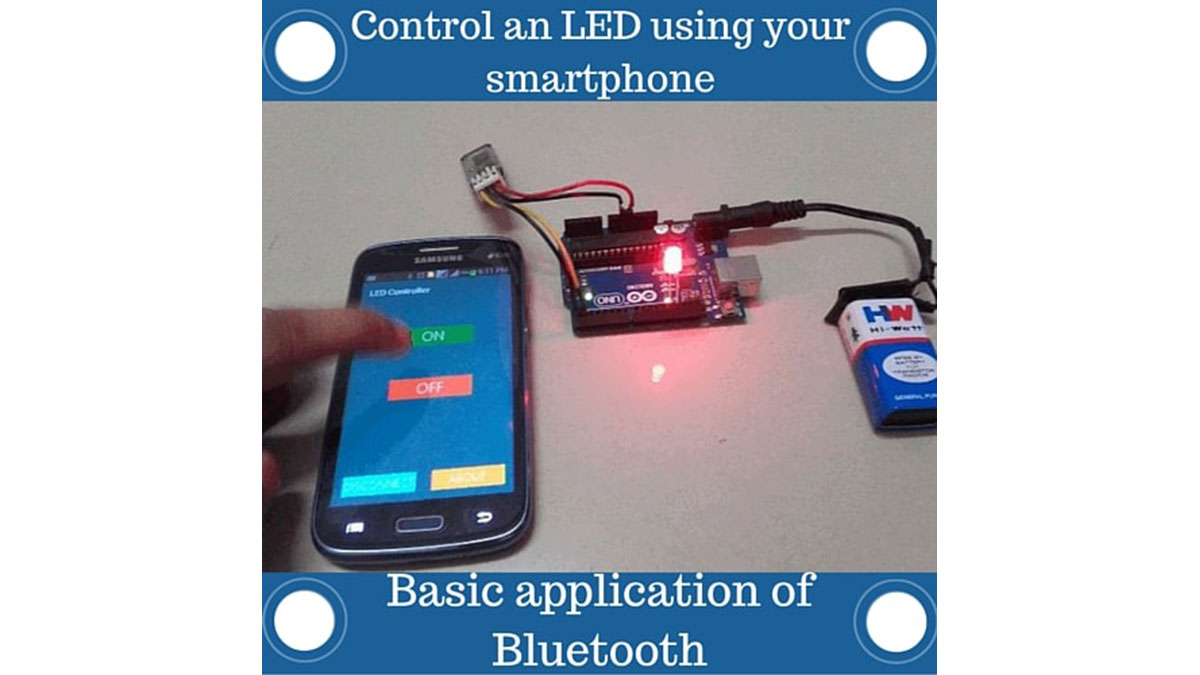
Required Materials
Hardware
Software
- Arduino IDE
- Android Studio.
Android studio isn’t really required here since I will provide you with the android application that I made. You can install the given .apk file to use the application. 🙂
How Does it Work?
There are three main parts to this project. An Android smartphone, a Bluetooth transceiver, and an Arduino.
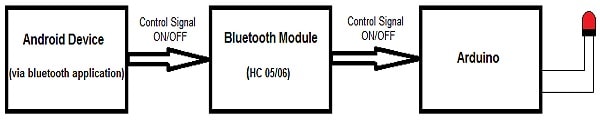
HC 05/06 works on serial communication. The Android app is designed to send serial data to the Arduino Bluetooth module when a button is pressed on the app. The Arduino Bluetooth module at other end receives the data and sends it to the Arduino through the TX pin of the Bluetooth module(connected to RX pin of Arduino). The code uploaded to the Arduino checks the received data and compares it. If the received data is 1, the LED turns ON. The LED turns OFF when the received data is 0. You can open the serial monitor and watch the received data while connecting.
Connecting the Arduino Bluetooth hardware
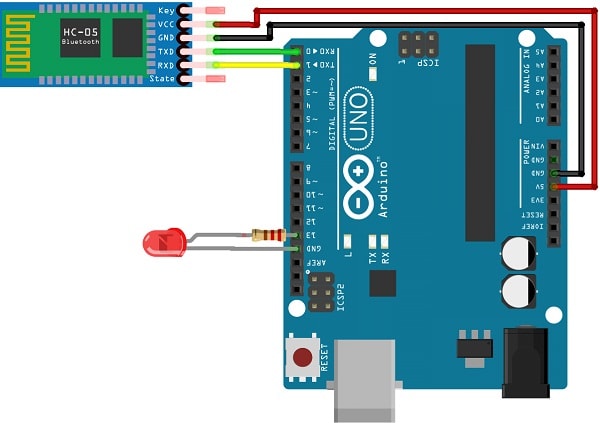
This circuit is simple and small. There are only four connections to be made between the Arduino and Bluetooth module!!
Arduino Pins Bluetooth Pins
RX (Pin 0) ———> TX
TX (Pin 1) ———> RX
5V ———> VCC
GND ———> GND
Connect a LED positive to pin 13 of the Arduino through a resistance (valued between 220Ω – 1KΩ). Connect its negative to GND, and you’re done with the circuit!
Read More: How to Control an LED Using a SmartPhone and Arduino
- How does the project work?
The Android app sends serial data to the Bluetooth module, which passes it to the Arduino to turn the LED on or off based on the received value. - Can I use Android Studio?
No, Android Studio is not required because a pre-made .apk application file is provided for installation. - What happens when the received data is 1?
The LED turns ON when the Arduino receives the data value of 1. - Which pins connect between the Arduino and Bluetooth module?
Arxino RX connects to Bluetooth TX, Arduino TX connects to Bluetooth RX, 5V connects to VCC, and GND connects to GND. - How should the LED be connected?
Connect the LED positive terminal to Arduino pin 13 via a resistor and the negative terminal to GND. - What range of resistance is suitable for the LED?
A resistance valued between 220Ω and 1KΩ can be used for the LED connection. - Does the Arduino code check the received data?
Yes, the uploaded code checks and compares the received data to determine the LED state. - How can I monitor the data being sent?
You can open the serial monitor to watch the received data while connecting the devices.
