Update: New version out that works with Arduino 1.0 and higher!
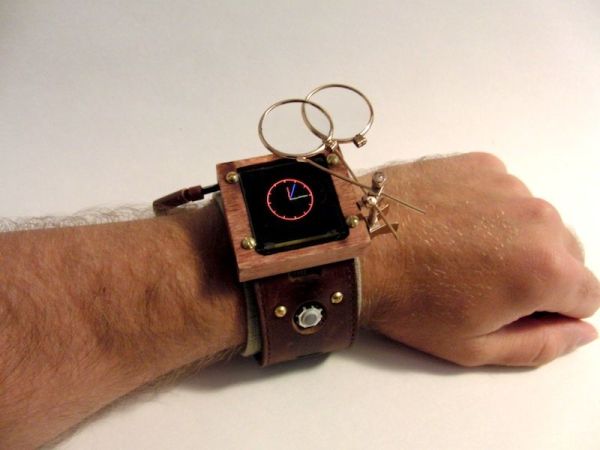
The Arduino Watch provides augmented sensing of temperature and range, 16-bit color drawing program, Breakout game, and also tells the time in your choice of digital, binary, or analog. Additional sensors, devices, and programs are easy to add as any standard Arduino.
The source code can be downloaded from the google code page, code.google.com/p/arduino-watch.
Updates and news on the Arduino Watch can be found at OptimizedForce.com
This is a video that gives an overview of what the Arduino Watch can do.
Step 1: The Materials
Electronics
1 Arduino Mini Pro 328 – 3.3V/8MHz available at SparkFun
1 FTDI Basic Breakout (if you don’t have one) available at SparkFun
1 4D Systems OLED Module 1.5″ (128×128 pixels) available at SparkFun
1 Blackberry Trackballer Breakout available at SparkFun (I’m sensing a theme of the supplier)
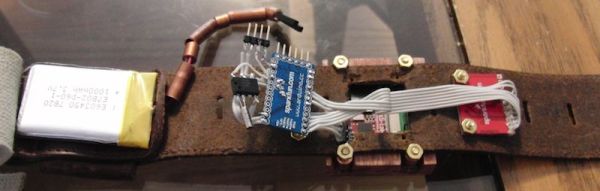
1 3.7V 1000mAh Li-Polymer battery available at SparkFun
1 LiPoly Fast Charger available at SparkFun
1 DS1307 Real-time clock available at Digi-Key
1 Crystal 32kHz available at SparkFunNuts and Bolts available at local hardware stores
2 #4 bolts 3/8″ long
2 #4 bolts 1/4″ long
4 #4 bolts 3/4″ long
8 #4 nuts
(for the nuts and bolts I found the brass ones at Ace and the zinc ones at Home Depot)
Watch Band
~13″ x 1 5/8″ leather band for the outer layer (I used a wide leather belt)
~8″ x 1 7/8″ elastic band for the inner layer (I used another belt)
Misc
1/4″ OD copper tube available at Home Depot
1/2″ thick piece of wood for screen case, I usually use poplar wood.
6 right angle header pins available at MarVac
1 Connector Housing 6 pin housing (if you can find a 5 pin housing get that) available at MarVac
2 Connector Housings 1 pin housing
7 female pins available at MarVac
1 IDE ribbon cable (dig it out of that pile of cables you never use)
Alternate parts
1 4D Systems OLED Module 0.96″ (96×64 pixels) available at SparkFun will also work since I originally programmed the watch for that display until I accidentally broke mine and everyone was out of stock so I had to move to the next size up.
1 3.7V 900mAh Li-Polymer battery available at SparkFun smaller cheaper battery almost as much power.
1 Real-time clock module available at SparkFun or at RobotShop these modules would replace the real-time clock chip and the 32kHz crystal and give you a backup battery.
Step 3: Preparing the materials
Solder the right angle header pins to the Arduino so that you can connect the FTDI Basic Breakout board easily.Battery Prep
Cut the JST connector off of the battery and attach the single pin housings to the ends of the wirethis tutorial is useful to teach how to crimp the wires.
Step 4: Carving the Screen Case
This step covers the carving of the case for the OLED display. The frame was carved on a Carvewright woodcarving machine. Then sanded down the part and drilled the screw holes on a drill press with a 1/8″ bit. To locate the holes I put the display in and marked out where to drill. Originally I tried to drill the holes in with the Carvewright but it split the frame during the hole drill and I had to start over. Next I used a dark stain to give the poplar wood a nice finish.
1 FTDI Basic Breakout
1 4D Systems OLED Module 1.5″
1 Blackberry Trackballer Breakout
For more detail: Arduino Watch Build Instructions