Wearable computing, e-textiles, soft circuits or whatever you want to call it, is a growing field of applying technology to garments or accessories like bags, shoes or backpacks. It is a fun and creative challenge which goes beyond just adding LED lights to fabric. For a primer, you must check out the work of Lynne Bruning.
Of course, to make things light up really cool, you need some kind of microprocessor. I have always used a bicycle safety LED flasher from my dollar store as the core unit of several ibles because It was an inexpensive self contained unit that had everything I needed, battery case, on/off/pattern switch, 5 LEDs and could cycle through different lighting sequences. You can make everything from light up hoodies, signal gloves, stoplight scarfs and logo scarfs.But then you feel the restraints imposed by the limits of the bicycle flasher. I finally got an arduino a few months back and started to experiment with it. Using it with an accelerometer allowed me to create a set of necomimi arduino cat ears.
Well, they are all examples of wearables but another part of the puzzle was missing. I had always used wire, regular insulated wire, as the circuit path for the circuits. Conductive thread is what makes it a true wearable. I finally have a few bobbins to experiment with. Conductive thread is fine metal fibers twisted into a soft thread or yarn. It is truly flexible but needs to be insulated when crossing wires.
But then you will find, jumping into the world of arduino is not really cheap. Costs add up with additional components. I only have an Arduino Uno. Now what to do when all the wearables are done with a Lilypad. No one can get their hands on a Adafruit’s FLORA yet.
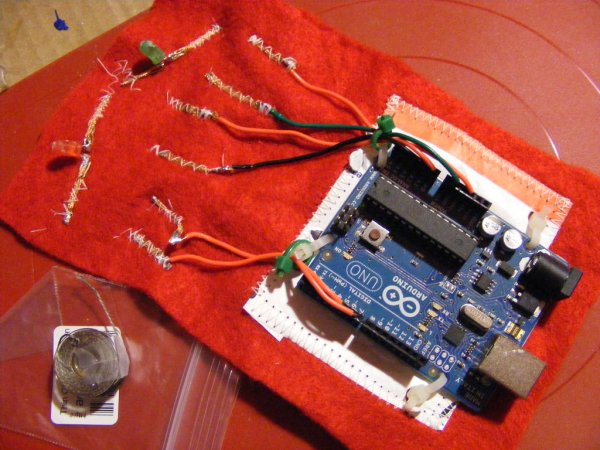
Here is my solution to using your ordinary Arduino as the microprocessor unit on your wearables. An easy mounting “shield” and a bus adapter to get the pinouts from the headers on your Arduino to your fabric…sort of a digital to real-world analog interface. I think it is hard to prototype when all of your input wires to the arduino are hard sewn to the “header”. When you troubleshoot or prototype, you have wires that you need to disconnect or rearrange. This wearable shield also takes your prototyping directly to the finished product. The core arduino can be removed easily for use with other projects. Also, remove the arduino if you need to wash the garment. Hmmm, dry clean copper wires only?
Step 1: Support your local electronics greengrocer…
We don’t need anything too exotic for this project.
You will need:
Tyvek envelopes – this is that miracle indestructible rip-proof matted-fiber polyester film shipping envelope stuff – reuse if you have any or acquire at the snail mail office. Ones marked Express do not work any faster than the Priority ones.
ordinary metal paper single hole puncher
small tie-wraps
22 AWG gauge solid hookupwire
generic sewing machine – nice to have a zigzag stitch or do everything by hand
generic soldering stuff and electronics working tools like pliers, wire cutters, wire stripper
and the secret ingredient – solder wick (desoldering braid)
Optional to dress up the connections:
sugru or plumber’s epoxy putty
fray-check or seam sealer
CAUTION: Learn how to sew and solder safely. Two things Three things that mix.
For more detail: Arduino Sew Easy Wearable Shield