Summary of Arduino Self-Driving Car
This article details building a self-driving car using an Arduino UNO R3 and an L293D Motor Shield. The vehicle utilizes four BO motors for movement and an HC-SR04 ultrasonic sensor mounted on a 90g micro servo to scan paths. The project involves assembling hardware, connecting components via jumper wires, installing specific libraries (Adafruit-Motor-Shield and NewPing), and uploading custom code to enable autonomous navigation powered by a 9V battery.
Parts used in the Self-Driving Car:
- Arduino UNO R-3 Board
- L293D Motor Shield
- BO Motors and Wheels (x4)
- HC-SR04 Ultrasonic Sensor
- Ultrasonic Sensor Bracket
- 90g Micro Servo
- 9 Volt Battery
- 9 Volt Battery Clip
- Male to Female Jumper Wires
- Plastic Box
- Wires
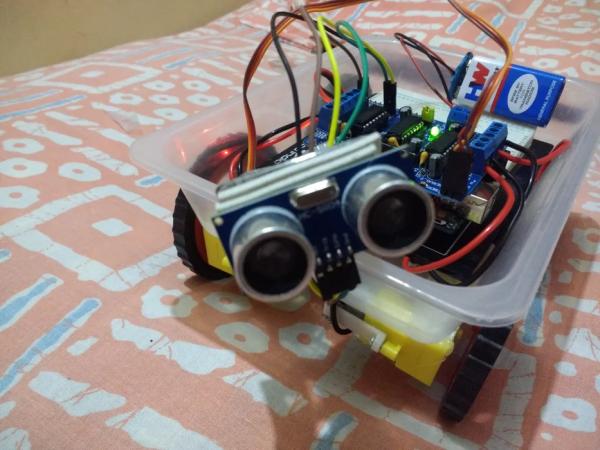
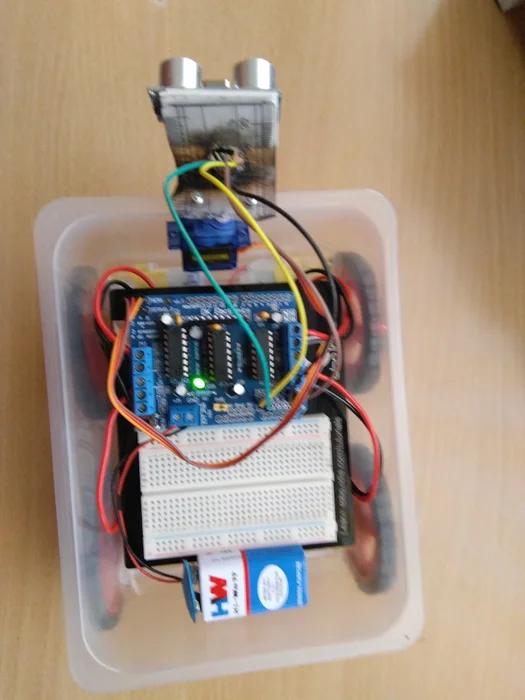
This is basically a Self-Driving Car powered by Arduino R-3 Development Board and a L293D Motor Shield.It uses the data given by the HC-SR04 Ultrasonic Sensor which is connected to analog pins of the arduino board. As an additional feature, I have added a Micro 90g servo which the ultrasonic sensor is fixed to. Basically what the servo does is, it makes the ultrasonic sensor to look around and search for different paths. So this was it, now lets get started with the project.
Step 1: The Materials Needed : (Really??)
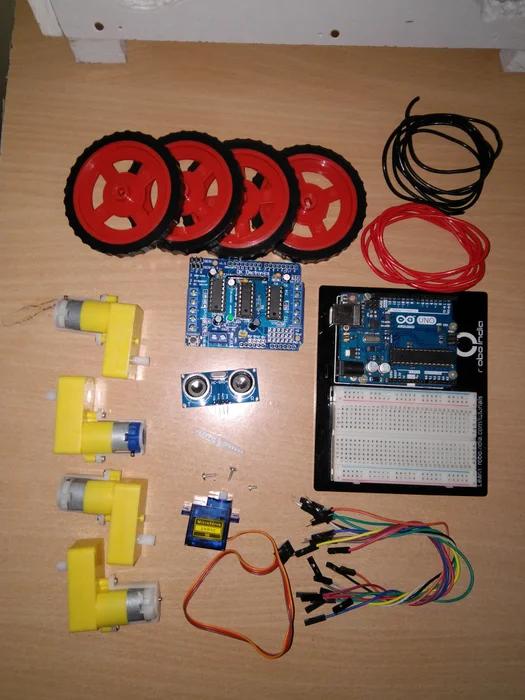
Parts–
1- Arduino UNO R-3 Board Link: http://www.amazon.in/Arduino-ATmega328P-ATMEGA16U2…
2- L293D Motor Shield Link: http://www.amazon.in/L293D-Driver-Stepper-Shield-A…
3- BO Motors and Wheels (x4) Link: http://www.amazon.in/REES52-BOSET-Motor-Pieces-Scr…
4- HC-SR04 Ultrasonic Sensor Link: http://www.amazon.in/Arduino-Ultrasonic-Distance-M…
5- Ultrasonic Sensor Bracket Link: http://www.amazon.in/Cartoon-Ultrasonic-Mounting-B…
6- 90g Micro Servo Link: http://www.amazon.in/REES52-KG113-Tower-Servo-Moto…
7- 9 Volt Battery (x1) Link: http://www.amazon.in/Duracell-Alkaline-Battery-Dur…
8- 9 Volt Battery Clip Link: http://www.amazon.in/Banggood-50797-Battery-Connec…
9- Male to Female Jumper Wires (x4) Link: http://www.amazon.in/Banggood-53767-Female-Jumper-…
10- Plastic Box Link: (Come on, u can find that in ur home)
11- Wires Link: (You might find some in ur nearest hardware shop)
Tools–
1- Soldering Iron Link: http://www.amazon.in/amiciKart-Soldering-different…(A good iron for beginners)
2- Soldering Wire Link: http://www.amazon.in/Buyyart-BART_1-Rosin-Solder-S…(Flux inside the wire)
3- Hot Glue Gun Link: http://www.amazon.in/Stanley-69GR20B-Gluepro-Trigg…(I personally like it)
4- Hot Glue Sticks Link: http://www.amazon.in/All-Purpose-Melt-Glue-Sticks/…
5- Screwdriver Link: http://www.amazon.in/Precision-ScrewDriver-Repairi…
6- Screws Link: (Included with the servo)
7- Pliers Link: http://www.amazon.in/Stanley-70-482-Sturdy-Combina…(A good one)
Step 2: About the Motors (ooohh)
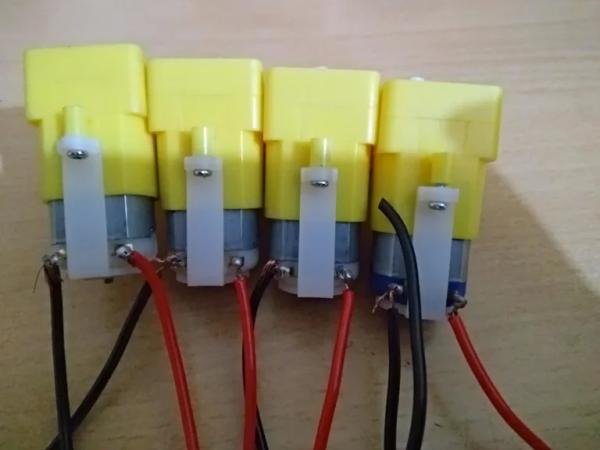
Solder the wires on each of the motor terminals and check them using the battery. Solder the negative or black wires on the left terminalsof the motor while the positive or red wires on the right terminals. Now glue the motors to the box.
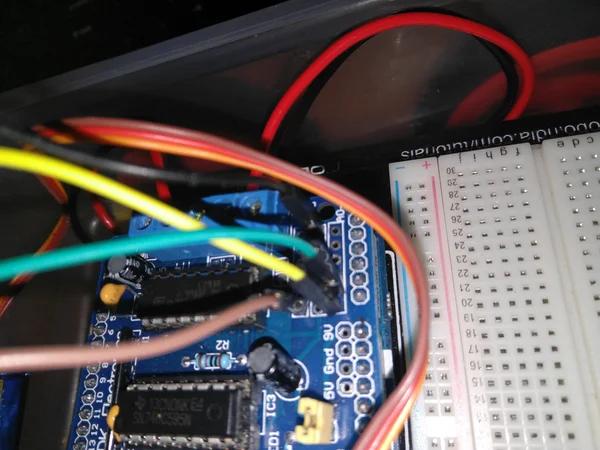
Step 3: About the Motor Shield (: I )
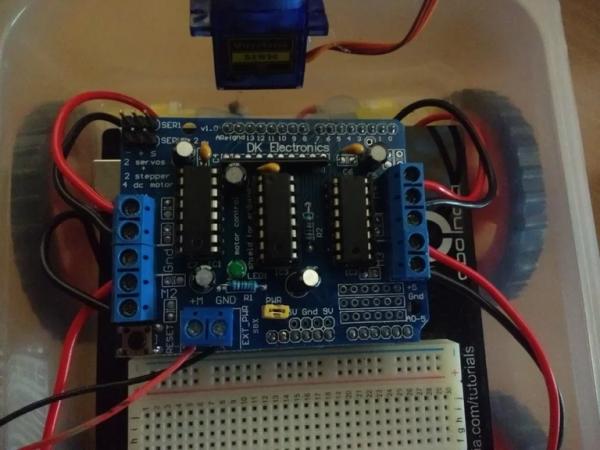
Now plug the L293D Motor Shield on the Arduino UNO. Put the shield in this way that the reset button on the shield is facing towards the usb port and the power input of the arduino. Now connect the top-left motor to the M1 on the shield, down-left to the M2, top-right to the M3, down-right to the M4. Connect the positive and negative wires in the way as shown in the picture.
Step 4: Servo!! (: ) )

Connect the servo on the L293D Motor Shield as shown in the image. Now glue it to the box as shown.
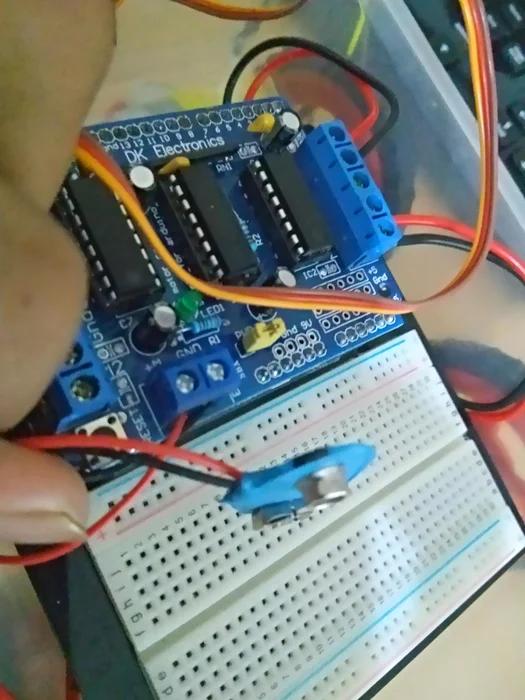
Step 5: The Ultrasonic Sensor (???)
Now attach the ultrasonic sensor to the bracket and attach the wires corresponding to (VCC- Brown), (Trig-Yellow), (Echo- Green), (Gnd- Black). Now attach the the sensor to the motor shield as(VCC- 5v), (Gnd- Gnd), (Trig- Analog 0), (Echo- Analog 1).
Step 6: Batteries (Yes!!!, Some Juice!!!)
Note: First things first, you can use an external power supply if the battery is not working for you.
Now connect the positive battery clip wire to the M+ of the motor sheild and negative wire to the gnd.
Step 7: Libraries (Uhh, No Juice : ( )
Now first download the libraries.
1- Adafruit-Motor-Shield-library Link: https://github.com/adafruit/Adafruit-Motor-Shield-…
2- Arduino New Ping Link: https://bitbucket.org/teckel12/arduino-new-ping/do…
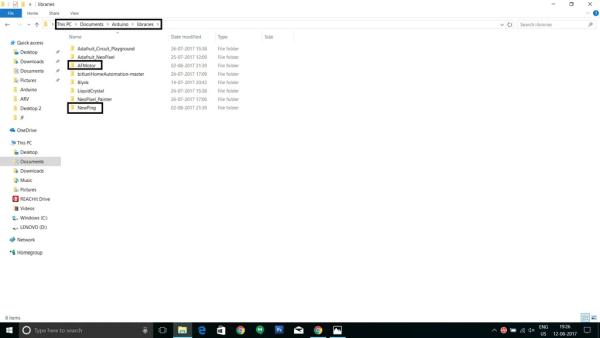
Now extract these libraries into: This PC> Documents> Arduino> libraries.
Don’t forget to Rename these libraries to AFMotor and NewPing respectively.
If you dont have the Arduino IDE Link: https://www.arduino.cc/en/Main/Software
Step 8: Coding (Get Serious : I )
The Code is in the text file given.
Step 9: Batteries (Finally SOME JUICE!!!)
Now Plug-In The Battery.
Source: Arduino Self-Driving Car
- How do I connect the ultrasonic sensor to the Arduino?
Connect VCC to 5v, Gnd to Gnd, Trig to Analog 0, and Echo to Analog 1. - Can I use an external power supply instead of the battery?
Yes, you can use an external power supply if the battery is not working for you. - What libraries are required for this project?
You need the Adafruit-Motor-Shield-library and the Arduino New Ping library. - How should I name the extracted libraries in the Arduino folder?
Rename the Adafruit library to AFMotor and the New Ping library to NewPin. - Which pins on the motor shield connect to which motors?
Connect top-left to M1, down-left to M2, top-right to M3, and down-right to M4. - Does the servo allow the sensor to move?
Yes, the micro servo makes the ultrasonic sensor look around and search for different paths. - Where should I place the reset button on the motor shield?
Put the shield in so the reset button faces towards the USB port and the power input of the Arduino. - How do I wire the positive and negative motor terminals?
Solder the negative or black wires on the left terminals and the positive or red wires on the right terminals.