Summary of Arduino Powered 3-zone thermostat
Concise summary: The author documents building a DIY internet-ready 3-zone thermostat using an Arduino Uno, DS18B20 temperature sensors, a 16x2 LCD with keypad shield, and libraries (OneWire, DallasTemperature). They outline procuring parts, programming in Arduino (using SublimeText with Stino), wiring sensors on a single bus, reading sensor addresses, sketching control logic for dampers and furnace, and initial testing on a breadboard with plans to integrate a Raspberry Pi later.
Parts used in the 3-zone thermostat:
- Arduino Uno
- DS18B20 temperature sensors
- 16x2 Character LCD display (Hitachi compatible)
- LCD Keypad Arduino shield
- OneWire library
- DallasTemperature library
- Miscellaneous wire leads
- Connectors
- Resistors
- Breadboard
- Computer with Arduino IDE or SublimeText with Stino addon
- Raspberry Pi (for planned logging/integration)
I was looking at all those swoopy-zoomy internet connected and controllable thermostats. “Self,” I told myself, “we should make one of those.” He didn’t seem all that excited about that – I mean, what do we know about hardware, firmware, electronics or HVAC? Well, now’s as good as any to figure it out.
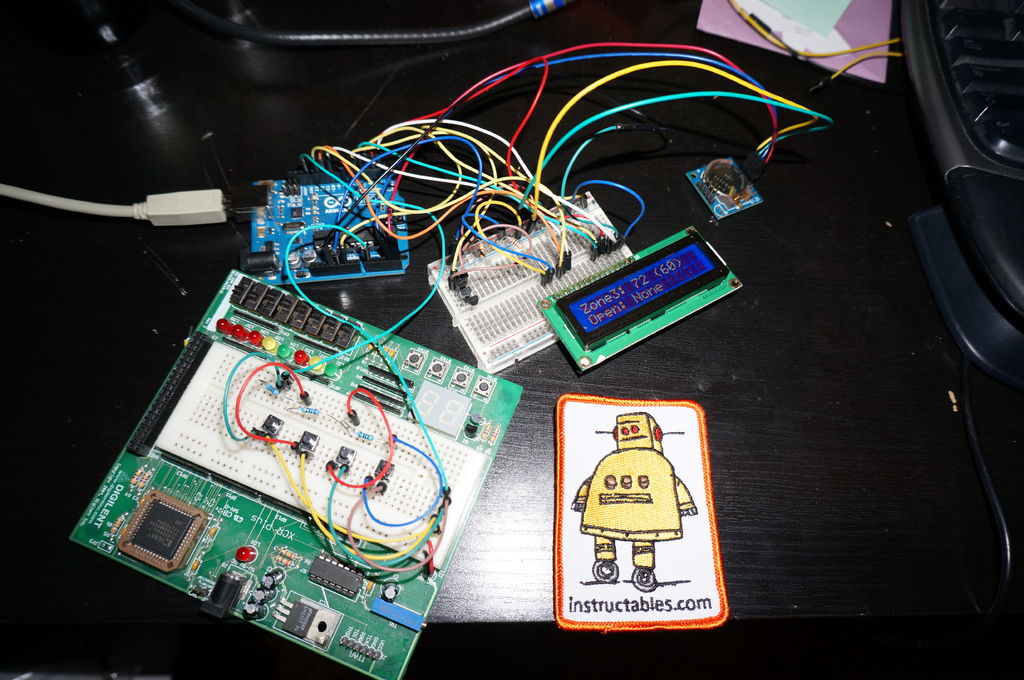
So without further ado, here’s my Instructable on my endeavors building a functioning 3-zone thermostat. (internet connectedness coming later)
Step 1: Procure components
This build requires lots of different things I didn’t have, and as such I had to move forward by using the internet! I researched (a LOT of research) all the different components people are using and have success within the realm of what I was trying to do. That meant I needed a bunch (or at least some) of the following:
- Arduino Uno – I know there’s a way to build your own, but I’m trying to keep things simple – at least initially. Besides, I need to be able to program the ATMega chip, right?
- Temperature Sensors – DS18B20 Temperature Sensors was what I decided on. There was another one that also could handle humidity, but again we’re erring on the side of simpler.
- 16×2 Character LCD display – Hitachi compatible.
- LCD Keypad Arduino shield
- miscellaneous wire leads, connectors, and resistors.
Once all my parts arrived, I started looking at hooking things together on a small, local scale.
Step 2: Start programming the Arduino
I am not new to programming, so moving into the programming space of the Arduino was not some imposing task. I went through a handful of tutorials (turning on LED’s and such) to get the syntax and some of the conventions down, and I was off.
The first thing I did was document what I wanted to do IN THE CODE. After that, I ran a thumbnail sketch of the program I wanted to develop – that is, I set up the inputs and outputs, sketched out some functions which I could use to open and close the dampers, turn the furnace on or off, those kinds of things. Great, I had my initial program sketched out. Of course it wasn’t ready, wouldn’t compile, anything like that.
During this process, I was getting pretty frustrated with the poor development environment of the Arduino IDE. A quick search later, I had found an add on for SublimeText called ‘Stino’. Stino did everything I wanted it to and was a much more mature dev environment. I switched over immediately.
Step 3: Pull the program together
The first step in making the program actually work was to get the temp sensors working. They are at the heart of the thermostat, and without them, the furnace doesn’t know when to turn on or off.
Time to introduce a couple of libraries.
The temperature sensor is pretty cool in that it uses a single wire to send data back to the Arduino. What’s more, each sensor has an address, a unique number which identifies the sensor. This is really exciting because it means you can have multiple sensors sending their inputs into the same pin on the Arduino (a big deal when you start to look at what it takes to plug in the 16×2 LCD screen. Pin space is at a premium!).
In order to do this, we’ll call on a couple of libraries that already exist – no need to reinvent the wheel. The two libraries are OneWire and DallasTemperature. Both are freely available and will come in useful as we move forward. Being unfamiliar with either one of these libraries, I again referred to the interwebs and found a pretty interesting tutorial on just that thing. All I had to do was modify it to fit my needs.
In going through the hacktronics tutorial, it was mentioned that the DS18B20 Temp sensors are addressable – that is, that they are represented by a specific address. This is what allows for multiple sensors to ride into the Arduino on the same pin. So as we go forward, we have to find those temperature sensor addresses. Hacktronics offers another tutorial which outlines how to find those addresses, as well.
OneWire library
DallasTemperature library
Code so far: (a lot of stuff is commented out because there are still a lot of suppositions and unknowns, but I THINK this is how the code will eventually play out. We’ll see)
/*
This is the application that I will be using to control the
furnace. The concept is this: I have 3 zones I will be monitoring.
Each zone will have at least one zone damper which will be
controlled by the arduino application.
Each zone will have a single thermometer which will report
back to the controller. Depending on the thermometer reading and
the thermostat setting, the dampers will open or shut and the
central furnace will be turned on. Once an acceptable temperature
has been reached in all zones, the furnace will turn off.

In addition to general heating cycles, the system will be
programmable. At this time, however, the programming cycle will be handled here, not via the thermostat.

IMPORTANT TEST CASES: (to be added as I think of them/come across them

    * Need to ensure that the furnace is always off if all 3 dampers are closed.

*/

#include   //This is a library needed for the LCD display
#include         //This is a library needed for the thermometer readings
#include  //This is a temperature library
#include

// Connections:
// rs (LCD pin 4) to Arduino pin 12
// rw (LCD pin 5) to Arduino pin 11
// enable (LCD pin 6) to Arduino pin 10
// LCD pin 15 to Arduino pin 13
// LCD pins d4, d5, d6, d7 to Arduino pins 5, 4, 3, 2
LiquidCrystal lcd(12, 11, 10, 5, 4, 3, 2);

const int backlight = 13; //controls backlight

#define THERM_BUS 6 // all temperature readings come in via this single pin.

OneWire oneWire(THERM_BUS);
DallasTemperature sensors(&oneWire);

DeviceAddress zone1Therm = {0x28, 0x48, 0x39, 0x11, 0x04, 0x00, 0x00, 0x94};

// START PROGRAMMING
// Times are 6 AM, 8 AM, 3PM, and 9PM
int* PROGRAMMED_VALUES[7];
int SUNDAY_VALUES[4]      = {67, 67, 67, 60};
int MONDAY_VALUES[4]      = {67, 67, 67, 60};
int TUESDAY_VALUES[4]     = {67, 67, 67, 60};
int WEDNESDAY_VALUES[4]   = {67, 67, 67, 60};
int THURSDAY_VALUES[4]    = {67, 67, 67, 60};
int FRIDAY_VALUES[4]      = {67, 67, 67, 60};
int SATURDAY_VALUES[4]    = {67, 67, 67, 60};
//END PROGRAMMING

float zone1Temp = 0;
float zone2Temp = 0;
float zone3Temp = 0;
boolean isOverrideHeld    = false;
boolean isOverridden      = false;
boolean furnaceState      = false; //with furnaceState, false means it's currently off, true means its currently on.

int overrideValue         = 0;

const int furnacePin      = 1;

void setup() {
  Serial.begin(9600); // This connects the arduino to the RPi
  sensors.begin();
  sensors.setResolution(zone1Therm, 10);
  //SETUP OUTPUTS
  pinMode(furnacePin, OUTPUT);
  //SETTING UP THE WEEKLY PROGRAM
  PROGRAMMED_VALUES[0] = SUNDAY_VALUES;
  PROGRAMMED_VALUES[1] = MONDAY_VALUES;
  PROGRAMMED_VALUES[2] = TUESDAY_VALUES;
  PROGRAMMED_VALUES[3] = WEDNESDAY_VALUES;
  PROGRAMMED_VALUES[4] = THURSDAY_VALUES;
  PROGRAMMED_VALUES[5] = FRIDAY_VALUES;
  PROGRAMMED_VALUES[6] = SATURDAY_VALUES;
}

// this runs the continual loop
void loop() {
  delay(1000);
  log("000", "Getting Temperature");
  sensors.requestTemperatures();
  zone1Temp = getTemperature(zone1Therm);

  log("001", (String)(int)zone1Temp);
  // if(c1 || c2 || c3) {
  //   if(!furnaceState) {
  //     startFurnace();
  //   }
  //   TODO - DETERMINE THE CORRECT PINS FOR THE DAMPERS. WILL THE DAMPERS BE DIGITAL OR ANALOG?
  //   if(c1) {
  //     openDamper(1);
  //   }
  //   if(c2) {
  //     openDamper(2);
  //   }
  //   if(c3) {
  //     openDamper(3);
  //   }
  // }
//  else {
//    if(furnaceState){
//      stopFurnace();
//    }
//  }
//  if(!c1) {
//    closeDamper(damper1Pin);
//  }
//  if(!c2) {
//    closeDamper(damper2Pin);
//  }
//  if(!c3) {
//    closeDamper(damper3Pin);
//  }
}

float getTemperature(DeviceAddress deviceAddress) {
  float tempC = sensors.getTempC(deviceAddress);
  //Serial.println(tempC);
  if(tempC == -127){
    Serial.println("ERROR getting temperature.");
  }
  return DallasTemperature::toFahrenheit(tempC);
}
//convenience function. Handles all the boilerplate for writing to the LCDScreen
void toScreen(String line1Value, String line2Value) {
  lcd.begin(16,2);
  lcd.clear();
  lcd.setCursor(0,0);
  lcd.print(line1Value);
  lcd.setCursor(0,1);
  lcd.print(line2Value);
}

int getTime() {
  return -1;
}
void openDamper(int damper) {
//  if(damper == damper1Pin || damper == damper2Pin || damper == damper3Pin) {
//    digitalWrite(damper, HIGH);
//  } else {
//    log("Problem opening damper. Damper not found. Was expecting 1, 2, or 3. Got " + damper);
//  }
}
void closeDamper(int damper) {
//  if(damper == damper1Pin || damper == damper2Pin || damper == damper3Pin) {
//    digitalWrite(damper, LOW);
//  } else {
//    log("Problem closing damper. Damper not found. Was expecting 1, 2, or 3. Got " + damper);
//  }
}

//function for logging messages to the console.
//Eventually plan to write to logfile on RPi
void log(String code, String message) {
  Serial.println(code + ": " + message);
}
void recordData(String type, String object, String value) {
  // TODO - output to RPi database
}
void startFurnace(){
  //Send appropriate signal to the furnace to start up
  if(furnaceState != 0) {
    digitalWrite(furnacePin, HIGH);
  }
}
void stopFurnace(){
  //Send appropriate signal to the furnace to stop
  if(furnaceState == 1){
    digitalWrite(furnacePin, LOW);
  }
}
Step 4: First steps in getting things working
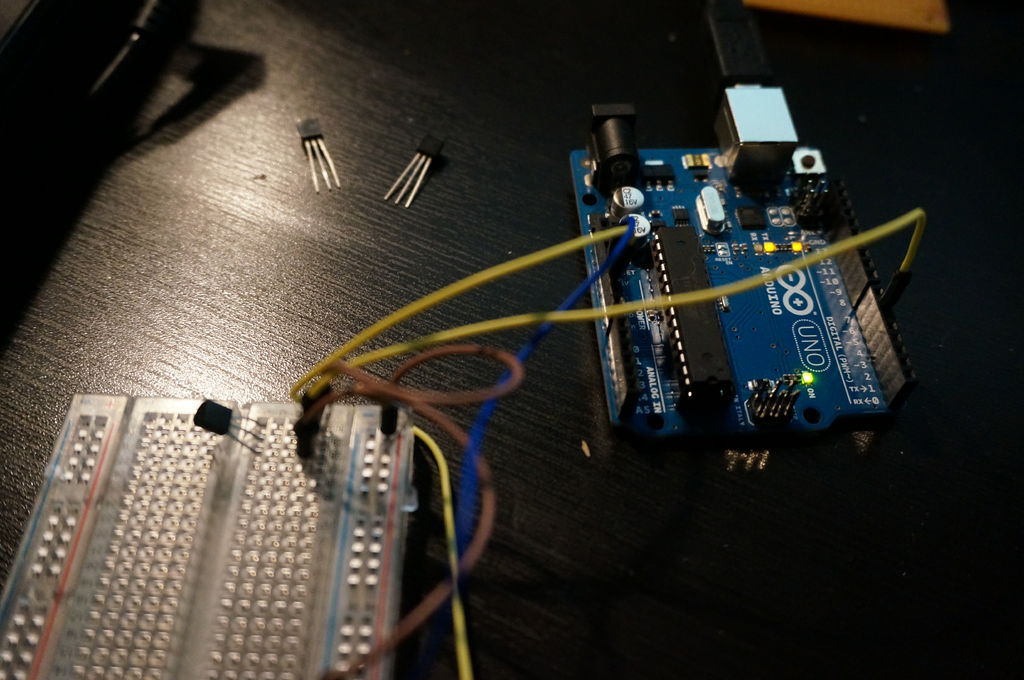
So now I have my breadboard, a temperature sensor, an Arduino, and have the program set up so I can test out and see if my temperature sensor is reading correctly. Now to wire everything up and see what happens!
For more detail: Arduino Powered 3-zone thermostat
- What microcontroller is used for the thermostat?
The article uses an Arduino Uno. - Which temperature sensors are chosen?
The build uses DS18B20 temperature sensors. - How are multiple temperature sensors connected to the Arduino?
Multiple DS18B20 sensors share a single data pin via the OneWire bus and are addressable. - Which libraries are required for reading the temperature sensors?
The OneWire and DallasTemperature libraries are used. - What display is used for showing information?
A 16x2 Hitachi compatible character LCD is used, with an LCD Keypad Arduino shield. - What development environment did the author prefer over the Arduino IDE?
The author switched to SublimeText with the Stino addon. - How does the system decide to start or stop the furnace?
The Arduino program checks zone temperatures against setpoints and would open dampers and start the furnace when zones require heat; it aims to turn off the furnace when all zones are at acceptable temperatures. - Are sensor addresses needed and how are they obtained?
Yes; each DS18B20 has a unique address, and the author followed tutorials (Hacktronics) to find those addresses. - What initial hardware setup was used for testing?
Testing was done on a breadboard with an Arduino, a temperature sensor, and the program to verify readings.