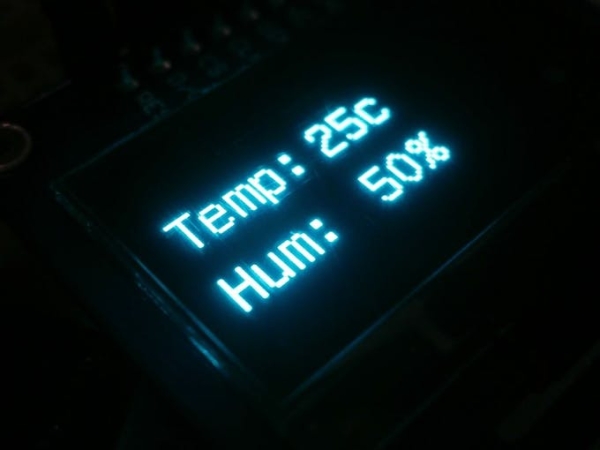
Hygrometers are used to determine the moisture content of the environment. They find application in farms, food storage, museums, and other places where moisture needs to be monitored to ensure damage is not done to goods and other things stored in that space. For today’s tutorial, we are going to build a Hygrometer using the DHT11 temperature and humidity sensor and an OLED display. To fully utilize the ability of the DHT11 sensor we will add a thermometer to the hygrometer so both temperature and humidity are displayed on the OLED display.
At the center of today’s project is the DHT11 temperature and humidity sensor, and the OLED Display. OLED (Organic light-emitting diode) displays are made of light-emitting diodes (LED) in which the emissive electroluminescent layer is made up of a film of organic compound that emits light in response to an electric current. For this tutorial, we will use the 1.3″ OLED Display from Waveshare. The display is monochrome blue in color, has a resolution of 128×64 pixels and communicates over 4 wire SPI or I2C. It is low power as it only consumes 0.04W of energy which is one-tenth of what is required to power a 16×2 LCD display.
While there are a lot of DHT variations to choose from, for this tutorial, we will use the DHT11. The choice of the DHT11 is not based on any factor other than the fact that we had it lying around. If you desire high accuracy for your project, you should consider either of the DHT21 or the DHT22 both of which surpasses the DHT11 in performance and power consumption.
The DHT11 is a basic, ultra low-cost digital temperature and humidity sensor. It uses a capacitive humidity sense element and a thermistor to measure the surrounding air and gives out a digital signal on the data pin (no analog input pins needed). Its fairly simple to use, but requires careful timing to grab data. The only real downside of this sensor is that you can only get new data once every 2 seconds, as such, sensor readings can be up to 2 seconds old.
At the end of today’s project, you would know how to use the DHT11 temperature and humidity sensor and how to display data on an OLED Display.
REQUIRED COMPONENTS
The following projects are required to build this project:
Each of these components can be bought via the attached links. There is no special reason behind the choice of the Uno, feel free to use any of the other Arduino boards.
SCHEMATICS
The schematics for today’s project is easier than most. The OLED display communicates over SPI and is connected to corresponding pins on the Arduino, while the signal pin of the DHT can be connected to any of the rest of pins on the Arduino. For this tutorial, we will connect it to analog pin A0.
Read more: ARDUINO OLED HYGROMETER AND THERMOMETER USING DHT11