hey there Electronic Enthusiasts!
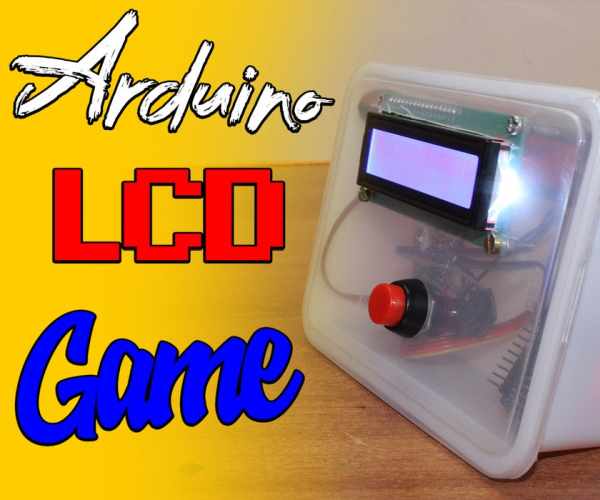
Kids, Adults, Seniors, in fact everyone loves games! so here is another Awesome Project based on Arduino, yes its a GAME, follow this pretty INSTRUCTABLE to make your own Arduino LCD Stick Man Game!
Step 1: Watch the Video!
Step 2: Gather the Material
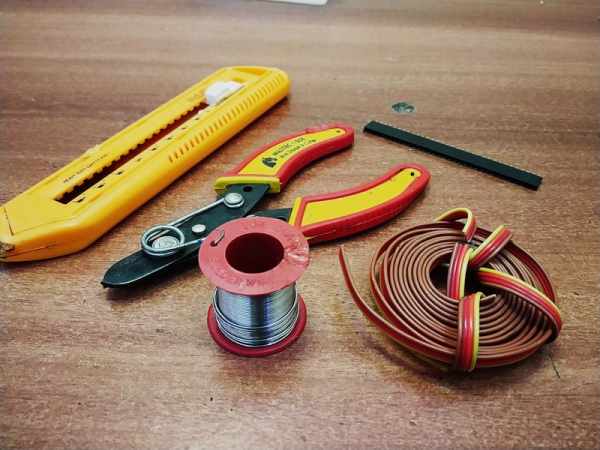
for this project, we will require the following Material
A. Electronics
1. Arduino Nano : https://www.gearbest.com/boards-shields/pp_1313295…
2. I2C LCD Display : https://www.gearbest.com/lcd-led-display-module/pp…
3. Push Button : https://www.gearbest.com/development-boards/pp_144…
4. Wire : https://www.gearbest.com/other-accessories/pp_1367…
B. Misc
1. Case : https://www.amazon.com/Crystal-Hinged-Plastic-Trad…
C. Tools
1. Solder Iron : https://www.gearbest.com/soldering-supplies/pp_313…
2. Wire Stripper : Wire Stripper Link
3. HotGlue Gun : https://www.gearbest.com/other-tools/pp_0098709883…
Step 3: Upload the Code to Arduino
<p>#include <Liquidcrystal_i2c.h>
<liquidcrystal_i2c.h>#include <wire.h><wire.h></wire.h></liquidcrystal_i2c.h></p><p>#define PIN_BUTTON 2
#define PIN_AUTOPLAY 1
#define PIN_READWRITE 10
#define PIN_CONTRAST 7</p><p>#define SPRITE_RUN1 1
#define SPRITE_RUN2 2
#define SPRITE_JUMP 3
#define SPRITE_JUMP_UPPER '.'         // Use the '.' character for the head
#define SPRITE_JUMP_LOWER 4
#define SPRITE_TERRAIN_EMPTY ' '      // User the ' ' character
#define SPRITE_TERRAIN_SOLID 5
#define SPRITE_TERRAIN_SOLID_RIGHT 6
#define SPRITE_TERRAIN_SOLID_LEFT 7</p><p>#define HERO_HORIZONTAL_POSITION 1    // Horizontal position of hero on screen</p><p>#define TERRAIN_WIDTH 16
#define TERRAIN_EMPTY 0
#define TERRAIN_LOWER_BLOCK 1
#define TERRAIN_UPPER_BLOCK 2</p><p>#define HERO_POSITION_OFF 0          // Hero is invisible
#define HERO_POSITION_RUN_LOWER_1 1  // Hero is running on lower row (pose 1)
#define HERO_POSITION_RUN_LOWER_2 2  //                              (pose 2)</p><p>#define HERO_POSITION_JUMP_1 3       // Starting a jump
#define HERO_POSITION_JUMP_2 4       // Half-way up
#define HERO_POSITION_JUMP_3 5       // Jump is on upper row
#define HERO_POSITION_JUMP_4 6       // Jump is on upper row
#define HERO_POSITION_JUMP_5 7       // Jump is on upper row
#define HERO_POSITION_JUMP_6 8       // Jump is on upper row
#define HERO_POSITION_JUMP_7 9       // Half-way down
#define HERO_POSITION_JUMP_8 10      // About to land</p><p>#define HERO_POSITION_RUN_UPPER_1 11 // Hero is running on upper row (pose 1)
#define HERO_POSITION_RUN_UPPER_2 12 //                              (pose 2)</p><p>LiquidCrystal_I2C lcd(0x27, 16, 2);</p><p>static char terrainUpper[TERRAIN_WIDTH + 1];
static char terrainLower[TERRAIN_WIDTH + 1];
static bool buttonPushed = false;</p><p>void initializeGraphics() {
  static byte graphics[] =</p><p> {
    // Run position 1
    B01100,
    B01100,
    B00000,
    B01110,
    B11100,
    B01100,
    B11010,
    B10011,
    // Run position 2
    B01100,
    B01100,
    B00000,
    B01100,
    B01100,
    B01100,
    B01100,
    B01110,
    // Jump
    B01100,
    B01100,
    B00000,
    B11110,
    B01101,
    B11111,
    B10000,
    B00000,
    // Jump lower
    B11110,
    B01101,
    B11111,
    B10000,
    B00000,
    B00000,
    B00000,
    B00000,
    // Ground
    B11111,
    B11111,
    B11111,
    B11111,
    B11111,
    B11111,
    B11111,
    B11111,
    // Ground right
    B00011,
    B00011,
    B00011,
    B00011,
    B00011,
    B00011,
    B00011,
    B00011,
    // Ground left
    B11000,
    B11000,
    B11000,
    B11000,
    B11000,
    B11000,
    B11000,
    B11000,
  };
  int i;
  // Skip using character 0, this allows lcd.print() to be used to
  // quickly draw multiple characters
  for (i = 0; i < 7; ++i)</p><p> {
    lcd.createChar(i + 1, &graphics[i * 8]);
  }
  for (i = 0; i < TERRAIN_WIDTH; ++i) {
    terrainUpper[i] = SPRITE_TERRAIN_EMPTY;
    terrainLower[i] = SPRITE_TERRAIN_EMPTY;
  }
}</p><p>// Slide the terrain to the left in half-character increments
//
void advanceTerrain(char* terrain, byte newTerrain) {
  for (int i = 0; i < TERRAIN_WIDTH; ++i) {
    char current = terrain[i];
    char next = (i == TERRAIN_WIDTH - 1) ? newTerrain : terrain[i + 1];
    switch (current) {
      case SPRITE_TERRAIN_EMPTY:
        terrain[i] = (next == SPRITE_TERRAIN_SOLID) ? SPRITE_TERRAIN_SOLID_RIGHT : SPRITE_TERRAIN_EMPTY;
        break;
      case SPRITE_TERRAIN_SOLID:
        terrain[i] = (next == SPRITE_TERRAIN_EMPTY) ? SPRITE_TERRAIN_SOLID_LEFT : SPRITE_TERRAIN_SOLID;
        break;
      case SPRITE_TERRAIN_SOLID_RIGHT:
        terrain[i] = SPRITE_TERRAIN_SOLID;
        break;
      case SPRITE_TERRAIN_SOLID_LEFT:
        terrain[i] = SPRITE_TERRAIN_EMPTY;
        break;
    }
  }
}</p><p>bool drawHero(byte position, char* terrainUpper, char* terrainLower, unsigned int score) {
  bool collide = false;
  char upperSave = terrainUpper[HERO_HORIZONTAL_POSITION];
  char lowerSave = terrainLower[HERO_HORIZONTAL_POSITION];
  byte upper, lower;
  switch (position) {
    case HERO_POSITION_OFF:
      upper = lower = SPRITE_TERRAIN_EMPTY;
      break;
    case HERO_POSITION_RUN_LOWER_1:
      upper = SPRITE_TERRAIN_EMPTY;
      lower = SPRITE_RUN1;
      break;
    case HERO_POSITION_RUN_LOWER_2:
      upper = SPRITE_TERRAIN_EMPTY;
      lower = SPRITE_RUN2;
      break;
    case HERO_POSITION_JUMP_1:
    case HERO_POSITION_JUMP_8:
      upper = SPRITE_TERRAIN_EMPTY;
      lower = SPRITE_JUMP;
      break;
    case HERO_POSITION_JUMP_2:
    case HERO_POSITION_JUMP_7:
      upper = SPRITE_JUMP_UPPER;
      lower = SPRITE_JUMP_LOWER;
      break;
    case HERO_POSITION_JUMP_3:
    case HERO_POSITION_JUMP_4:
    case HERO_POSITION_JUMP_5:
    case HERO_POSITION_JUMP_6:
      upper = SPRITE_JUMP;
      lower = SPRITE_TERRAIN_EMPTY;
      break;
    case HERO_POSITION_RUN_UPPER_1:
      upper = SPRITE_RUN1;
      lower = SPRITE_TERRAIN_EMPTY;
      break;
    case HERO_POSITION_RUN_UPPER_2:
      upper = SPRITE_RUN2;
      lower = SPRITE_TERRAIN_EMPTY;
      break;
  }
  if (upper != ' ') </p><p>{
    terrainUpper[HERO_HORIZONTAL_POSITION] = upper;
    collide = (upperSave == SPRITE_TERRAIN_EMPTY) ? false : true;
  }
  if (lower != ' ') </p><p>{
    terrainLower[HERO_HORIZONTAL_POSITION] = lower;
    collide |= (lowerSave == SPRITE_TERRAIN_EMPTY) ? false : true;
  }</p><p>  byte digits = (score > 9999) ? 5 : (score > 999) ? 4 : (score > 99) ? 3 : (score > 9) ? 2 : 1;</p><p>  // Draw the scene
  terrainUpper[TERRAIN_WIDTH] = '\0';
  terrainLower[TERRAIN_WIDTH] = '\0';
  char temp = terrainUpper[16 - digits];
  terrainUpper[16 - digits] = '\0';
  lcd.setCursor(0, 0);
  lcd.print(terrainUpper);
  terrainUpper[16 - digits] = temp;
  lcd.setCursor(0, 1);
  lcd.print(terrainLower);</p><p>  lcd.setCursor(16 - digits, 0);
  lcd.print(score);</p><p>  terrainUpper[HERO_HORIZONTAL_POSITION] = upperSave;
  terrainLower[HERO_HORIZONTAL_POSITION] = lowerSave;
  return collide;
}</p><p>                                   // Handle the button push as an interrupt
void buttonPush()</p><p> {
  buttonPushed = true;
}</p><p>void setup() </p><p>{
  pinMode(PIN_READWRITE, OUTPUT);
  digitalWrite(PIN_READWRITE, LOW);
  pinMode(PIN_CONTRAST, OUTPUT);
  digitalWrite(PIN_CONTRAST, LOW);
  pinMode(PIN_BUTTON, INPUT);
  digitalWrite(PIN_BUTTON, HIGH);
  pinMode(PIN_AUTOPLAY, OUTPUT);
  digitalWrite(PIN_AUTOPLAY, HIGH);
  lcd.init();
  lcd.backlight();</p><p>                                                                                                    // Digital pin 2 maps to interrupt 0
  attachInterrupt(0/*PIN_BUTTON*/, buttonPush, FALLING);</p><p>  initializeGraphics();</p><p>  lcd.begin(16, 2);
}</p><p>void loop() </p><p>{
  static byte heroPos = HERO_POSITION_RUN_LOWER_1;
  static byte newTerrainType = TERRAIN_EMPTY;
  static byte newTerrainDuration = 1;
  static bool playing = false;
  static bool blink = false;
  static unsigned int distance = 0;</p><p>  if (!playing)</p><p> {
    drawHero((blink) ? HERO_POSITION_OFF : heroPos, terrainUpper, terrainLower, distance >> 3);
    if (blink) </p><p>{
      lcd.setCursor(0, 0);
      lcd.print("Press Start");
    }
    delay(250);
    blink = !blink;
    if (buttonPushed) </p><p>{
      initializeGraphics();
      heroPos = HERO_POSITION_RUN_LOWER_1;
      playing = true;
      buttonPushed = false;
      distance = 0;
    }
    return;
  }</p><p>  // Shift the terrain to the left
  advanceTerrain(terrainLower, newTerrainType == TERRAIN_LOWER_BLOCK ? SPRITE_TERRAIN_SOLID : SPRITE_TERRAIN_EMPTY);
  advanceTerrain(terrainUpper, newTerrainType == TERRAIN_UPPER_BLOCK ? SPRITE_TERRAIN_SOLID : SPRITE_TERRAIN_EMPTY);</p><p>  // Make new terrain to enter on the right
  if (--newTerrainDuration == 0)</p><p> {
    if (newTerrainType == TERRAIN_EMPTY)</p><p> {
      newTerrainType = (random(3) == 0) ? TERRAIN_UPPER_BLOCK : TERRAIN_LOWER_BLOCK;
      newTerrainDuration = 2 + random(10);
    }</p><p> else </p><p>{
      newTerrainType = TERRAIN_EMPTY;
      newTerrainDuration = 10 + random(10);
    }
  }</p><p>  if (buttonPushed)</p><p> {</p><p>    if (heroPos <= HERO_POSITION_RUN_LOWER_2) heroPos = HERO_POSITION_JUMP_1;
    buttonPushed = false;
  }</p><p>  if (drawHero(heroPos, terrainUpper, terrainLower, distance >> 3))</p><p> {
    playing = false; // The hero collided with something. Too bad.
  }</p><p> else</p><p> {
    if (heroPos == HERO_POSITION_RUN_LOWER_2 || heroPos == HERO_POSITION_JUMP_8) </p><p>{
      heroPos = HERO_POSITION_RUN_LOWER_1;
    } else if ((heroPos >= HERO_POSITION_JUMP_3 && heroPos <= HERO_POSITION_JUMP_5) && terrainLower[HERO_HORIZONTAL_POSITION] != SPRITE_TERRAIN_EMPTY) {
      heroPos = HERO_POSITION_RUN_UPPER_1;
    } else if (heroPos >= HERO_POSITION_RUN_UPPER_1 && terrainLower[HERO_HORIZONTAL_POSITION] == SPRITE_TERRAIN_EMPTY) {
      heroPos = HERO_POSITION_JUMP_5;
    } else if (heroPos == HERO_POSITION_RUN_UPPER_2) {
      heroPos = HERO_POSITION_RUN_UPPER_1;
    } </p><p>else </p><p>{
      ++heroPos;
    }
    ++distance;</p><p>    digitalWrite(PIN_AUTOPLAY, terrainLower[HERO_HORIZONTAL_POSITION + 2] == SPRITE_TERRAIN_EMPTY ? HIGH : LOW);
  }
  delay(100);
}</p>
upload the attached code into your Arduino Nano Board.
if you find difficulty in uploading the code, here is a video that will help you to solve those problems
Step 4: Connect the LCD and PUSH Button to Arduino
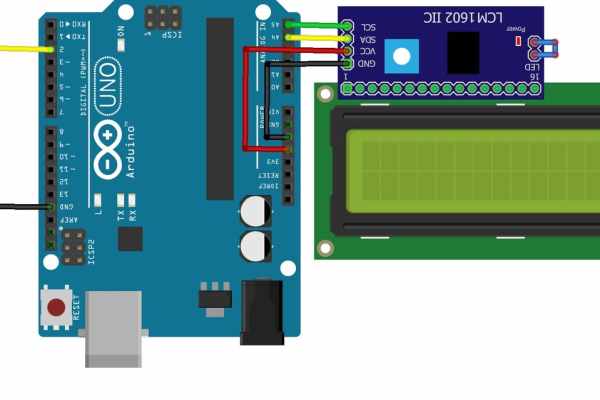
This is a simple arduino project, so in connections we just connected I2C L.C.D. display and a push button.
here is a video for I2C L.C.D. basics incase if you are new
Connection Summary
I2C LCD Display’s :
SCL– pin A5
SDA – pin A4
VCC – 5V
GND – GND
PUSH BUTTON :
between pin D2 & GND.
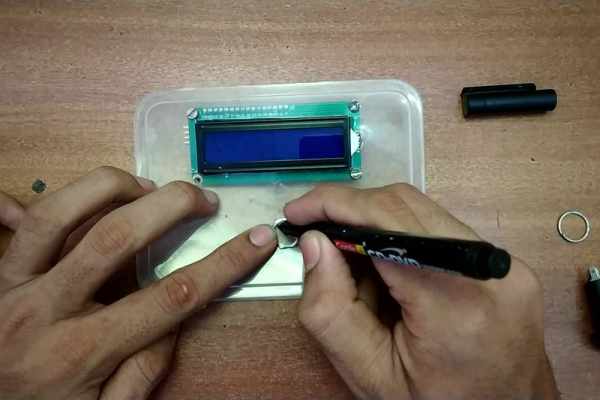
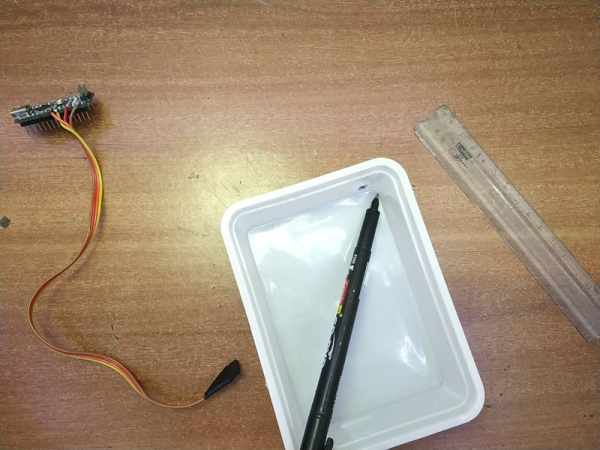
Step 5: Mount LCD on the LEAD of BOX

to make the enclosure box, we will start with creating a slot for our LCD display on the LEAD of the Plastic box we choose for this project.
to Mount the LCD:
- Mark the edges of LCD screen on the LEAD of Container. ( Dimension of LCD are 70mm X 25mm)
- use a ruler to draw accurate and straight lines along the edges of LCD.
- use a BOX Cutter to cut the marked area along the lines we created.
- Mark the holes using a CD marker with reference of holes on LCDs PCB board. (size of Holes is M3)
- using a hand Drill, plot the holes on the LEAD of BOX.
- mount the LCD and fix it with the M3 bolts and nuts.
Step 6: Mount the PUSH BUTTON
the Push Button is used to interact with the user, it provides INPUT to the arduino.
to mount the Push Button:
- Mark the diameter of the switch using a CD marker.
- use hand drill to make a pilot hole and increase the hole using box cutter or use soler iron to directly create a hole for the required size.
- using the nut, fix the switch to the lead of the container.
Step 7: Mount the Arduino Inside BOX
to mount the ARDUINO inside the BOX, we will first need to make a slot on the BOX for USB to pop in.
to Mount ARDUINO:
- Using a permanent marker, copy the outlines of USB port of arduino
- using a Box Cutter, cut the slot for USB port.
- using the hot glue gun, fix the arduino nano in such a way that usb port comes out of the slot we created and thus usb port is accessible.
Source: Arduino LCD Stick Man Game!