
Summary of Arduino LCD Project for Measuring Distance with Ultrasonic Sensor
In this lesson you combine an ultrasonic distance sensor with an Arduino-driven LCD to measure and display distance readings. Using the schematic provided (compatible with the SparkFun Inventor Kit LCD), you wire the ultrasonic sensor and LCD to the Arduino, verify connections carefully, then write or adapt code to trigger the sensor, read distance, and print the value to the LCD. The lesson references prior lessons for LCD wiring and offers sample code as a guide.
Parts used in the Arduino LCD Project for Measuring Distance with Ultrasonic Sensor:
- Arduino board
- Ultrasonic sensor (HC-SR04 or similar)
- 16x2 LCD display (SparkFun Inventor Kit style or similar)
- Potentiometer for LCD contrast
- Jumper wires
- Breadboard
- Power source for Arduino (USB cable or battery)
- Resistors (if required by specific LCD model)
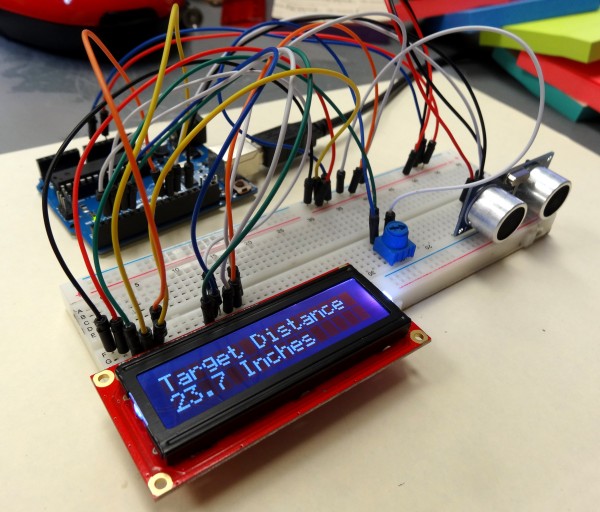
Be very careful connecting the circuit. Check your work, and it helps to work with a Buddy. Have one person looking at the schematic, and one looking at the circuit. Sometimes it is easier to get it right working in pairs.
Now the objective of this project is to measure distance using the ultrasonic sensor, and then display that value on the LCD display. You should have the skills you need from the earlier lessons. Try and do this project on your own, but if you get stuck, you can look at my code below. As always, don’t copy and paste my code, but it should be used as a guide to help you write yours if you get stuck.
– See more at: http://www.toptechboy.com/arduino/lesson-20-arduino-lcd-project-for-measuring-distance-with-ultrasonic-sensor/#sthash.eWyq5823.dpuf
- What is the objective of this project?
The objective is to measure distance with an ultrasonic sensor and display the value on an LCD. - Which LCD is the schematic designed for?
The schematic is for the SparkFun Inventor Kit LCD or a similar LCD. - Can I use a different LCD than the one in the SparkFun kit?
Yes, but you will need to determine the proper connections for your specific LCD model. - What prior lessons are referenced for help?
Lesson 18 (ultrasonic sensor) and Lesson 19 (LCD connection) are referenced for background and wiring details. - Where can I get an ultrasonic sensor if I need one?
The lesson indicates you can pick one up from the provided link (HERE) in the original article. - Should I copy the example code exactly?
No, the example code is provided as a guide; you should try to write your own code and use the sample only if you get stuck. - How should I approach building the circuit safely?
Be very careful, double-check connections, and consider working with a buddy—one person reads the schematic while the other builds the circuit. - Does the lesson include a schematic to follow?
Yes, the lesson provides a schematic for connecting the ultrasonic sensor and LCD to the Arduino.
