
Summary of Create A Giant Meter Using Arduino
Summary: The project builds a giant speedometer-style meter to display website response time. It uses CNC-carved 1/4” bi-color HDPE and a 1/8” orange acrylic needle, mounted to a micro servo and controlled by an Arduino Uno. Optional LED alphanumeric displays and a bicolor LED matrix show additional metrics. Design files were created with Inkscape and Easel.
Parts used in the Giant Meter:
- 1/4” bi-color HDPE (12 inches square)
- 1/8” orange acrylic needle
- Arduino UNO
- micro servo motor (specific outer casing shape)
- 2x Adafruit Quad Alphanumeric Display - Blue 0.54” (optional)
- Adafruit Bicolor LED Square Pixel Matrix (optional)
- misc jumper wires
- screws
- scrap wood for test cuts
The Meter
The whole idea of this project was to create a giant meter to show website response time almost like a speedometer would. The result is something that’s both fun to watch and provides a meaningful ‘heartbeat’ of current status. After several revisions and different designs along the way, I ended up with what you see here.
Construction & Design
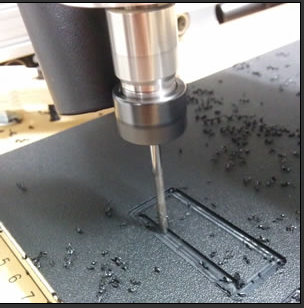
The meter is carved using my CNC machine from 1/4” bi-color HDPE (12 inches square). This is a great material to cut signs or other carvings with because anything carved out is the alternate material color, so there’s no painting/masking/re-painting needed. The needle is cut from 1/8” orange acrylic which worked great for the speedometer theme. For mounting the micro servo, I designed a hole matching the shape of the outer plastic casing which the servo I chose had (see parts list for a link). I designed the whole thing using Inkscape and Easel, mainly because they are free and fairly easy to use. Check out my bill of materials if you are interested in using the same HDPE and acrylic.
Electronics
I decided to power the meter using the Arduino Uno microcontroller since it handles servo control really well. The Raspberry Pi would be another option, but I’ll detail the Arduino setup for now. My implementation also uses a few LED displays to display detailed metrics, but the servo is the main piece you need. Here’s a quick parts list:
- Arduino UNO
- micro servo motor (my design has a specific hole for this exact type, but can be modified)
- 2x Adafruit Quad Alphanumeric Display – Blue 0.54” (optional)
- Adafruit Bicolor LED Square Pixel Matrix (optional)
- misc jumper wires
- screws, scrap wood for test cuts, etc.
For More Details: Create A Giant Meter Using Arduino
- What is the main purpose of the Giant Meter?
To show website response time in a speedometer-style visual that provides a meaningful heartbeat of current status. - What materials are used for the carved meter face?
The meter face is carved from 1/4” bi-color HDPE (12 inches square). - What material is the needle made from?
The needle is cut from 1/8” orange acrylic. - Which microcontroller is used to power and control the meter?
The project uses an Arduino UNO to handle servo control. - Can a Raspberry Pi be used instead of the Arduino?
Yes, the article states the Raspberry Pi would be another option, but the write-up details the Arduino setup. - What type of servo is required?
A micro servo motor is used, and the design includes a hole matching the specific outer plastic casing shape of the chosen servo. - Are there optional displays included in the design?
Yes, optional components include 2x Adafruit Quad Alphanumeric Display - Blue 0.54” and an Adafruit Bicolor LED Square Pixel Matrix. - What software was used to design the meter?
The meter was designed using Inkscape and Easel. - Why was bi-color HDPE chosen?
Because carved areas show the alternate material color, eliminating the need for painting or masking.
