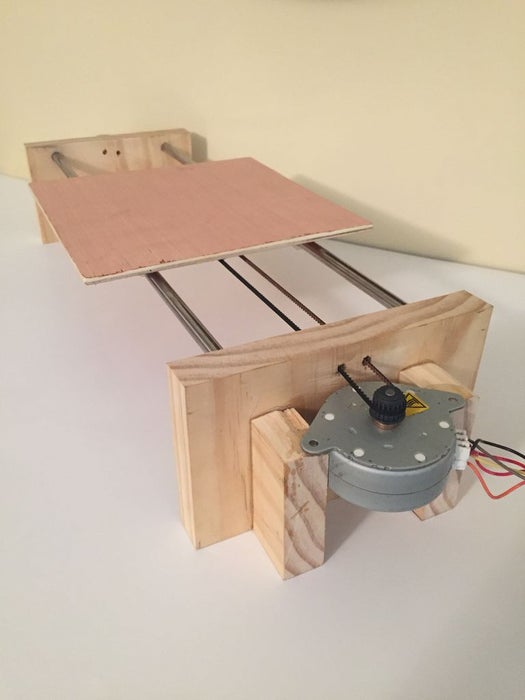
Hey guys this is part 2 of my Arduino CNC machine! Thanks to you guys you motivated me to make my next part into building this! This is me building the y-axis on the CNC machine. Hope you guys enjoy!
Step 1: Patreon

As you may or may not know, I am Kester. I have a YouTube channel that is based on making electronics videos and diy videos and tutorials. As me making lots of videos and putting time and lots of effort and money into producing products and videos, I would like to get some support from my fellow fans to help me keep up with producing more content and projects for you guys. So on behalf, I would like to show you guys Patreon. Patreon helps support fellow DIY’ers and people who need help from the fans and supporters to keep content flowing for their fans to enjoy. So what I’m asking for is a donation from you guys to keep my content going and to make my fans happy by producing more content! Thanks again for all of your support. Be sure to check out my YouTube channel and my Patreon account! Thanks guys!
LINKS: Thanks For All Of The Support Guys!
Step 2: Parts List
You will need the following parts for this project.
(Wood) (L•W•H)- in inches
– 7•7•0.25 Piece of Plywood (Thin Wood)
– 6•0.75•3.5 Wood ( 2 pieces )
– 2 Of The Same Pieces of Wood.
– 1 Belt With Teeth
– 16 Inches Long Metal Rod ( 5/16 of in inch in diameter) ( 2 pieces )
– Epoxy
– 5 Nylon Spacers That Fit Perfectly Around The Metal Rods.
– 2 Washers
– 1 Stepper Motor
– 1 Screw
Step 3: Cut the Wood to the Dimensions
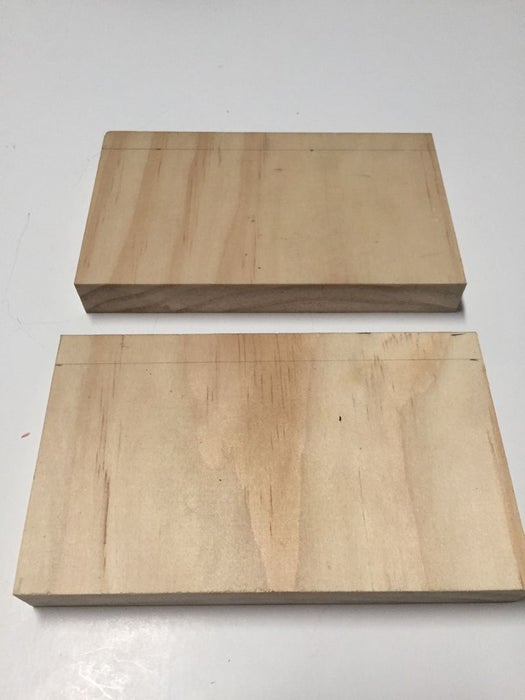
Now cut your wood into the dimensions as shown in the parts list.
-First piece you need to cute is your piece of plywood (thin wood). You need to cut it as 7 inches long by 7 inches wide and 0.25 inches thick.
– Second and third piece of wood (they are the same dimensions) you will need to cut it as 6 inches long by 0.75 inches wide by 3.5 inches tall. *Remember you need 2 pieces!*
Step 4: Sand the Edges
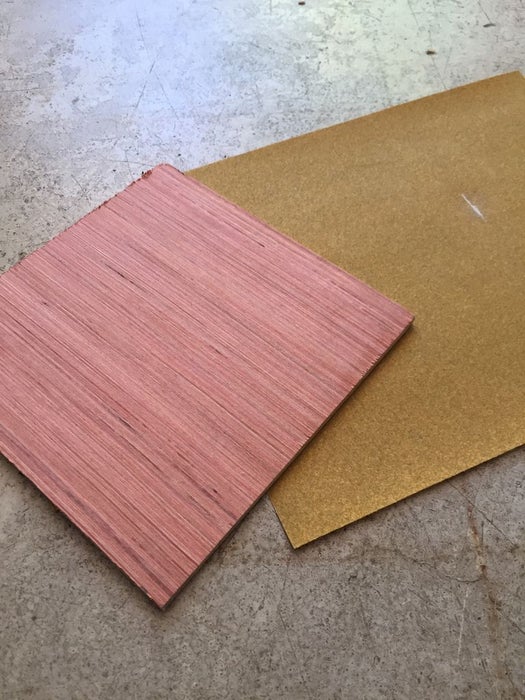
Now to make them smooth, go ahead and sand them down so you don’t have any rough edges.
Read more: Arduino: CNC Machine / Part 2