
Summary of Arduino ADK LED Lighting
This article guides users through creating a smartphone-controlled LED lighting system using the Arduino ADK (Android Development Kit). It explains that no Android coding is required, as the project utilizes the Handbag app and standard Arduino code. The tutorial covers hardware setup, including connecting an LED strip to a relay for high-voltage control, and details the communication between the Arduino Mega-based ADK and Android devices via USB host functionality.
Parts used in the Arduino ADK LED Lighting Project:
- Arduino Mega ADK
- USB-B Cable for Arduino ADK Programming
- LED Strip - 1M
- 2N2222 Transistor
- Relay SPDT
- Diode Small Signal 1N4148
- 10K Resistor - 1/6W
- Half Size Breadboard
- 12V DC Power Adapter
- Jumper Wires
Have you ever wanted to control electronics with your smartphone? The Arduino ADK (Android Development Kit) is the Arduino Mega with a built in USB host device, ready for your smartphone to be plugged in! We’ll make a simple introductory project with a few LED strips and a relay (to control the high voltages of the LED strip). For this project, you will need no Android programming experience (or even learn how to code Android!), but a moderate Arduino code understanding. We’ll use the easy Handbag app for Android.
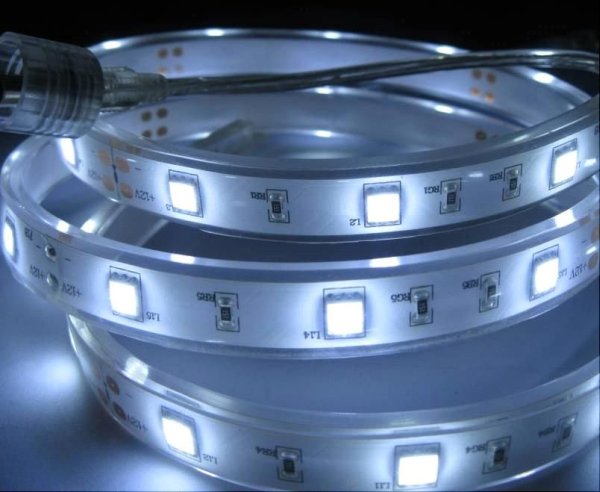
This Instructable will cover how the Arduino ADK works, how to use it with Android devices, and how to make a cool example project of lighting up LED strips with Android!!!
Please vote for me in the Make to Learn Youth Contest and Lamps and Lighting Contest!!! Every vote counts!
What did you make?
I made a tutorial on the Arduino ADK, which I found little documentation on in the past. I wanted other people to learn all about the Arduino ADK easily, once they got one and didn’t know how to use it. The ‘ADK in-depth’ part of this Instructable is a compilation of many resources that I have found on the internet. I also created an ‘example project’ in Step 4-8 to interface an LED strip (with a relay, which I have never worked with in the past) with the Arduino ADK, and an Android device. The simple program uses the Handbag application and libraries (wasn’t designed by me) to make a simple application menu for the Android to turn on/off the LED strip.
How did you make it?
I used many of my prior electronics and soldering skills, and some electronic components I have gotten in the past. My parents gave me the LED strip last Christmas, and I got the Arduino ADK at Maker Faire Bay Area 2012, but didn’t know what to do with it. Later on, I looked online and found the Handbag application, and started coding in minutes. Using only Arduino programming (which is the great part of Handbag, you don’t have to write any Android code), I coded a simple application menu that activated the relay that switches the LED strips on and off.
Where did you make it?
I made the project mainly in my garage/hackerspace (Qtechknow Labs), where I teach many of my friends DIY electronics. I also used my soldering iron and project desk. I have gotten many of my soldering skills at booths at Maker Faire, and lots of my electronics skills around the internet! I looked at Arduino.cc as well as Google Developers to get to know what the Arduino ADK was about, even though I didn’t understand it at first.
What did you learn?

I learned all about the Arduino ADK, relays, and Android devices, all of which I had no experience with in the past. I learned that everything fails at first, but you have to keep on trying to get it the way you want it. I’m super excited that I now know all about the Arduino ADK, so I can design some more cool Android projects!
Step 1: Parts and Tools
The total cost of the parts is about $28.50, excluding the Arduino ADK and LED Strip.
Tools:
Android Phone (Check OS requirements)
USB cable for Android Phone
Soldering Iron
Solder
Wire Strippers
Safety Glasses
Safety Mask or Solder Fume Extractor
Laptop
Wire (only a little bit is needed)
Step 2: Introduction to the Arduino ADK
The Arduino ADK is basically an Arduino Mega with a built in USB host controller. It has over 50 digital pins, 15 analog pins, and many more for communication. It has a very fast processor with over 200kb of memory to store code!!! In most programs, you use less than 15kb.
The Arduino ADK can communicate with Android devices, or basically any USB slave (i.e. keyboard, mouse). It has a MAX3421E that communicates with the ATmega2560 through SPI to transmit and receive data to the Arduino ADK.
Some of these concepts might be a little confusing, but you don’t have to understand them in full detail to make a simple Android app.
Arduino Mega ADK (Makershed, $85)
USB-B Cable for Arduino ADK Programming (SparkFun, $4)
LED Strip – 1M (you only need 2 feet; Adafruit, $20)
2N2222 Transistor (Digikey, $0.34)
Relay SPDT (SparkFun, $2)
Diode Small Signal 1N4148 (SparkFun, $0.15)
10K Resistor – 1/6W (SparkFun, $0.25)
Half Size Breadboard (SparkFun, $6)
12V DC Power Adapter (SparkFun, $6)
Jumper Wires (SparkFun, $4.50)
For more detail: Arduino ADK LED Lighting
- How can I control electronics with my smartphone?
You can use the Arduino ADK with the Handbag app to interface an Android device with electronics like LED strips without writing Android code. - What components are required for this project?
The project requires an Arduino Mega ADK, LED strip, relay, transistor, diode, resistor, breadboard, power adapter, and jumper wires. - Does the Arduino ADK require Android programming experience?
No, you do not need any Android programming experience or knowledge of how to code Android for this project. - What is the function of the relay in this setup?
The relay is used to control the high voltages of the LED strip by switching them on and off based on signals from the Arduino. - Can the Arduino ADK communicate with other USB devices?
Yes, it can communicate with Android devices or any USB slave such as a keyboard or mouse. - What application is used to create the menu for the Android device?
The simple program uses the Handbag application and libraries to create a menu for turning the LED strip on and off. - How much memory does the Arduino ADK processor have?
The Arduino ADK has over 200kb of memory to store code. - What tool is needed to connect the components on the breadboard?
Soldering iron, solder, wire strippers, and wire are listed as tools needed for assembly.
