Summary of Alexa Controlled Servo
This project demonstrates a DIY voice-activated device using an Alexa-controlled servo to press a keyboard key, preventing a laptop screen saver from activating. The system monitors security cameras and renews the display on command.
Parts used in the Alexa Controlled Servo Keyboard Press:
- Wemos D1 microcontroller
- Micro servo
- 3300 uf 6.3 volt electrolytic capacitor
- Acrylic clamp (custom designed)
- USB cable
- External 5 volt power supply (optional)
Introduction
I have a laptop on a shelf in my office that monitors several cameras that are around the outside of my house. They alert me to deliveries and visitors. While I can use a web browser to see their images it is easier to just glance at the screen on the laptop from time-to-time to see what’s up.
Unfortunately the laptop’s screen saver cuts in after 30 minutes and blanks the screen. That forces me stop what I am doing and press the space bar or shift key to bring the screen back.
Having a voice activated Alexa controlled “finger” that could touch a key on the keyboard is surely not the simplest solution but it sounded like a fun project. This servo device places a movable arm just above a key on the keyboard. The statement “Alexa turn on keyboard” cycles the servo arm, pressing down on the shift key & renewing the screen – nice!
The application presented here is just one way that the servo can be used. Other applications include throwing a wall switch that turns lights on/off or moving some other device, perhaps a latch on a door or cabinet. If you come up with other applications please drop me an email and let me know ([email protected]).
Step 1: Video
There is a YouTube video here that gives an overview of this project
Step 2: Hardware
- Wemos D1 – from BangGood and Amazon.
- micro servo – Amazon and BangGood
- 3300 uf, 6.3 volt electrolytic capacitor – eBay or junk box – any fairly high capacity capacitor should work (see notes in article)
Step 3: The Clamp
The “clamp” that holds it all together is shown here. The servo goes in the upper right and the Wemos goes into the holes to the left. The large tapered slot holds it to the side of the laptop. You will need to be changed the dimensions of that slot to fit your laptop. The links here are for a PDF or CorelDraw version of this clamp. The sixteen small holes for the Wemos are not electrically connected to anything – the are just there to help hold the controller in place.
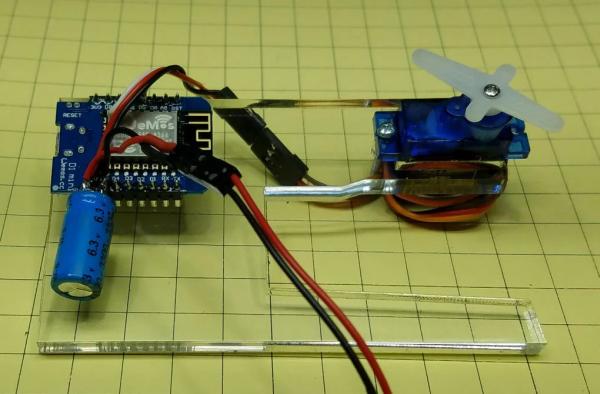
Step 4: Putting It Together
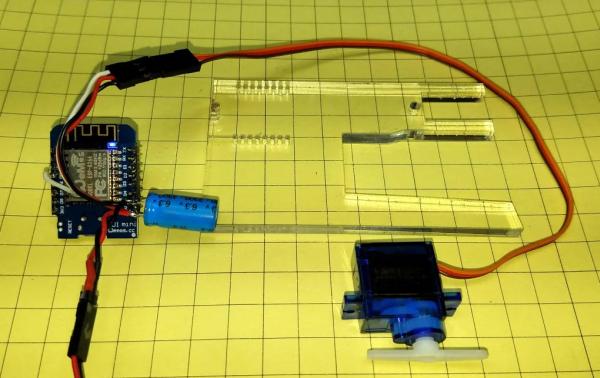
The parts that I used are listed above and shown here.
Step 5: Connections
All of the connections are made by soldering right to the Wemos D1. The capacitor and 5 volt power connecting go to the 5v and G pins. The servo also connects to these pins for power. The servo’s data line (the white wire in this photo) goes to pin D5. Those are the only connections that are needed. Power can be supplied from an external 5 volt power supply or, as in this case, by a USB cable plugged into the laptop. The 3300 uf capacitor was added when the Wemos crashed periodically, probably due to variations in the supply voltage. Since the cap was added the unit has been very stable. Other electrolytic caps of 1000 uf or more should work.
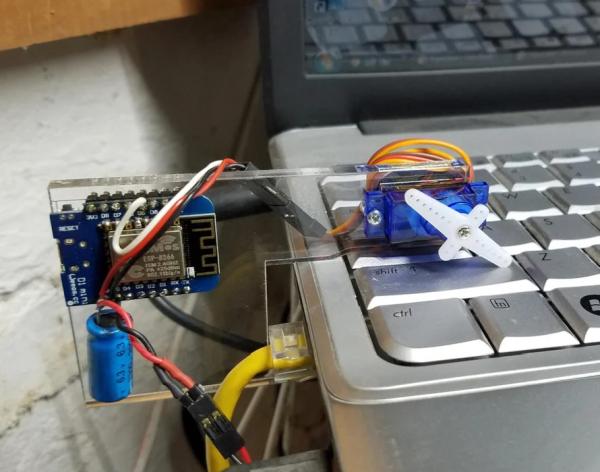
Step 6: Attach to Laptop
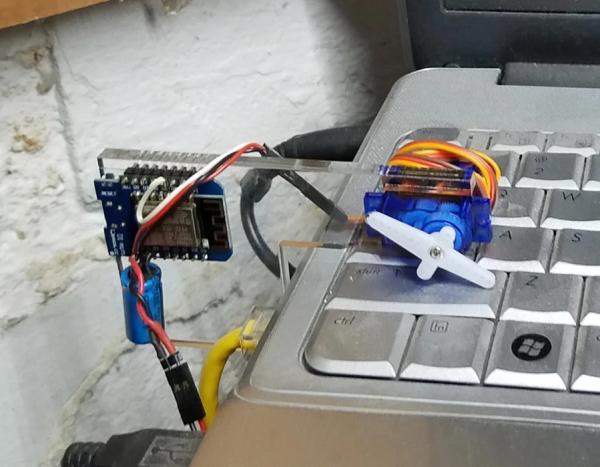
Here the Wemos & servo are mounted and the acrylic clamp has been placed on the keyboard.
Step 7: Using With Alexa
After programming with the code in this ZIP file (be sure to change the SSID and password to match your system) I told Alexa to discover devices. In a minute or so she reported that she had found a new device called keyboard. Once that is set the servo can be activated by saying “Alexa turn on keyboard” – note that there is no need to say “Alexa turn OFF keyboard” as the servo arm returns to the off position after pressing a key.
Step 8: Software Notes
If you want to change the name that Alexa uses with this device from “keyboard” to something else you need to change the word “keyboard” to your word in a number of places. To simplify this I just changed ALL instances of “keyboard” to the new word using the search and replace function (edit / find).
The code includes a routine that blinks the on-board LED on the Wemos every second. This was added to give the controller a “heart beat” during testing. If you find it unnecessary or distracting it can be deleted.
Note that a number of libraries must be added to your Arduino IDE for this sketch to compile – They are at the top of the listing in the “#include” statements. You also have to add the Wemos to the IDE (see: https://www.instructables.com/id/Wemos-ESP8266-Get… )
Step 9: Other Uses
The servo can be used to move other things as well. Thingiverse.com has several designs for a servo operated light switch including this one that can be 3D printed:
Source: Alexa Controlled Servo
- How does the device prevent the screen saver from activating?
The servo arm presses the shift key every 30 minutes to renew the screen when the saver would normally activate. - What voice command activates the servo?
You can say Alexa turn on keyboard to cycle the servo arm and press the key. - Can I change the name of the device discovered by Alexa?
Yes you need to change all instances of the word keyboard in the code to your preferred name. - Why was a capacitor added to the circuit?
The capacitor stabilizes the unit after the Wemos crashed periodically due to variations in the supply voltage. - Where does the servo data line connect on the Wemos D1?
The white wire data line connects to pin D5 on the Wemos board. - What happens if I do not say turn off keyboard?
The servo arm automatically returns to the off position after pressing a key so no off command is needed. - Can this servo be used for other applications?
Yes it can throw wall switches move latches or operate other devices like door cabinets. - How is the device powered?
Power comes from a USB cable plugged into the laptop or an external 5 volt power supply.