
Summary of Alarm System Powered By Arduino
This article details a DIY Arduino security alarm system designed by Dejan Nedelkovski. The project utilizes an ultrasonic sensor to detect objects within a specific range and triggers a buzzer for alerts. Users can activate the alarm via a keypad, set passwords, and monitor status on an LCD display. The system includes a countdown timer before full activation and measures distance changes relative to an initial baseline to trigger notifications.
Parts used in the Arduino Security Alarm System:
- Arduino board
- LCD display
- 4×4 keypad
- Ultrasonic sensor
- Buzzer
Dejan Nedelkovski had built an Arduino security and alarm system project that uses an ultrasonic sensor for detecting objects and a buzzer for notification.
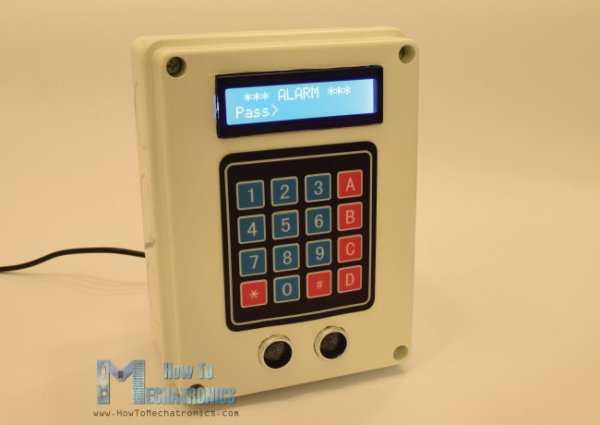
Components needed to build this simple system are: Arduino board, LCD display, 4×4 keypad, ultrasonic sensor and buzzer. The circuit can be connected as shown in the schematics below.
In order to build the project, you have to connect the buzzer with a PWM pin and the keypad pins where 4 of the 8 pins are for rows and the rest are for columns.
“The 4×4 keypad has 8 pins, 4 of them are for the rows and 4 of them for the columns of the keypad. Each button is actually a push button switch which makes a short between one row and column when pressed. So, for example, if we set the row 1 line low, and all column lines high, when we will press, for example, the button 3, due to the short between the two lines, the column 3 line will drop to low so in such a case we can register that the button 3 has been pressed.”
For connecting the LCD display and ultrasonic sensor you can check this detailed video tutorial by Dejan Nedelkovski and to see the project in action:
We want to activate the alarm by setting the A button to activate it. B button is used to change the password, and you need to enter the preset password “1234” to be able to change it.
After activating the alarm by pressing A, a 200 milliseconds sound will be produced from the buzzer showing that the alarm is now active. A message on the LCD display will appear to saying “Alarm will be activated in” and a countdown will be running afterwards until the alarm is completely active. At the end of the countdown a ” Alarm Activated” is on the display and the sensor will start working. Comparing with the initial distance at the start, the sensor will measure the distance is smaller than the initial distance, corrected by a value of 10 cms. The buzzer will produce a sound if an object is observed as per the condition.
Read more: Alarm System Powered By Arduino
- What components are needed to build this system?
The required components are an Arduino board, LCD display, 4×4 keypad, ultrasonic sensor, and buzzer. - How is the 4×4 keypad connected?
It connects using 8 pins where 4 are for rows and 4 are for columns. - How do you change the password?
You must press button B and enter the preset password 1234 to change it. - What happens when the A button is pressed?
The alarm activates with a 200 millisecond sound from the buzzer and starts a countdown on the LCD. - When does the sensor start working?
The sensor begins working after the countdown finishes and the display shows Alarm Activated. - How does the sensor determine if an object is present?
It compares the current distance to the initial distance, triggering the buzzer if the measured distance is smaller than the initial distance corrected by 10 cms. - Can I see the project in action?
Yes, there is a detailed video tutorial available by Dejan Nedelkovski showing the project in operation.
