
Summary of Easily control your iPod using Arduino
This article details a DIY project to control an iPod using an Arduino Uno via serial commands. It provides the necessary schematic, code, and parts list for building the interface, which can be powered by USB, battery, or a wall adapter. The setup includes voltage dividers to manage logic level differences between the 5V Arduino and 3.3V iPod signals, along with button inputs for user interaction.
Parts used in the iPod Control Project:
- 5x 1K ohm resistors
- 2x 1M ohm resistors
- 1x 12K ohm resistor
- 1x 1.5K ohm resistor
- 4x normally opened push buttons
- Wire
- Protoboard (optional)
- 3.5mm audio jack
- Arduino Uno or similar
- Recycled iPod Dock or PodBreakout
Easily control your iPod with Arduino using serial commands. This instructable includes the schematic, the code and some extra info; everything you need to make this work.
USB,battery or wall power supply powered.
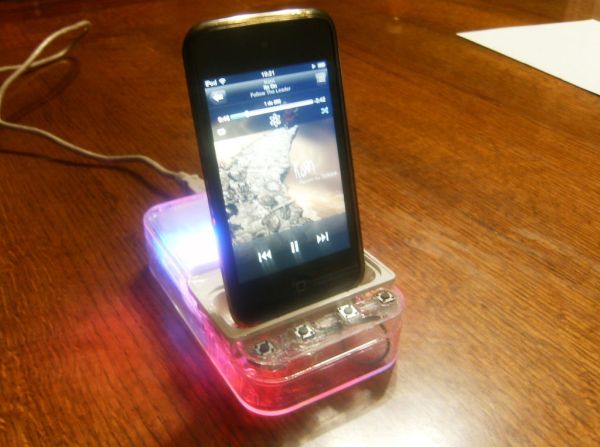
Step 1: What you need
Parts:
5x 1K ohm resistors
2x 1M ohm resistors
1x 12K ohm resistors
1x 1.5K ohm resistors
4x normaly opened push buttons
wire
protoboard (optional)
3.5mm audio jack
Arduino Uno or similar http://arduino.cc/
recycled iPod Dock or PodBreakout ( you can buy it here http://www.sparkfun.com/products/8295)
Step 2: Schematic
In the protoboard.
Arduino serial is 5v while iPod logic level is 3.3v. Because of it we need to add a voltage divider.
The two 1M ohm resistors are required to make a 500k to select the device.
The dectect cable is conected to iPod TX pin and use to let the arduino know when an ipod is conected.
Step 3: Code info
Basic comunication protocol. Dont worry, everything is in the code file.
My sources:
http://web.student.tuwien.ac.at/~e0026607/ipod_remote/ipod_ap_new.html
http://www.adriangame.co.uk/ipod-acc-pro.html
http://pinouts.ru/Devices/ipod_pinout.shtml

Step 4: Download the program
Here is the arduino code:
/*
By Daniel Solis
Licensed under Creative Commons Attribution-ShareAlike 3.0 Unported
http://creativecommons.org/licenses/by-sa/3.0/
You are able to modify this code as well as the hardware. If you
have a better code or make any changes that improve the performa
nce please share them
Analog pin 4: ipod TX(to detect ipod)
Analog pin 0: button detection
Digital pin 1: arduino TX
*/
3.5mm audio jack
Arduino Uno
For more detail: Easily control your iPod using Arduino
- How is the device powered?
The project supports power from USB, battery, or a wall power supply. - Why are two 1M ohm resistors used?
They are required to create a 500k resistance to select the device. - What voltage levels need conversion in this circuit?
Conversion is needed because Arduino serial is 5v while iPod logic level is 3.3v. - Which pin detects when an iPod is connected?
Analog pin 4 is used as the ipod TX input to detect the connection. - How does the system handle button detection?
Button detection is handled through Analog pin 0. - Where is the arduino TX signal connected?
The arduino TX connects to Digital pin 1. - Can users modify the provided code?
Yes, users are able to modify the code and hardware as they see fit. - What is the primary function of the 3.5mm audio jack?
The 3.5mm audio jack is a major component used to interface with the iPod.
