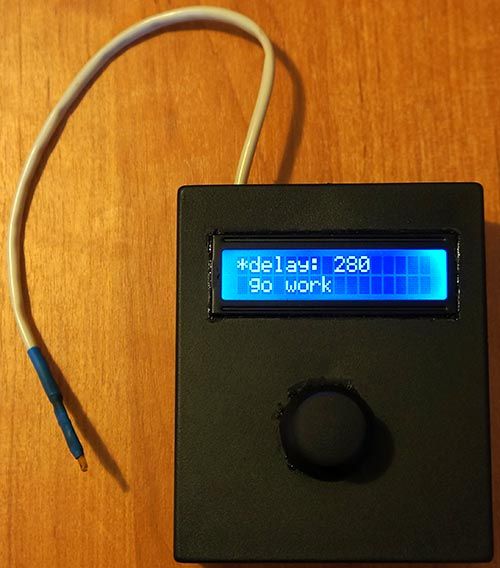
To built intervalometer you need:
Arduino Nano (or Arduino-compability). I used Nano V3
Serial LCD
Joystick Module
IR Led and resistor ~200 Ohm
Switch
Push Button
Plastic enclosure
Battery 9V
Step 2: Connection
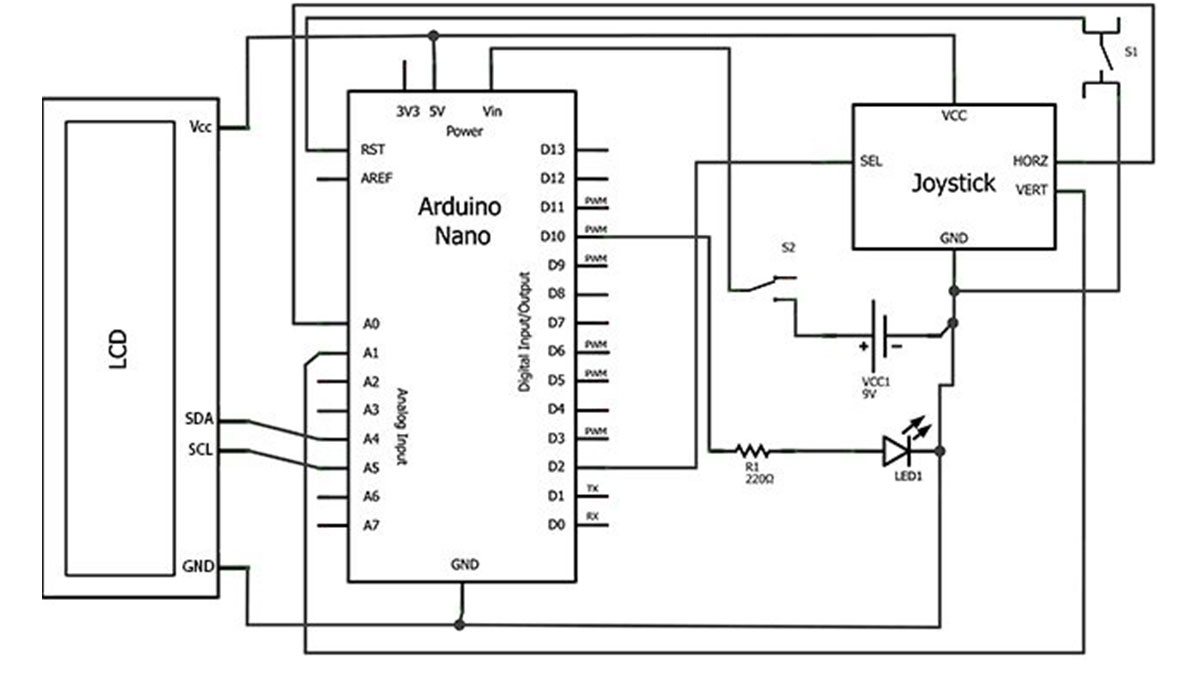
The joystick is connected by five wires: axis X (connect to Analog IN 0), axis Y (to Analog IN 1), axis/button Z (to Digital IN 2), supply Vcc and GND.

Step 3: Assembling
I use resistor ~200 Ohm, you can calculate it via on-line LED Calculator
Step 4: Software
To save battery life in the software has a function the LCD backlight off. When you press any key, the LCD backlight turn on.

Source Code:
// Article http://english.cxem.net/arduino/arduino6.php
// Version 1.0
#include “Wire.h”
#include “LiquidCrystal_I2C.h”
#define axis_X 0 // axis X of Joystic connected to Analog 0
#define axis_Y 1 // axis Y of Joystic connected to Analog 1
#define axis_Z 2 // axis-button Z of Joystic connected to Digital 2
#define pinIRLED 10 // IR LED
#define LEDgreen 13 // onboard LED
#define autoOFF 10 // autoOFF backlight LCD
LiquidCrystal_I2C lcd(0x27,16,2); // set the LCD address to 0x27 for a 16 chars and 2 line display
int value_X, value_Y, value_Z = 0; // axis values
int pos = 0; // current position (0 – delay, 1 – work)
int interval = 1; // pause between shots (sec)
int cntPict = 0; // shots count
boolean working = false;
unsigned long currentTime;
unsigned long TimeShot, TimeLCDOff;
void setup()
{
pinMode(axis_Z, INPUT); // Joystic button
pinMode(pinIRLED, OUTPUT); // IR LED
lcd.init(); // init LCD
lcd.backlight(); // turn LCD backlight ON
lcd.clear(); // clear LCD
show_menu(); // function show menu
currentTime = millis();
TimeShot = currentTime; // shots timer
TimeLCDOff = currentTime; // backlight timer
//Serial.begin(115200);
}
For more detail: Intervalometer for Sony NEX 5n
