Summary of 8 X 8 LED Pixel Art
This article details a DIY 8x8 LED pixel art display built from household items like an ice-cream tub and baking paper. The project uses 64 APA106 LEDs soldered in a zig-zag pattern, housed within a cardboard grid and diffused by baking paper. It features a custom Arduino setup and utilizes LCD Image Converter software to translate images into animation code for easy reprogramming.
Parts used in the 8x8 LED Pixel Art Display:
- 64 LEDs 5mm APA106
- Arduino UNO
- Ice-cream tub
- Baking paper
- LCD Image Converter software
- Hot glue gun
- Soldering iron
- Cardboard
- Switch
Create a display of 8×8 square pixels that can work independently. And to easily reprogram it to display different animations. Also I don’t have a 3D printer, so I needed to make it out of things around the house.
Supplies
- LEDs 5mm APA106 x 64
- Arduino UNO
- Ice-cream tub
- Baking paper
- LCD Image Converter software https://sourceforge.net/projects/lcd-image-converter
- Hot glue gun
- Soldering iron
Step 1:
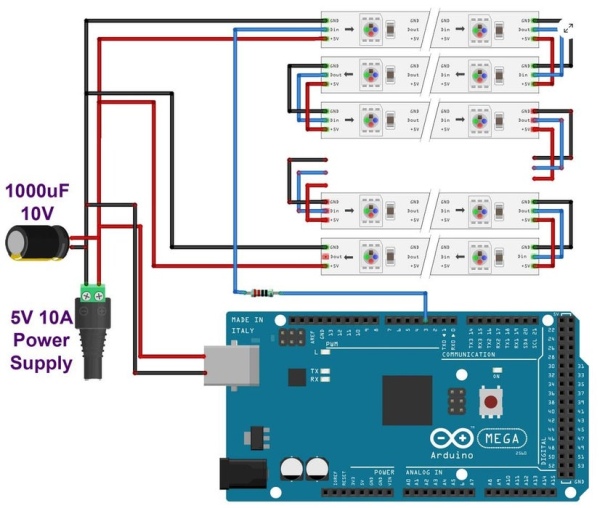
First I made a jig to hold the LED’s in place whilst I soldered them together. The LED’s are joined in a zig-zag left to right.
Step 2:
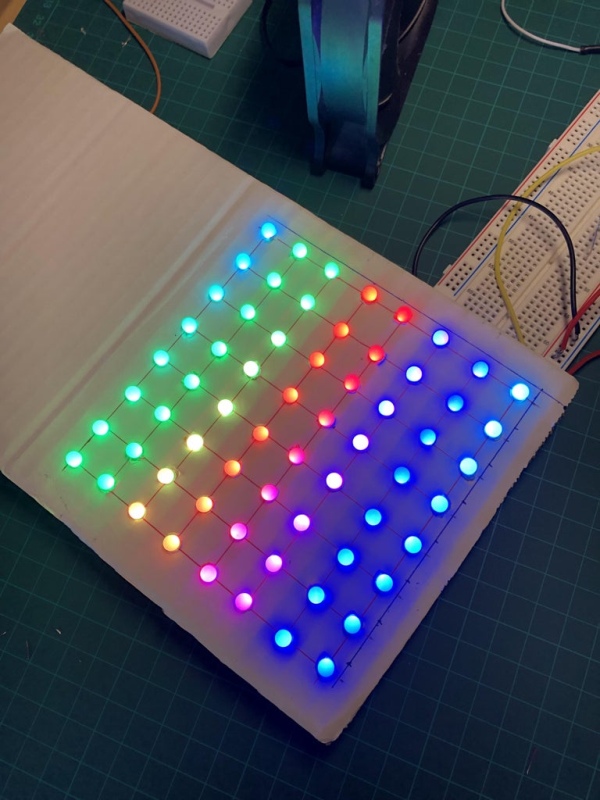
I then pushed the leds into a piece of cardboard to hold them in place once I was finished with the jig.
Step 3:
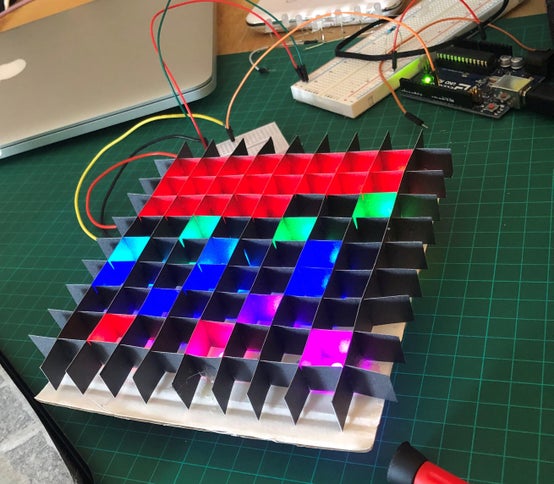
The most difficult part was making the square grill. I found some thin cardboard and managed to slot them together to create the squares. Then I used a glue gun to mount it onto the flat piece of cardboard. It actually worked a lot better then I expected. The squares are slightly wobbly but it give some character.
Step 4:
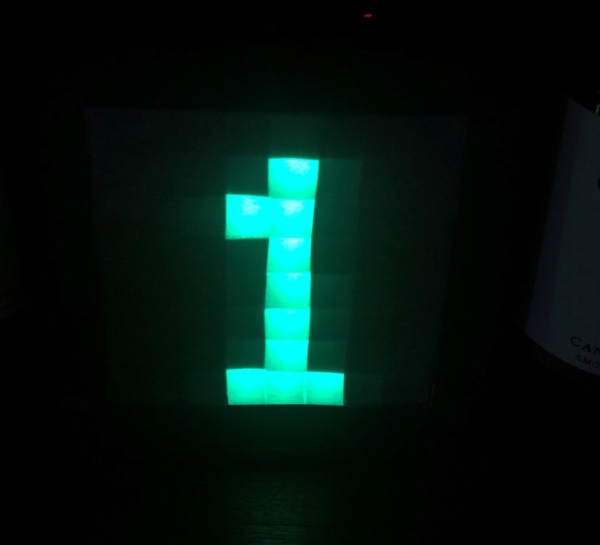
Next I needed to find a material to cover over the front of the squares. I found that baking paper diffused the light the best.
Step 5:
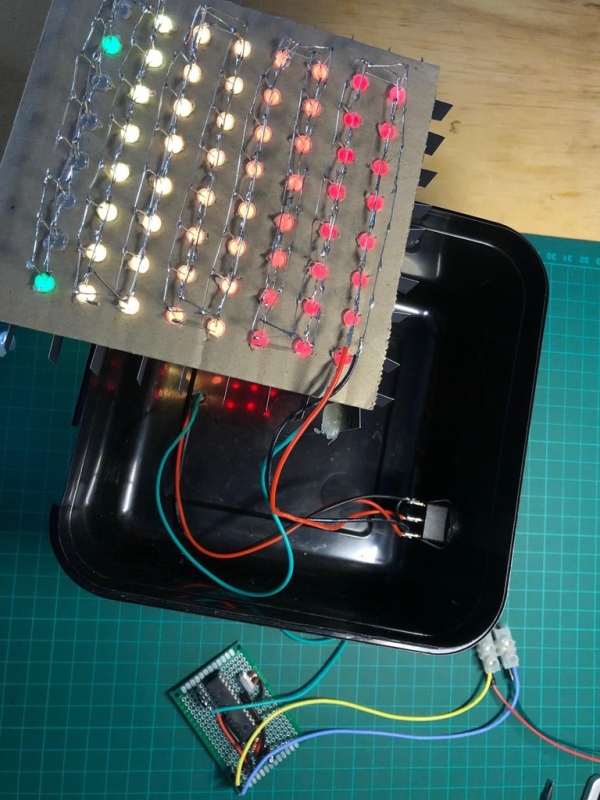
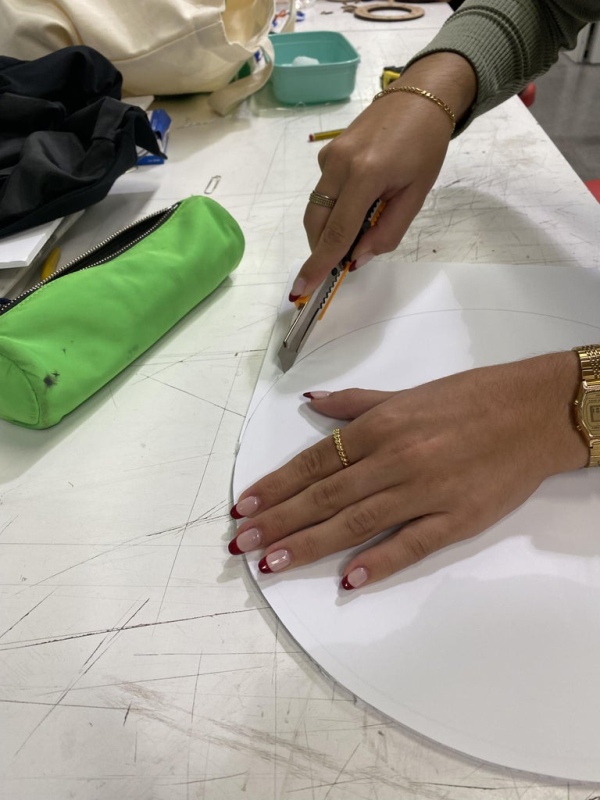
Now I just needed to find a box to put it all together. I found an empty black ice-cream tub and decided to use that. I cut a hole in the lid and stuck the baking paper over it. Also I mounted a switch on the top to turn it on and off and a hole drilled in the back to allow the 5v power wire to come in.
Step 6:
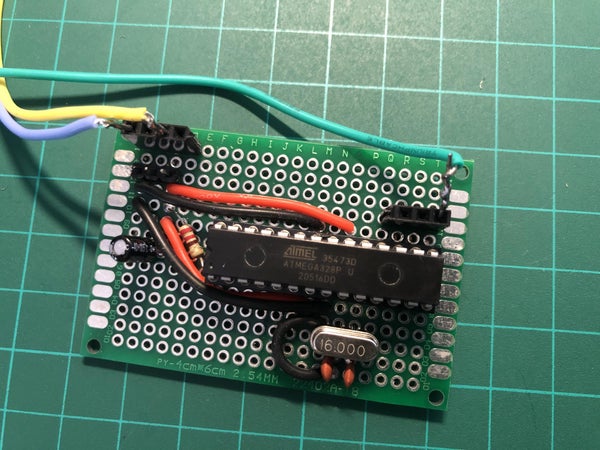
Also I made a DIY arduino that I can just keep inside the box, I’ll document how I made that another time. Now it is a self contained unit ready to be programmed with animations.
Step 7:
The next part is to program the arduino. Brainy bits here can explain it much better than me.
https://www.brainy-bits.com/post/making-an-arduino-animated-frame-with-256-rgb-leds
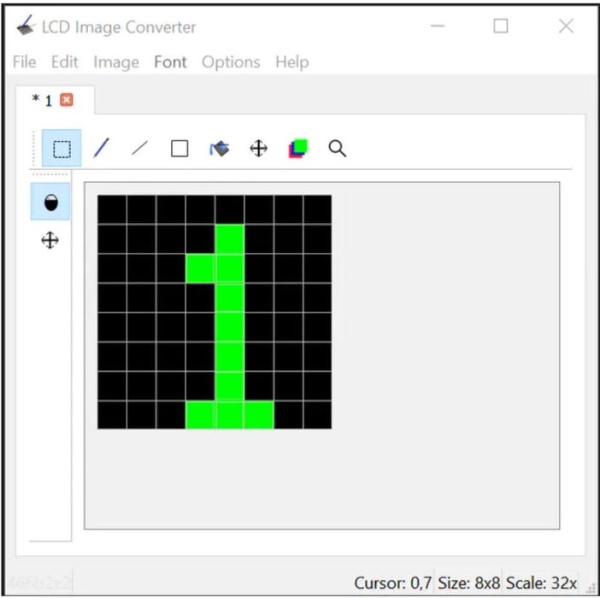
Basically we use some free software called LCD Image Converter to covert the pixel colours into code that the arduino software will understand. First open an image that you want to display that is the correct size, in our case 8 pixels by 8 pixels.
Can download the software from here https://sourceforge.net/projects/lcd-image-converter
Then click Options – Convert. Then Image tab and change ‘Block size’ to 24bit
Then Prepare tab – change Type to Color
Then tick ‘Use custom script’ and paste the following..
for (var y = 0; y < image.height; y++)
{
if ( y % 2 == 0)
for (var x = 0; x < image.width; x++)
{
image.addPoint(x, y);
}
else
for (var x = image.width - 1; x >= 0; x--)
{
image.addPoint(x, y);
}
}
Then click Show Preview, copy what is in the box and then paste it into your ardunio code. Each pixel will now show the correct colour for your image.
Step 8:
The code for the project is in this link.
Code:
https://github.com/MPG28/8×8-LED-Pixel.ino
Source: 8 X 8 LED Pixel Art
- How do I convert images for this display?
Use LCD Image Converter software to change image block size to 24bit and type to Color, then paste the generated script into the Arduino code. - What material works best to diffuse the light?
Baking paper is identified as the material that diffuses the light the best. - How are the LEDs arranged on the board?
The LEDs are joined in a zig-zag pattern from left to right. - Can I reprogram the display for different animations?
Yes, the design allows for easy reprogramming to display different animations using custom code. - What container was used for the project?
An empty black ice-cream tub was used as the box to house the components. - How is the power supplied to the unit?
A hole is drilled in the back of the tub to allow the 5v power wire to enter. - Does the square grill need to be perfectly rigid?
No, the squares are slightly wobbly but this adds character and still functions well. - Where can I find the source code for the project?
The code is available at the GitHub link provided in the article titled 8 X 8 LED Pixel.ino.