The 4Duino Polling Machine is an inquiry project that involves two or more people and has implemented the ability to send and receive data on both ends.
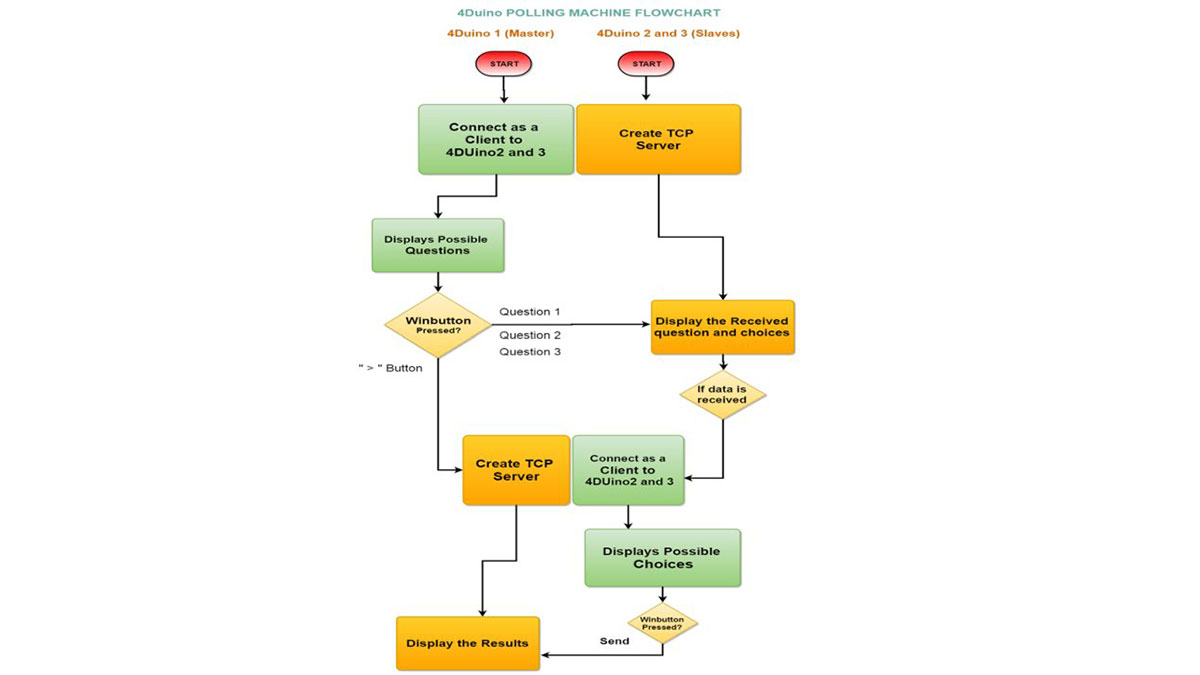
The Polling Machine Project works by sending and receiving Questions and Answers (from the Choices) in the form of strings. First, the Master 4Duino (Client) will select the desired question and will send the question with the choices on the 4Duino Slaves (Server).
Then the Master and 4Duino Slaves will switch roles and will become Master (Server) and Slave (Client) respectively. The Master will then proceed to tally the button choices from the slaves.
This project demonstrates the Wi-Fi capabilities of the 4Duino to establish a TCP communication. This is shown by creating a 4Duino Server and multiple 4Duino Clients, and its main function is to poll in votes from the 4Duino clients.
The main principle to learn in this project is using and communicating with the ESP8266 Wi-Fi module. The 4Dunino code of this project is showcase the use of ESP8266 library and AT commands, a programming command language for the ESP8266 to implement the internet connectivity protocols to the 4Duino modules.
COMPONENTS
- 3 x 4Duino Module
- 3 x microUSB cable
- 3 x uSD card
How it works
IMPLEMENTATION
Step 1: Build
4Duino has an inbuilt ESP8266 Wi-Fi module. Hence, there is no external circuitry required for this project.
Step 2: Program
Workshop 4 – 4Duino Basic Graphics environment is used to program this project. (The same could be implemented in the latest Arduino IDE)
This project requires the Arduino IDE to be installed as Workshop calls the Arduino IDE for compiling the Arduino sketches. The Arduino IDE however is not required to be opened or modified to program the 4Duino.
Open these files using Workshop 4.
Note: Download the project code here.
Step3: Comms Port
Connect the 4Duino’s to the PC using µUSB cable.
Then navigate to the Comms tab and select the Comms port to which the 4Duino’s are connected.
Step4: Compile and Upload
Finally, go back to “Home” tab and now click on the “Comp’nLoad” button for each 4Duino.
Step 5: Insert µSD card
After uploading the program in to the 4Duino, it will try to mount the µSD card. If the µSD card is not present it will prints an error message. All you need to do is insert the µSD card you saved the image files into the 4Duino.
Repeat the above 3 steps for the 2 slaves with their respective 4Duino code.
DEMONSTRATION
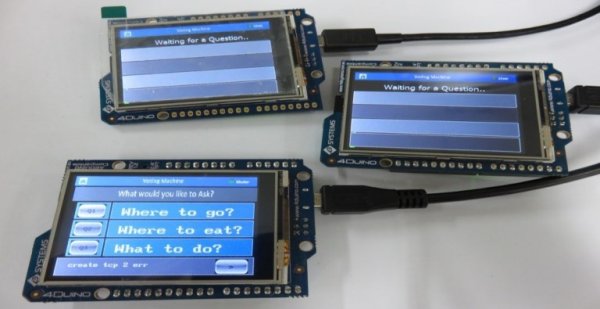
Form 1 when loaded to the 4Duinos
Image shows the Slave receiving a question from the Master and processing the received data.
“Waiting for 4Duino” indicates that the Master is still not in Server Mode
You can now choose” indicates that the Master is in Server Mode and ready to receive replies.
Form 2 of 4Duino Master showing the tally of the received data.
Read more: Voting Machine featuring 4Duino-24