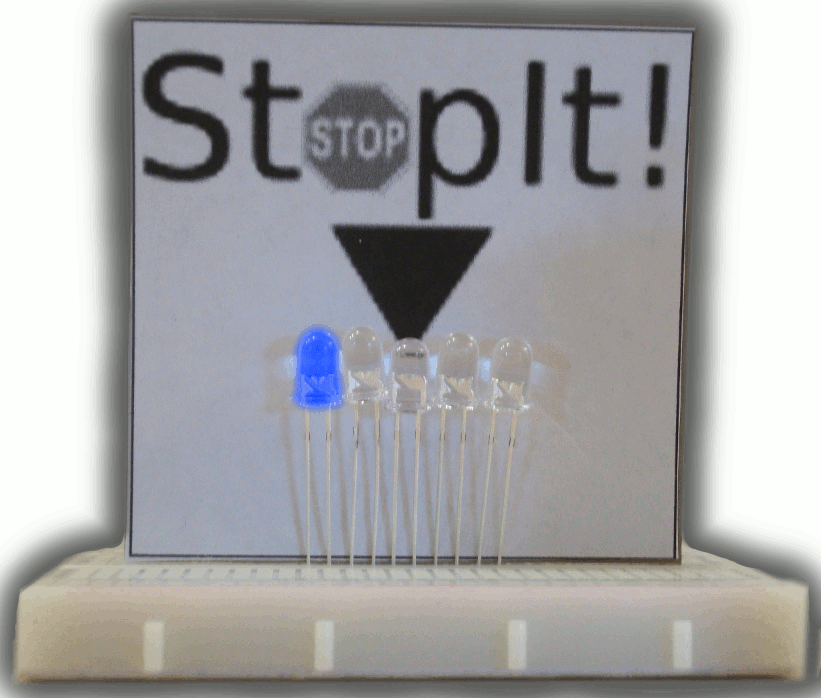
This project was inspired by this video from YouTube and the Pendulum Challenge Kit from Makershed.com. Its a simple game consisting of five LED lights and one pushbutton switch. The LEDs flash in a sequence and the player must press the button when the middle LED light is lit. The speed at which the lights flash increases until the player presses the button at the wrong time.
Don’t forget to rate this ‘ible!
Ok, lets go!
Use your soldering iron to attach jumper wires to the button. Make sure you have strong connections that are not touching.
Program the Arduino board
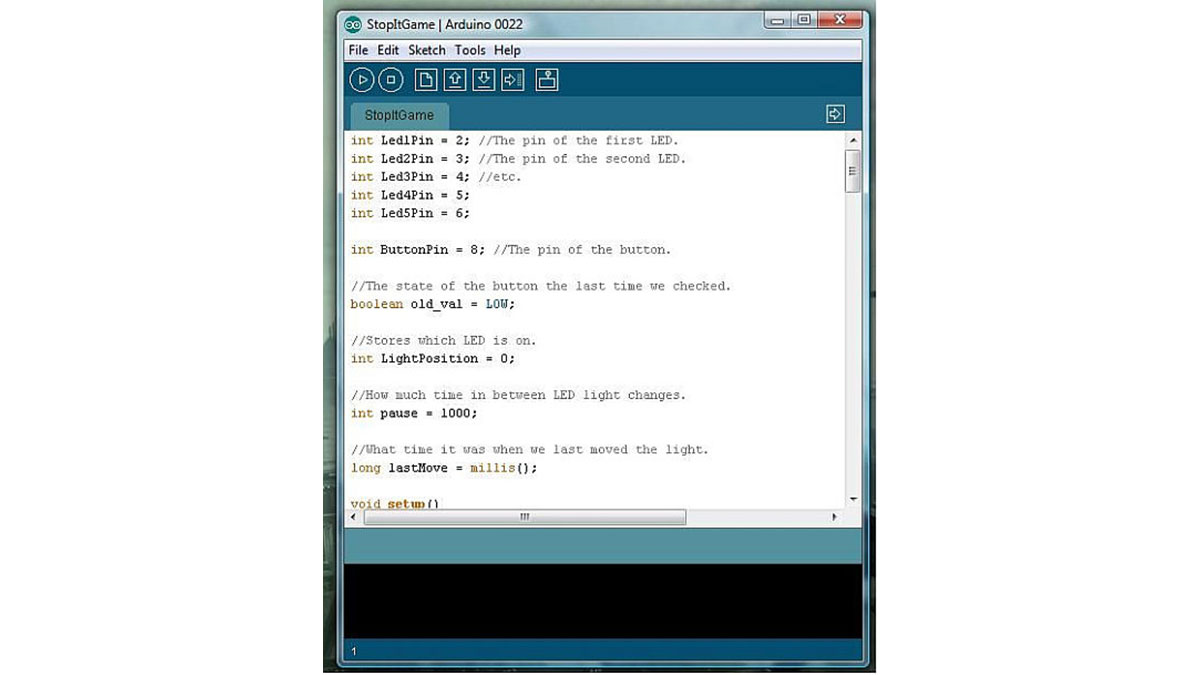
Download the attached Arduino Sketch file.Plugin you Arduino to your computer.
Open the sketch in the Arduino software.
Upload the sketch to your Arduino.
Build the circuit
Power and ground:
-Run a jumper wire from arduino “5V” pin to breadboard “+” rail.
-Run a jumper wire from arduino “GND” pin to breadboard “-” rail.
LEDs:
-Insert the LEDs into your breadboard as shown, with the longer leads farthest to the left. The red LED goes in the middle.
-Run wires from the each breadboard row with a short LED lead in it to the “-” breadboard rail.
-Run wires from the each breadboard row with a long LED lead to arduino pins 2 through 6.
Button:
-Run one of the buttons wires to the breadboard’s “+” rail.
-Run the second wire from the button to an empty breadboard row.
-Run a wire from the same row on the breadboard to arduino pin 8.
-Run a resistor from that row to the breadboard’s “-” rail.
Make sure your setup matches the pictures.
-Arduino Uno (This controls the LEDs and detects when the button is pressed.) -Can be purchased form makershed.com
-USB A-B cable (Sometimes called a printer cable.) -Should come with your arduino.
-Solderless breadboard (half sized) -Can be purchased from makershed.com
-5 Leds (Four of one color, and one of another.)
-Pushbutton switch -I bought mine at Radioshack
-small resistor (more if you are worried about burning your LEDs.)
-At least 15 or so breadboard jumper wires –Can be purchased from makershed.com
-A small amount of thin cardboard. I used empty cereal box.
Tools:
-Soldering Iron
-Electrical solder
-Computer
For more detail: StopIt! LED Game (powered by arduino)