hey guys this is my first arduino project plz comment how u feel.
Step 1: Things u need
As this is easy project for beginner’s so parts are also simple
Parts:
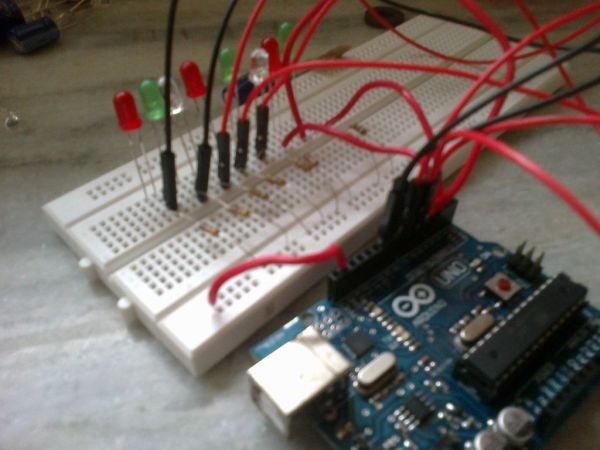
1- Arduino uno or any other board will work
1-Beardboard
9- jumper wires or wires will also do
8 -leds any color u like i used 3 red, 3 green and 2 blue
8- 1k resistors
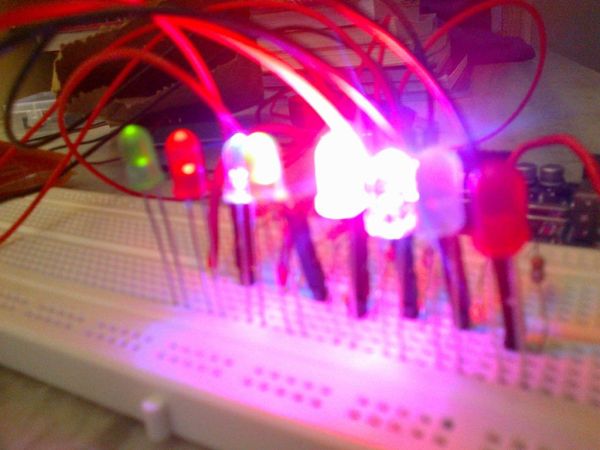
Step 2: Placing the leds and wiring
In this step u have to place the leds on the bread board i have kept the positive wire on the right side .
Next wire them as shown in
Step 3: Uploading the code
//LED Pin Variables
int ledPins[] = {2,3,4,5,6,7,8,9}; //An array to hold the pin each LED is connected to
//i.e. LED #0 is connected to pin 2, LED #1, 3 and so on
//to address an array use ledPins[0] this would equal 2
//and ledPins[7] would equal 9
/*
* setup() – this function runs once when you turn your Arduino on
* We the three control pins to outputs
*/
void setup()
{
//Set each pin connected to an LED to output mode (pulling high (on) or low (off)
for(int i = 0; i < 8; i++){ //this is a loop and will repeat eight times
pinMode(ledPins[i],OUTPUT); //we use this to set each LED pin to output
} //the code this replaces is below
/*
* loop() – this function will start after setup finishes and then repeat
* we call a function called oneAfterAnother(). if you would like a different behaviour
* uncomment (delete the two slashes) one of the other lines
*/
void loop() // run over and over again
{
oneAfterAnotherNoLoop(); //this will turn on each LED one by one then turn each off
}
void oneAfterAnotherNoLoop(){
int delayTime = 100; //the time (in milliseconds) to pause between LEDs
//make smaller for quicker switching and larger for slower
digitalWrite(ledPins[0], HIGH); //Turns on LED #0 (connected to pin 2 )
delay(delayTime); //waits delayTime milliseconds
digitalWrite(ledPins[1], HIGH); //Turns on LED #1 (connected to pin 3 )
delay(delayTime); //waits delayTime milliseconds
digitalWrite(ledPins[2], HIGH); //Turns on LED #2 (connected to pin 4 )
delay(delayTime); //waits delayTime milliseconds
digitalWrite(ledPins[3], HIGH); //Turns on LED #3 (connected to pin 5 )
delay(delayTime); //waits delayTime milliseconds
digitalWrite(ledPins[4], HIGH); //Turns on LED #4 (connected to pin 6 )
delay(delayTime); //waits delayTime milliseconds
digitalWrite(ledPins[5], HIGH); //Turns on LED #5 (connected to pin 7 )
delay(delayTime); //waits delayTime milliseconds
digitalWrite(ledPins[6], HIGH); //Turns on LED #6 (connected to pin 8 )
delay(delayTime); //waits delayTime milliseconds
digitalWrite(ledPins[7], HIGH); //Turns on LED #7 (connected to pin 9 )
delay(delayTime); //waits delayTime milliseconds
1-Beardboard
For more detail: How to control 8 leds using Arduino UNO