In this article you will learn how to make a digital clock using Arduino and the DS1307 RTC IC. What is DS1307 IC actually? Well, it is a Real Time Clock (RTC) IC that is simple to use, low cost and easy available. The IC basically is able to count the date and time accurately and it will continue its counting if the backup battery – coin cell battery is there although the mainsupply to the IC is cut off.
Part 1 : Demo Video
This video basically just show on a basic role of a digital clock that can display date, time and day of the week.
Part 2 : Hardware
In this part, I will roughly explain about how you can get started to have your own DIY digital clock!
Step 1
The hardware that you need for this are :
- DS 1307 RTC IC x 1 – datasheet
- 32.768kHz Quartz Crystal X 1
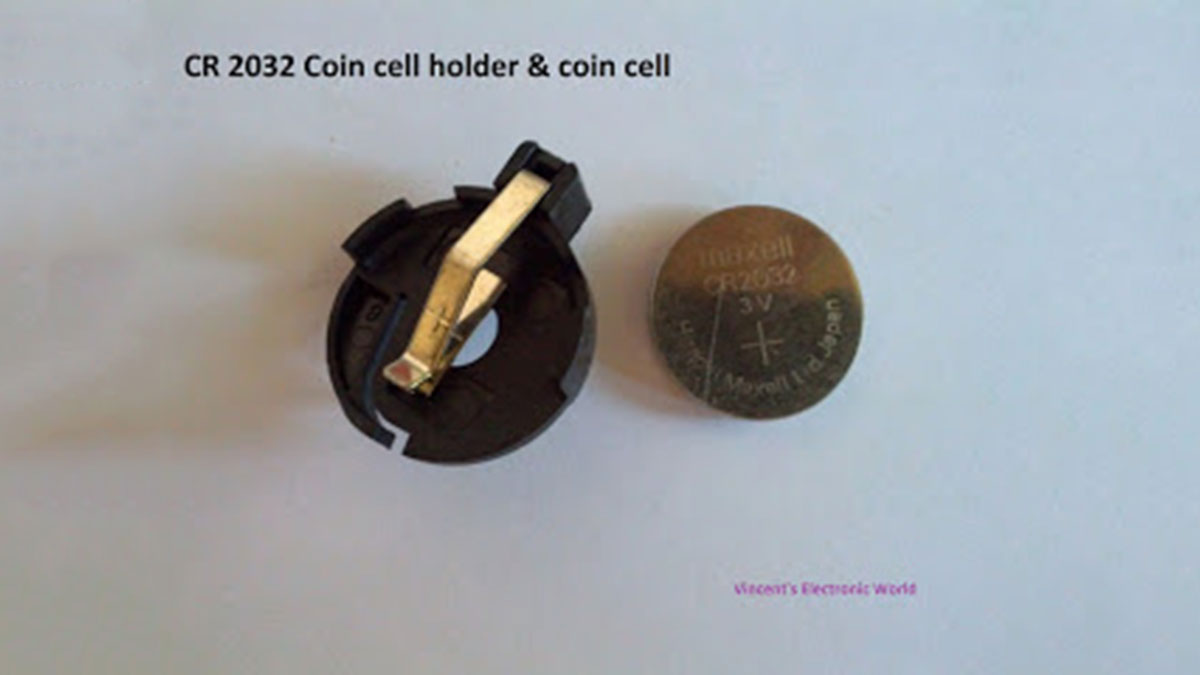
- Coin cell CR2032 & the holder
- 10k resistor x 2
- LCD board x 1
- Arduino x 1
This is the backup battery(CR2032) and its holder. Easily available in any electronic store.
Step 2
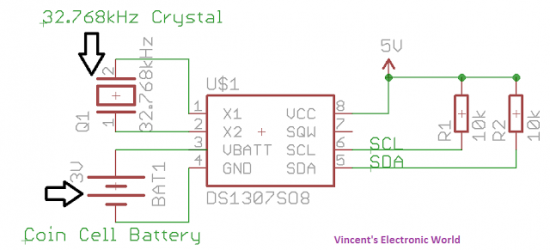
Ok, let’s get started. First of all, connect the DS1307 circuit as below:
So, it is not necessary to use coin cell battery as the backup battery. You can use any type of battery with volatge range from 2.0V to 3.5V as shown above. However, we choose to use coin cell battery as it is small and easy to carry/install.
Warning!
Remember not to connect supply voltage of more than 5.5V or else you will get the chip burnt.
Two 10k pull up resistor s are at the SDA and SCL pins. This is due to the reason that DS1307 communicates through I2C interface.
- SDA – Arduino pin A4
- SCL – Arduino pin A5
Next, wire up the LCD according to the schematic below:
The R3 value normally to be 220 ohm/330 ohm as a current limiting resistor.
Part 3: Software
The software required: Arduino IDE
There is a pretty easy to use library for this purpose. The name of the library is RTClib which you can download it here: RTClib
This library is easy to use and able to get the date, time and day of the week accurately. I bet you will like it when you try it ![]()
After that, I uploaded the below coding to my arduino UNO. What this code do is basically just set the time and date according to when the sketch is compiled. It might have some slight delay. Then the set date, time and day of the week will be displayed on a LCD screen. In my case, I am using a 20 x 4 LCD screen.
Part 4: Pictures

Part 5: Problems Encountered
Problem 1
When I first trying the new library, the example given only can display date and time and it does not mention about how to display the day of the week. So I started to search on the web and ask in arduino forum about this. You can refer to my thread for more discussions.
So, after some research done in the net, I have finally come to a conclusion. To display day of the week, you can use the below syntax:
- int dayofweek = now.dayOfWeek();
- switch(dayofweek){
- case 1:
- lcd.print(“Monday”);
- break;
- case 2:
- lcd.print(“Tuesday”);
- break;
- case 3:
- lcd.print(“Wednesday”);
- break;
- case 4:
- lcd.print(“Thursday”);
- break;
- case 5:
- lcd.print(“Friday”);
- break;
- case 6:
- lcd.print(“Saturday”);
- break;
- case 0:
- lcd.print(“Sunday”);
- break;
The syntax ‘ now.dayOfWeek();’ will give the day of the week in number form, like 0 for sunday, 1 for monday, 2 for tuesday and so on. So, by having the above coding, you can actually convert the output number to string of character for the day of the week. For example when the output number of ‘ now.dayOfWeek();’ = 0, it will display Sunday on the LCD. So as you can see, Sunday is the first day of each particular week.
For more detail: Digital Clock with Arduino and DS1307