The Wireless Pulse-Rate monitor is a conceptual project made for hospitals and clinics, its main function is to minimise the time that nurses or doctors need to visit each patient in a hospital. Usually, Doctors and nurses visit each patient to check vital signs, by using this project, they can monitor the patient’s vital signs even without visiting them, and this also allows them to remotely monitor the patient even outside the nurse’s station or outside the hospital.
As an added recommendation, users can also improve this project by adding more sensors such as body temperature sensor, respiration rate and even dextrose weightier to check the amount of the dextrose left.
HOW IT WORKS
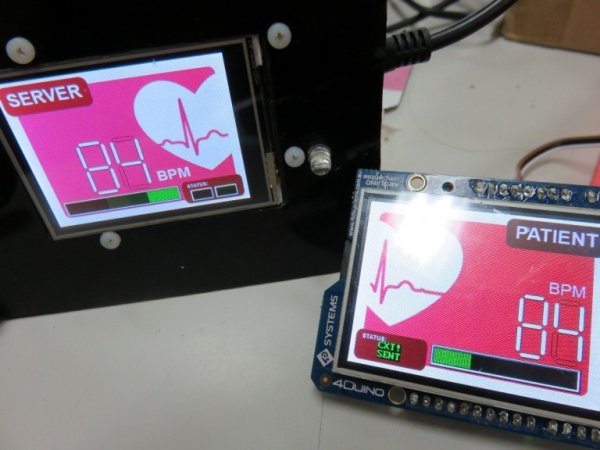
In this project, users can mount the 4duino (Patient-Client) onto a patient’s room, bed or wall, which will display the readings from the pulse-rate sensor. Calculations and added instructions will be handled by the PICASO controller on-board our 4Duino, then finally sent to another 4Duino (Doctor/Nurse – Server) which is in the possession of the nurse or doctor. Doctors or nurses can perform their other duties or attend to other patients rather than staying in the nurse’s station and monitor their vital signs.
Users can further improve this project by projecting the data received into a web browser and record the pulse-rate. Another improvements that can be added to the project is installing other sensing devices that will detect respiration rate, blood pressure or body temperature to ensure the status of the patient’s vital signs.
Components
- 2x 4Duino-24
- Pulse-rate sensor
- 2x uSD Card
- 2x microUSB programming cable
Implementation
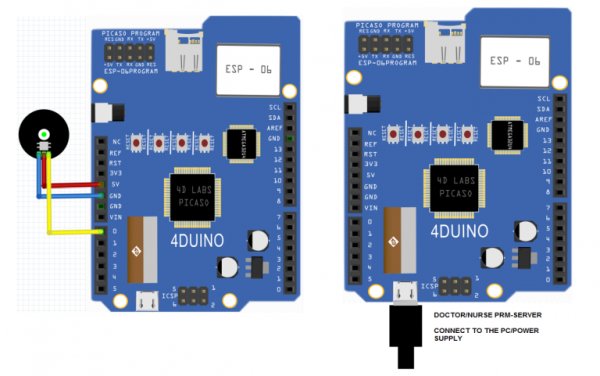
Step 1: Build
Build the circuit as shown in the following diagram and schematic.
Step 2: Program
Workshop 4 – 4Duino Basic Extended environment is used to program this project. (The same could be implemented in the latest Arduino IDE)
This project requires the Arduino IDE to be installed as Workshop calls the Arduino IDE for compiling the Arduino sketches. The Arduino IDE however is not required to be opened or modified to program the 4Duino-24.
Open these files using Workshop 4.
Note: Download the code here.
Step 3: Comms Port
Connect the 4Duino to the PC using uUSB cable.
Then navigate to the Comms tab and select the Comms port to which the 4Duino connected.
Read more: Wireless Pulse Rate Monitor featuring 4Duino-24