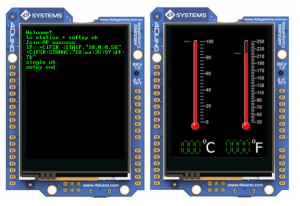
In this project we will quickly create a ‘temperature monitor’ that measures the ambient temperature of a room or an outdoor space. The temperature is measured by TMP35 temperature sensor and is displayed on the 4Duino screen. The data is also sent to Thingspeak IoT platform which enables data logging over a period of time.
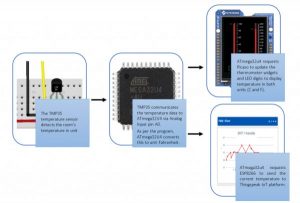
How it works
Components
- 4Duino
- TMP 35 Temperature sensor
- Bread Board
- Jumper cables
- µSD cable
- Micro USB cable
Implementation
Step 1: Build
Build the circuit as shown in the following diagram and schematic.
Create yourself a ThingSpeak account at https://thingspeak.com
- Create a new channel
- Get the channel API Key under channel settings / API Keys. This key will be later added in to your 4Duino code.
- Setup your Channel fields as below
Step2: Program
Workshop 4 – 4Duino Extended Graphics environment is used to program this project.
This project requires the Arduino IDE to be installed as Workshop calls the Arduino IDE for compiling the Arduino sketches. The Arduino IDE however is not required to be opened or modified to program the 4Duino.
Open this file using Workshop 4.
Note: Download the project file here.
Simply change the SSID and the PASSWORD to suit your router, on both the program.
Enter your API key for the channel you wish to use.
Step3: Comms Port
Connect the 4Duino to the PC using µUSB cable.
Then navigate to the Comms tab and select the Comms port to which the 4Duino connected.
Step4: Compile and Upload
Finally, go back to “Home” tab and now click on the “Comp’nLoad” button.
The Workshop 4 IDE will prompt you to insert a µSD card to the PC in order to save the widget images. Insert µSD card, select the appropriate drive and press button “OK”.
If the µSD card has the widget images you can click button “No Thanks”.
Read more: WiFi Temperature Sensor featuring 4Duino-24


