This simple system allows web based remote control of a swimming pool pump and heater, or any device that be switched with simple relays. It uses a Raspberry Pi as the main controller and web server. It also uses a remote thermometer run by an Arduino at the pool, powered by a battery and a solar panel. Two small XBee radio units supply the data link between the pool thermometer and the main controller.
I hacked into the physical pool controller timer unit to tap into the relay driver circuits, low voltage/low power Darlington transistor arrays which control the high power main pump relays. I control the heater (a Laars Lite 2, 400,000 BTU unit) via the “Fireman’s Switch” control line that allows for a remote kill switch in series with the other safety fuses. Then I set the thermostat to maximum. That way, as long as the pump is on, I can control whether or not the heater is on as well. If you don’t know what you’re doing, don’t even think about doing a project like this with a pool pump circuit and heater. You’ll void any warranty or worse…get a professional to install a proper remote system. Think of this as an outline for you to do something else that is simple and safe. That said, this is a wonderful way to control things in your house by your cell phone or laptop when you’re away.
Step 1: Parts Required
- Raspberry Pi, version 2 running Raspbian OS version “Jessie” or newer
- Arduino (Uno, Nano or “barebones” –make your own low power with ATMega328 chip)
- LT1529 3.3 low-power voltage regulator if you want to make a low power Arduino
- FTDI cable for programming the barebones Arduino chip, or just get a regular Arduino unit that has its own FTDI programming circuit onboard…but it will run your battery down faster.
- Solar panel, 6 volt unit. Not a 5V unit.
- Lipo battery, 3.7 volt, 4000mAH (you may get by with a smaller capacity battery)
- Lipo charger board (Adafruit)
- 5 volt buck/boost unit (Adafruit)
- Two Xbee radio units, Series 2 (Digikey)
- Breakout socket board for one Xbee, and another XBee socket with a USB type A (rectangular) connector
- Two 5 Volt relays of the type used with Arduino or Raspberry Pi projects
- Wifi USB dongle (not necessary if using Raspberry Pi 3 — it’s onboard)
- Power supply, 5V (at least 2 amps) to supply the Raspberry Pi, Wifi dongle, relays and Xbee radio
- Waterproof thermometer, one-wire type, must be a Dallas DSB-20 or equivalent
- Tupperware containers to keep the rain out
- You can find most of these things on eBay, Amazon, Adafruit, Sparkfun or any number of other sites.
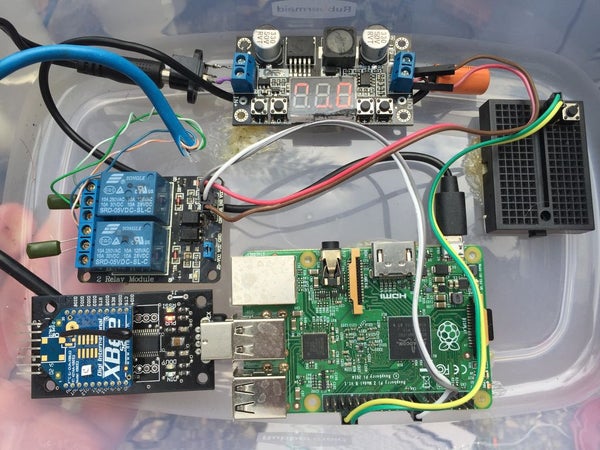
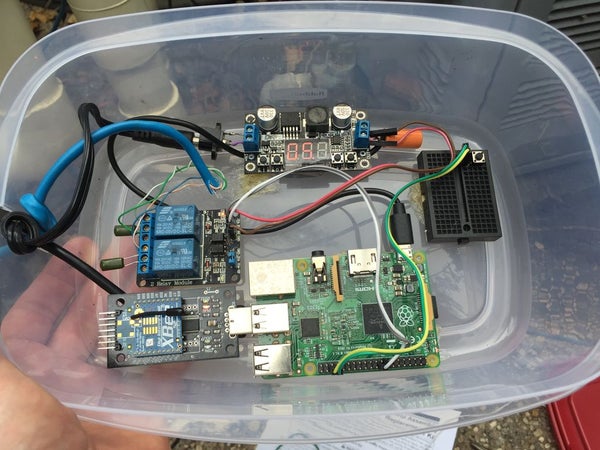
Step 2: Raspberry Pi Main Controller

I use a Raspberry Pi 2, running Raspbian version “Jessie.” It runs an Apache2 web server. By using a Wifi dongle plugged into one of the USB ports you can connect it to your local network and control the pool pump and heater with a simple html interface. By configuring port forwarding on your router you can access the controller remotely through your cell phone. Use a port that your ISP doesn’t block, and forward all html requests to port 80 on the Raspberry Pi on your internal network.
The Raspberry Pi drives two 5 volt relays directly from two pins on the GPIO header. These little relays have opto-isolators on the input side, so they work directly with the low power pins on a Raspberry Pi. The temperature data (4-digit numeric strings with a decimal point) are received through the XBee which is mounted on a USB adapter.
Step 3: Remote Thermometer Using Arduino and XBee
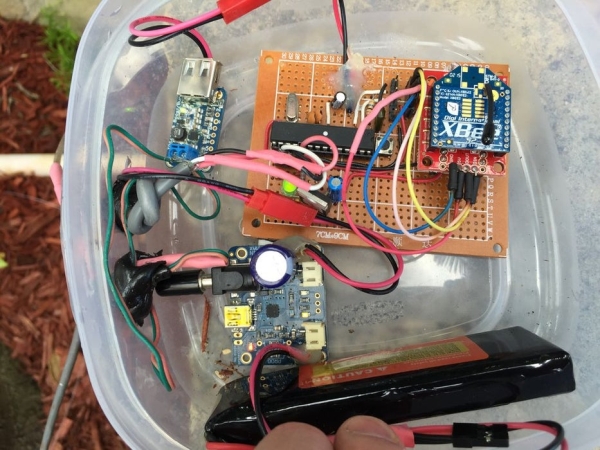
The thermometer is a standard one-wire Dallas DSB-20 unit. While it’s easy to connect this directly to the Raspberry Pi (there’s a one-wire library that comes with the Raspberry Pi) it may not work if the data line runs more than 30 feet, and besides, I don’t want anything in the pool that might short to the power line. You could use an opto-isolator to separate the lines, but a short might still occur. I prefer the safety of a battery operated thermometer in the pool. I use two little XBee radio units to send the data to the Raspberry Pi. A low-power Arduino takes the data from the DSB-20 thermometer and feeds it to the XBee transmitter. There is an Arduino library for the one-wire DSB-20.
Waterproof versions of the Dallas thermometer are easy to find as are all of the parts in this project. It’s important to note that this is a digital device that sends a data stream down a single wire. In reality it uses three wires–one for data, one for power (3 to 5.5V) and one for ground. The data line needs a 4.7k ohm pull-up resistor connected across to the positive power line.
Step 4: Configuring Raspberry Pi

The Raspberry Pi can be connected to a monitor with the HDMI connector and the mouse and keyboard through the USB connectors. Before you set up the Wifi you can use an Ethernet connection to your router. This is important for setting up the Raspberry Pi and getting updates and any software that may not come with the initial operating system on your micro-SD card. (Once it’s configured the unit becomes “headless”–without a monitor.) At this point I’m assuming you’ve booted your Raspberry Pi with a downloaded operating system (Raspbian for a Raspberry Pi 2 in my case). Now connect the Raspberry Pi to a USB Wifi dongle if you have a Raspberry PI 2. (The Raspberry Pi 3 has built-in Wifi.) Make sure you’re using the later “Jessie” release of the operating system for a Raspberry Pi 2. It’s much better at maintaining a stable Wifi connection than the earlier “Wheezy” version. Also, you’ll probably want to give it a static IP address that won’t be changed by your router from week to week. A good tutorial on this is found here.
Once you’ve got Wifi running you can access the Pi remotely using SSH and a command-line interface. A good tutorial is here.
Now you need to have a webserver running on your Raspberry Pi. This involves a set of four packages called LAMP (Linux, Apache, MySQL, PHP) and that’s easy to do. Here is one tutorial.
I use some very basic html pages to connect with simple Python and shell scripts that check on the temperature and determine whether the pool heater and/or pool pump should be on.
Read more: Web-Based Pool Controller W/ Raspberry Pi, Arduino, Xbee and Digital Thermometer