
Summary of Using Mozzi Library with 5 potentiometers using arduino
This project uses the Mozzi library to enable an Arduino to generate complex, real-time sound and allows manipulation via five 100K potentiometers and audio output. It covers installing Mozzi, wiring potentiometers with male/female headers for removable connections, wiring an audio jack for output, and suggests using a proto shield for cleaner power/ground distribution.
Parts used in the Arduino Sound Project:
- Arduino
- Mozzi Library (software)
- 100K Potentiometers - x5
- Male headers
- Female headers
- 1/8" Audio Jack
- Audio Cable
- Speaker
- Wires (red, black, white)
- Soldering tools
Getting Started
The goal of this project was to create filters and controls to that can manipulate sound that is being generated through an Arduino. Normally Arduino can only generate simple tones that are not useful if you are trying to achieve complex sounds and do sound manipulation. In order to do this project Mozzi library was used. This library helps Arduino to create complex sounds and also have real time input. Mozzi does all the job for you in the background with a non-blocking code that allows you to have multiple inputs at the same time.
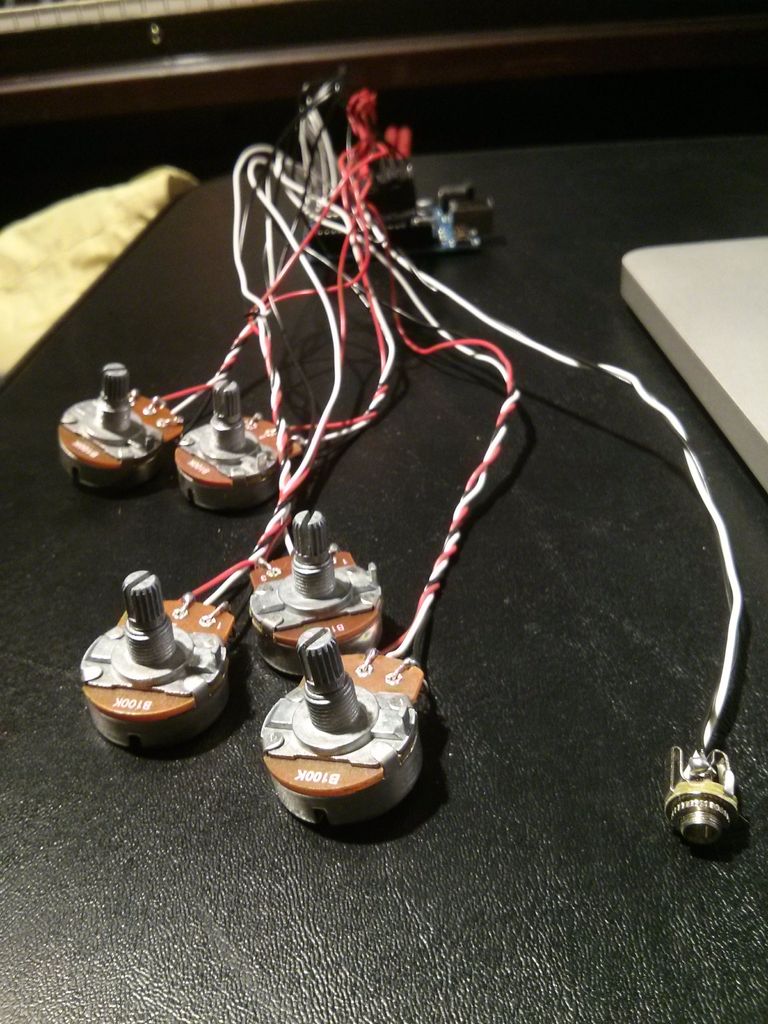
What you need
- Arduino
- Mozzi Library
- 100K Potentiometes – x5
- Male headers
- Female headers
- 1/8″ Audio Jack
- Audio Cable
- Speaker
What is an Arduino?
Arduino is a tool for making computers that can sense and control more of the physical world than your desktop computer. It’s an open-source physical computing platform based on a simple microcontroller board, and a development environment for writing software for the board.
Arduino can be used to develop interactive objects, taking inputs from a variety of switches or sensors, and controlling a variety of lights, motors, and other physical outputs. Arduino projects can be stand-alone, or they can communicate with software running on your computer (e.g. Flash, Processing, MaxMSP.) The boards can be assembled by hand or purchased preassembled; the open-source IDE can be downloaded for free.
For more information check out:
Step 1: Setting Up Mozzi Library
What is Mozzi?
Currently your Arduino can only beep like a microwave oven. Mozzi brings your Arduino to life by allowing it to produce much more complex and interesting growls, sweeps and chorusing atmospherics. These sounds can be quickly and easily constructed from familiar synthesis units like oscillators, delays, filters and envelopes. You can use Mozzi to generate algorithmic music for an installation or performance, or make interactive sonifications of sensors, on a small, modular and super cheap Arduino, without the need for additional shields, message passing or external synths.
Check out Mozzi:
http://sensorium.github.io/Mozzi/
Download Mozzi Library:
http://sensorium.github.io/Mozzi/
Setting Up
Once you download the Mozzi library, unzip the file and put it in your Arduino➞libraries folder. Quit Arduino (if open) and reopen it. You should now be able to see Mozzi in the list under Arduino➞Sketch➞Import Library and also under the examples.
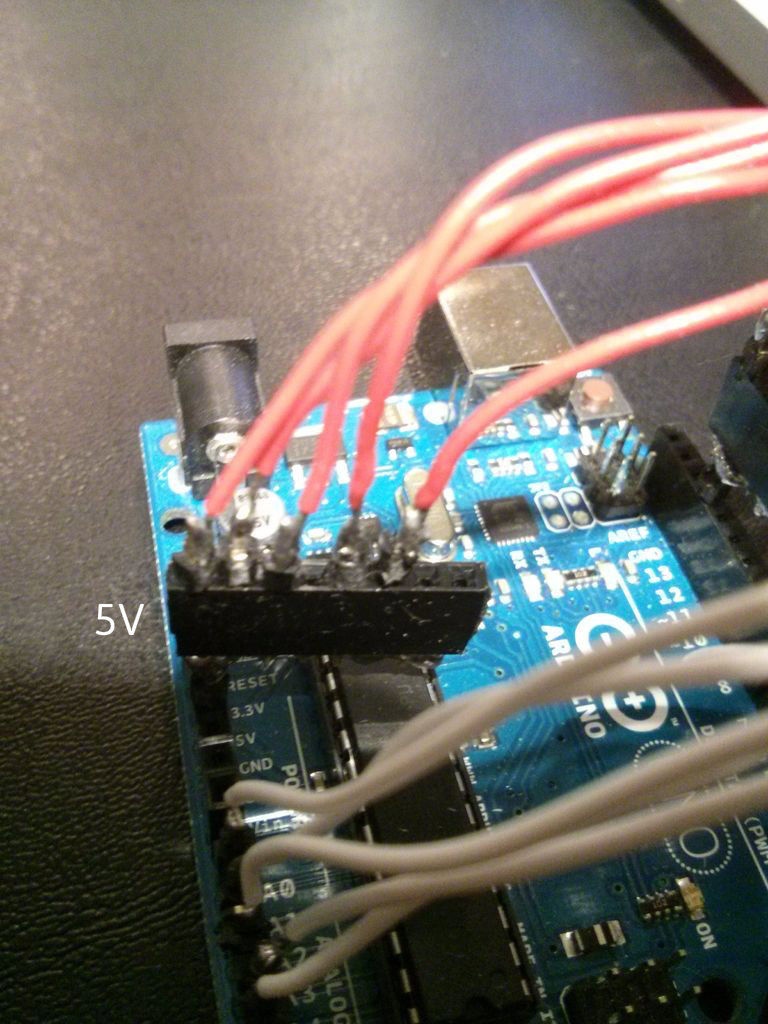
Step 2: Putting it together – 1
Potentiometers
First get 5 pairs of 100K potentiometers. The middle output of the potentiometer is always the analog output. The other 2 outputs on the left and right are either power (5V) or ground. Solder your red, black and white wires on to the potentiometers. After get enough of male headers and solder them to the ends of each wire. This will make it easier to put it together on the Arduino afterwards. The reason that I did not solder the wires on a proto shield is to make it removable so it can be replaced with a different kind of input like sensors.
Step 3: Putting it together – 2
Audio
Get your Audio Jack and solder a white wire to one of the positive outputs and solder the black wire to the negative output. After solder male headers to each end of the wires, same as the ones we did for the potentiometers.
To figure out the positive and negative outputs of the Audio Jack, check out these images:
Female headers
I created this part to have a terminal where I can connect all my power or my ground connections, but this is not the best way of doing it. I would recommend using an Arduino proto shield with a breadboard to connect everything together. If you would like to do it the quick and easy way I did it, then solder the bottom parts of the female headers together so they all connect with each other. After solder on male header to the bottom to connect it to the Arduino.
For more detail: Using Mozzi Library with 5 potentiometers using arduino
- What is the purpose of using the Mozzi library?
Mozzi allows Arduino to produce complex sounds and handle real-time inputs using non-blocking code. - How do I install the Mozzi library?
Download Mozzi, unzip it into the Arduino/libraries folder, then restart the Arduino IDE to see Mozzi under Import Library and examples. - How many potentiometers are used in the project?
The project uses five 100K potentiometers. - Which potentiometer pin gives analog output?
The middle pin of the potentiometer is the analog output. - How should I wire the audio jack?
Solder a white wire to the positive output and a black wire to the negative output of the 1/8" audio jack, then add male headers to the wire ends. - Why add male and female headers to the wiring?
Headers make the potentiometers and audio connections removable and easier to attach to the Arduino. - What alternative is recommended instead of soldering female headers together for power/ground?
Using an Arduino proto shield with a breadboard is recommended for cleaner power and ground connections. - Can Mozzi handle multiple inputs at the same time?
Yes, Mozzi uses non-blocking code which allows multiple inputs simultaneously.
