Summary of Use the STONE touch screen to make a music player Project introduction
The article details building a music player using the AC692N chip and STONE serial touch screen, supporting USB/Bluetooth playback and touch controls like play/pause, track navigation, and seeking.
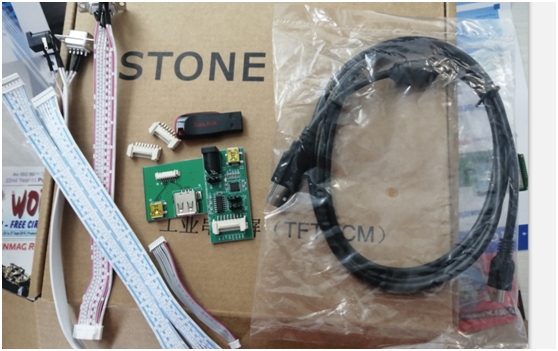
Parts used in the AC692N Music Player:
- AC692N development board
- STONE serial port touch screen (STVI050WT-01)
- Power amplifier circuit module
- Speaker
I’ve had an AC692N developer board at home for a long time, and now I want to make a music player that works with the STONE serial touch screen.
The following functions need to be implemented:
1. Play MP3 files in the USB flash drive
2. Connect the mobile phone with Bluetooth and play mobile music
3. Music playback of AC692N can be controlled through the STONE touch screen. Music pause, previous song control, next song control, fast forward for 10 seconds, fast backward for 10 seconds. With this in mind, I know which hardware modules I need to prepare.
The hardware modules needed are listed as follows:
2. STONE serial port touch screen (STVI050WT-01)
3. Power amplifier circuit module and speaker.
AC692N introduction
Before the project starts, I will briefly introduce the AC692N chip.
AC692N is a Bluetooth audio chip launched by a semiconductor company in China.
The chip is powerful, with a 32-bit CPU processor and integrated with common MCU peripherals such as IIC,SPI, TIMER, PWM and so on.
In terms of music playing, AC692N supports Bluetooth music playing, U disk and SD card music playing, AUX music playing, and the chip is integrated with FM FM radio circuit, which can receive AND play FM signals.
In addition, the CHIP USB interface support master and slave mode, can be connected to the computer to do HID sound card.
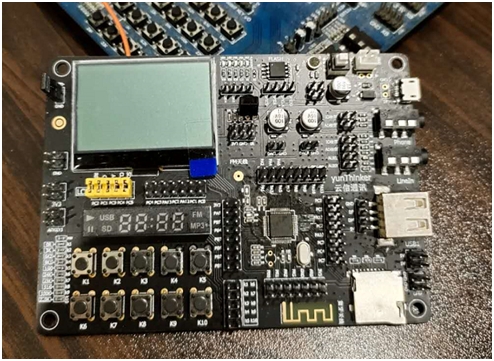
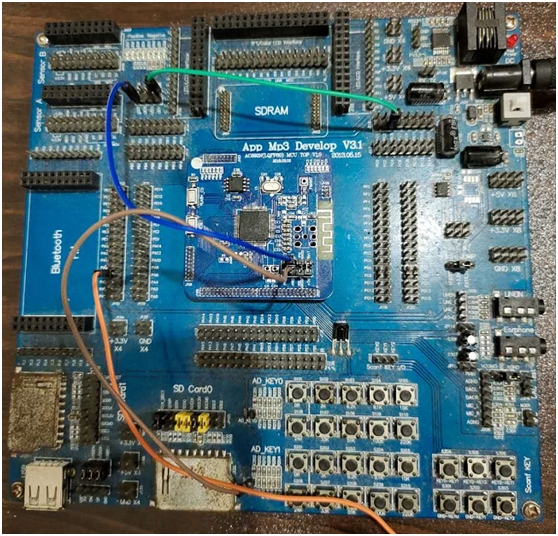
AC692N’s visual development environment USES the open source Codeblock, and the compiler Toolchain is written by JieLi Technologies. The following two pictures are the DEVELOPMENT board of AC692N, the blue development board is the development board of JieLi company, and the black development board is the development board made by other companies I bought on the Internet. In this project, I will use the development board of JieLi Company for development.
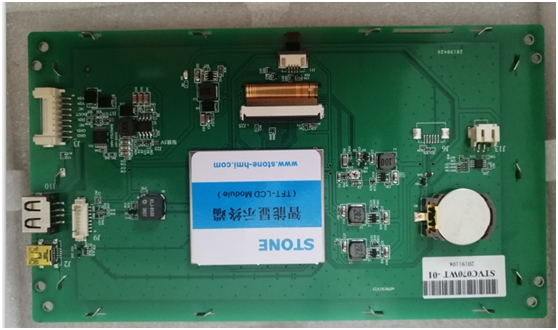
STONE STVI050WT-01 Display module introduction
In this project, I used the STONE STVI050WT-01 display touch screen for display and added buttons for music playback control.
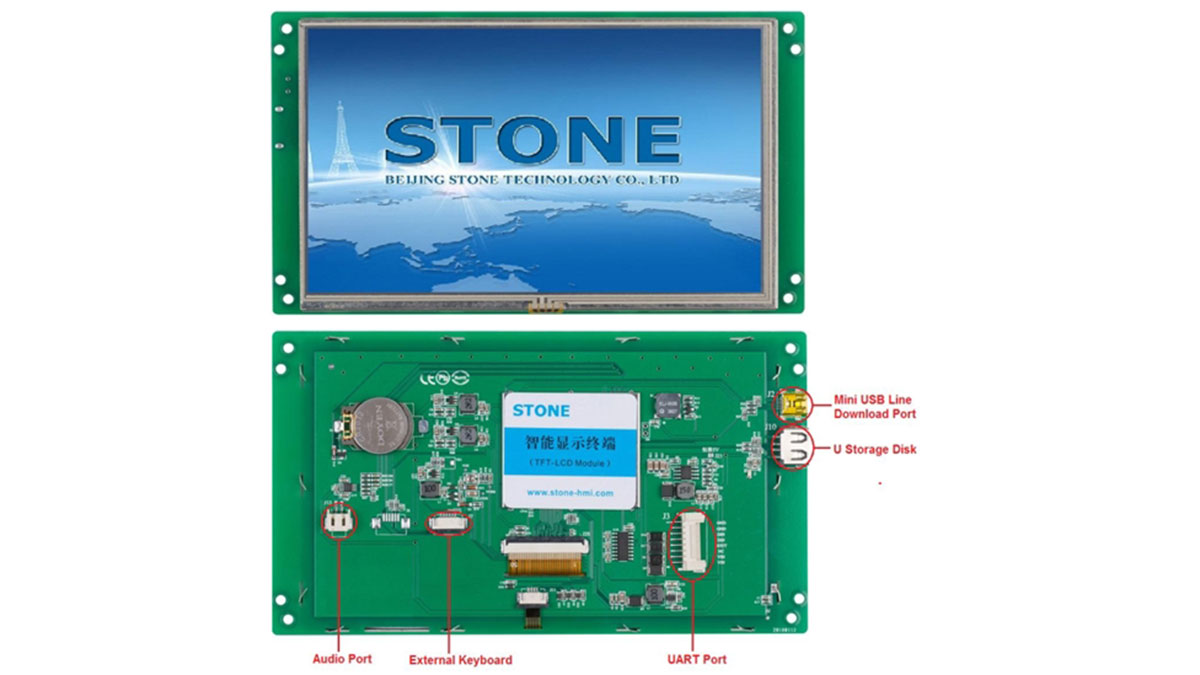
This display touch screen has an integrated driver chip and can be used by the upper computer. The user only needs to add the designed UI picture to the button, text box and other logic through the upper computer, then generate the configuration file and download it to the display screen, and then it can be run.STVI050WT-01 can communicate with AC692N chip via UARt-TTL signal.At the same time, this display also supports UARt-232 communication, which only needs to short circuit a welding plate on the back of the display.
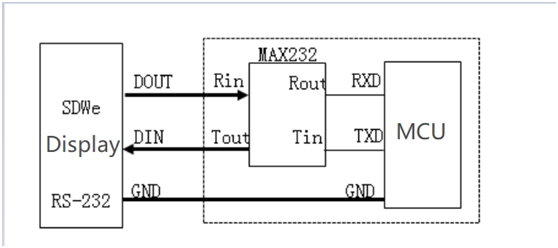
If UARt-232 communication is selected, then an MAX232 chip needs to be converted into TTL to communicate with AC692N. Therefore, in this project, I directly choose Uart-TTL communication.
In addition, if the MCU chip used in the project is not UART-TTL communication but UART-232 communication, STONE’s official website also sells a display that only supports the LOGIC level of UARt-232, so that it can communicate directly with the MCU.
For UART level conversion, you can refer to the picture of line plane:
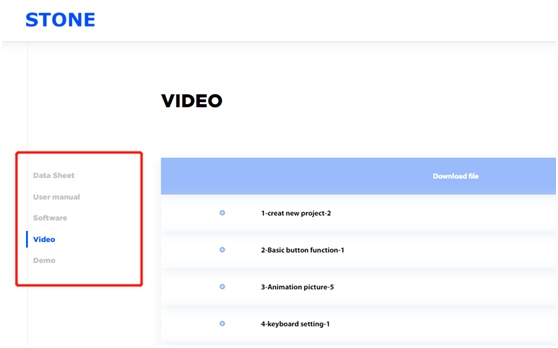
More details can be found at STONE’s website.
The website has detailed information and video tutorials:https://www.stoneitech.com/
What do I need to prepare to develop the STONE touch screen display module?
There are three main steps in the development of the STONE display module:
A. Design the display logic and button logic with the STONE TOOL software, and download the design file to the display module.
B. MCU communicates with STONE touch screen LCD display module through serial port.
C. MCU does other actions based on the data obtained in Step 2.
Of course, a prerequisite for all of this is to design a nice set of UI interfaces, usually in JPEG format.
In the above three steps, we need to install several software on our PC:
2、PhotoShop or other graphics software
3、A STONE touch screen displayer.
There are very few things to prepare, just a display screen (including a power supply system), and a PC upper computer software.
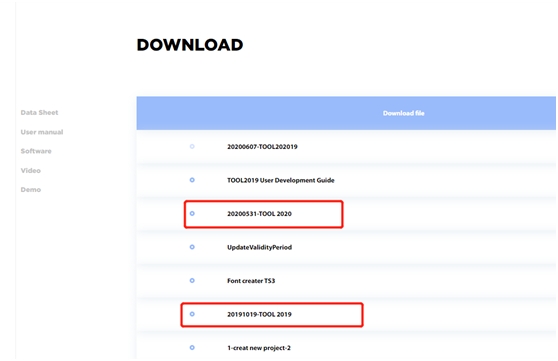
Use the STONE TOOL software
Download the latest version of the STONE TOOL software (currently TOOL2019) from your website, and then install it.
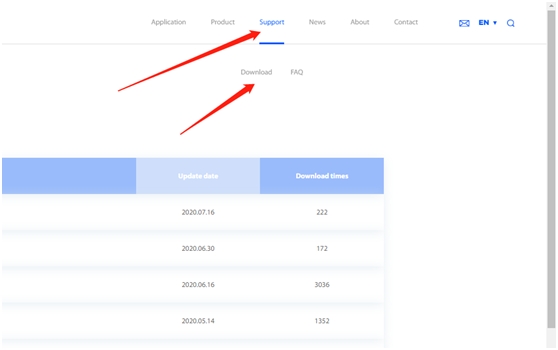
There are currently two versions of the TOOL software available for download, and I used TOOL2019.
In the meantime, we can see that the STONE website has a wealth of documentation and video tutorials, which is great news for new users.
Proceed to install the software.
After the software installation is completed, the following interface will be opened:
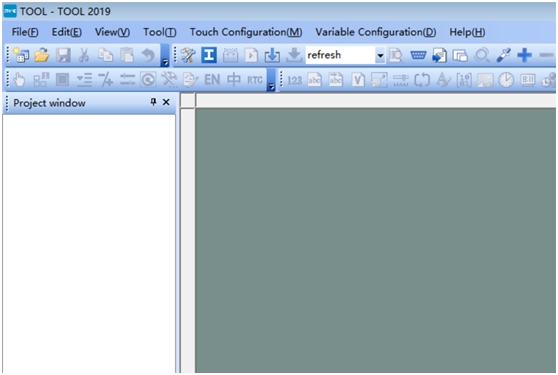
Click the “File” button in the upper left corner to create a new project, which will be described later.
Photoshop software is mainly used to make UI interface. In the STONE serial touch screen, all user interfaces are loaded and displayed in the form of pictures, while characters are used in the built-in font library of the screen.
How do I get started with STONE TOOL software
In the first step, we need to use Photoshop to create two images, one is the home page and the other is the button effect page.
In the second part, two designed images are loaded in the STONE TOOL software.
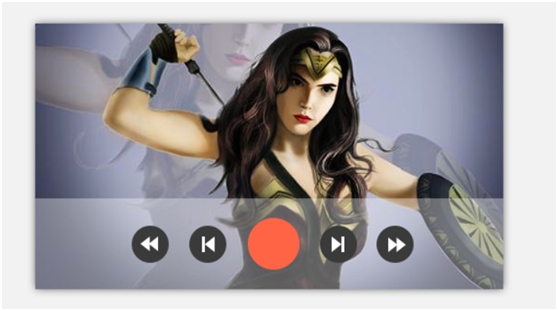
Here are two images of my simple design of the user interface:
(The pictures are from the Internet. If there is infringement, please tell me to delete.)
The first image is the main interface, which has been displayed since the screen was powered on.
The second image is the button effect. You can see only the background color of the button is different.
When the user downloads the image to the STONE serial touch screen, the screen is powered to display the first image all the way through.There are five buttons in the image, and the TOOL 2019 software allows you to configure what data the STONE display sends through a serial port when these buttons are pressed.
In this project, when the five buttons are pressed separately, the STONE display will send an instruction to the AC692N chip through UART. After receiving this instruction, the AC692N chip will perform different actions according to the specific instruction content received.For example: play the song, pause the song, the last song, the next song, fast forward, fast back.
Create new projects in TOOL 2019 software
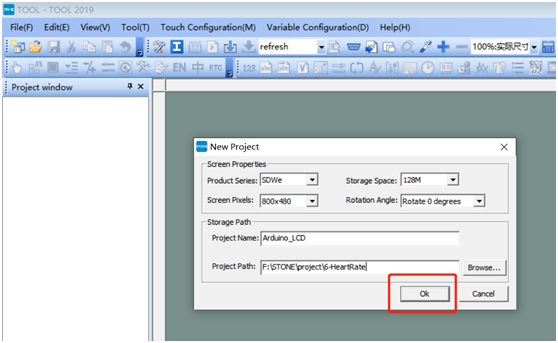
Save the designed UI image as JPG.
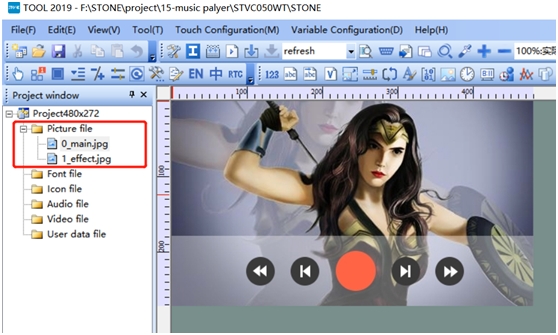
Open STONE TOOL2019 and create a new project:
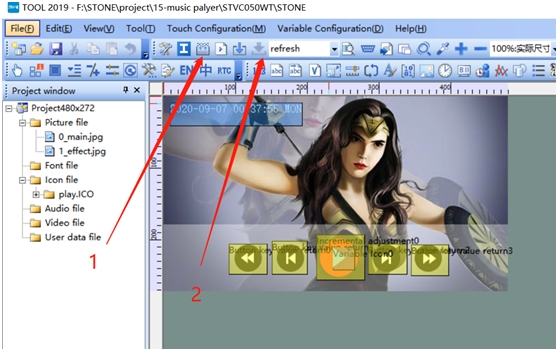
Delete the image that the new project loads by default, and then add the UI image that we designed ourselves.
As you can see, the two UI images you just designed have already been loaded.
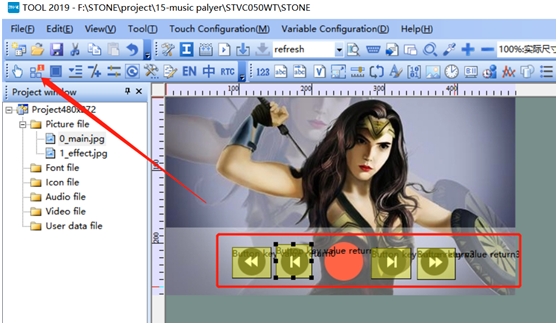
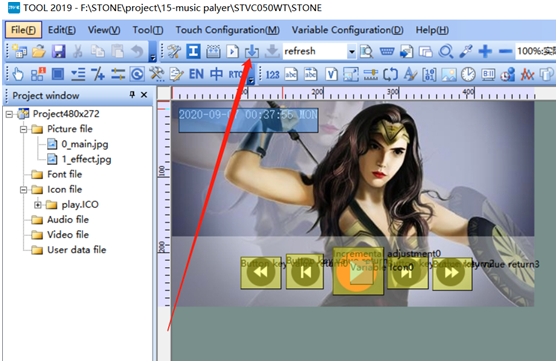
The component indicated by the arrow in the figure is a button component. Add it to the area of four buttons, and the button is finished. The button component has the following properties that can be configured in the listing:
X Coordinates: Coordinates a component’s Position in the X direction across the UI interface
Y Coordinates: A component’s Y-orientation position across the UI interface
Width&Height: The width and length of the component
Moving Lcok: A fixed position
Name DEFINE: The Name of the component
Button Effect: The display effect of a Button being pressed
Page switch: The button is pressed to switch to the next Page, or null if not
Audio File: The Audio file to play when a button is pressed
Variable Memory Address: The address of a component in the display
I mainly change one place:
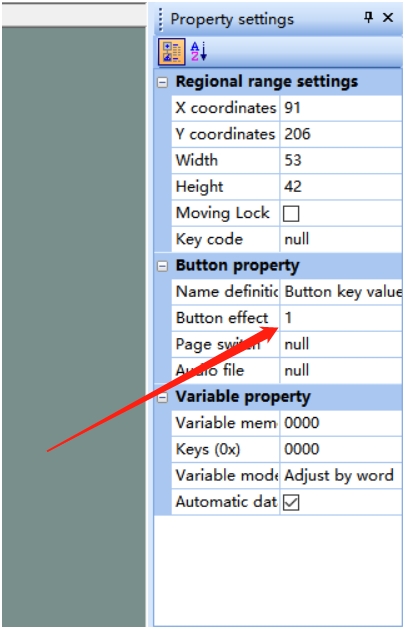
Change the effect of all buttons to page 1, meaning that when the button is pressed, the effect of the button will be the effect of the “1_effect” page, and the STONE touch screen display will send the address of the button to the MCU through a serial port.
Add a date and time component
The STONE serial touch screen display itself comes with RTC, so you can add a date and time component directly.
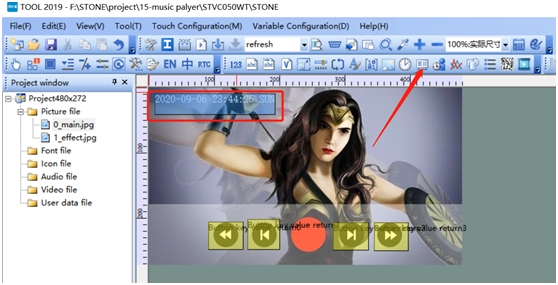
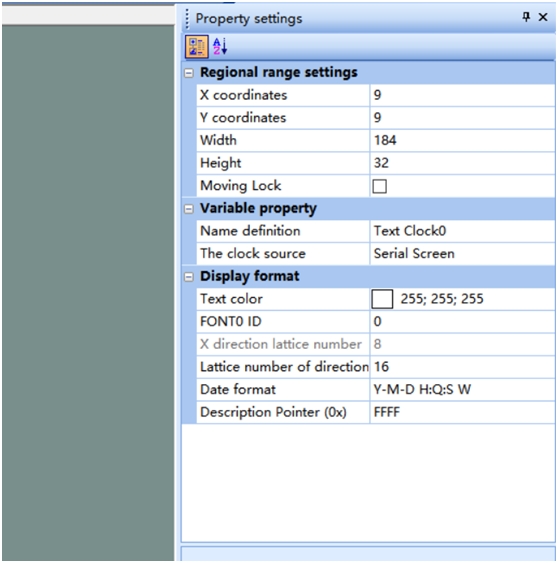
The component marked by the arrow is a time and date component. You just need to add it to the UI display picture, and modify the relevant properties of this component according to your actual requirements. The properties you can modify are as follows:
Here I only changed the display position, font size, and font color.
Other attributes can also be modified based on actual requirements.
In the actual display process, the song play and the song pause are two events, but Here I only use one button, so I need to do the button image state switch.
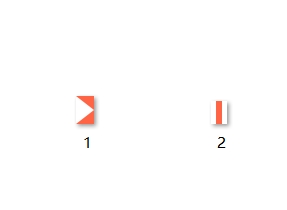
First you need to make two small ICONS and save them in BMP format:
Then use The STONE TOOL2019 software to add these two ICONS to your project:
Once added, you can see the ICON resources in the directory of the ICON File.
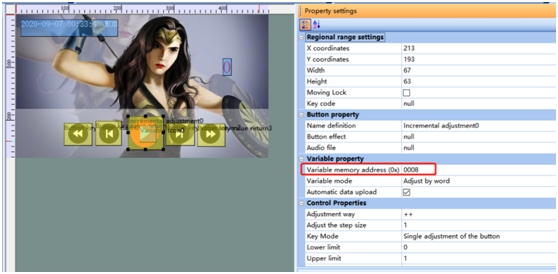
Next you need to add an ICON component and a button that supports addition and subtraction:
And stack them together to set the same component address:
After the above work, you can compile and generate the configuration file, and then watch the effect of the simulation run directly in the computer.
Simulation run
Click generate configuration file and run the simulation to see the effect.
Modify the UART Baud rate of the STONE touch screen display
The screen supports to modify the UART Baud rate. Middle-aged Settings can be set in the following interface:
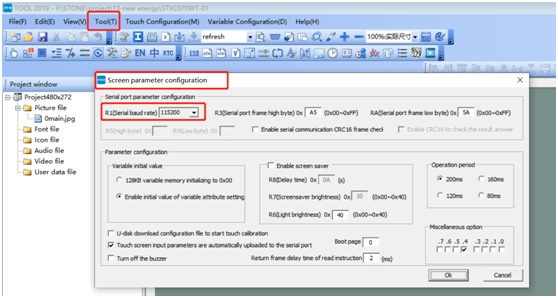
The maximum baud rate is 921,600, and in this case I’m using 115200.
Changing the Baud rate actually changes the values of registers R1, R5, and R9 in the STONE display module:
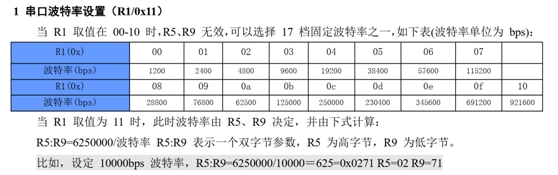
When R1 is 0x00-0x10, R5 and R9 are invalid.
When R1 is 0x11, the baud rate is determined by R5 and R9.
Generate the configuration file and download it to the STONE display
Once the UI design is complete, the configuration file can be generated and downloaded into the stvi050Wt-01 display, which is described in STONE’s development documentation.
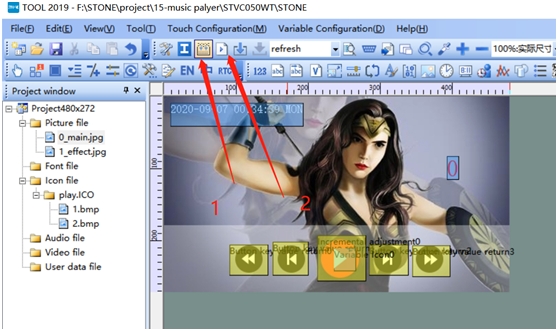
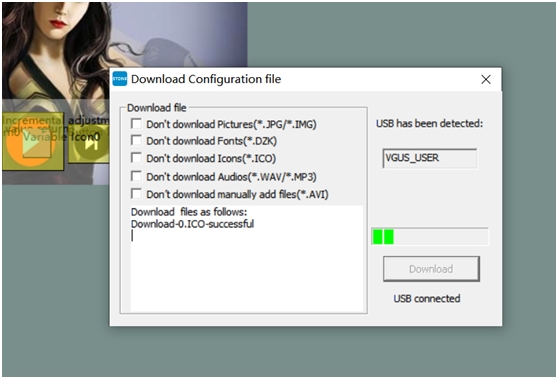
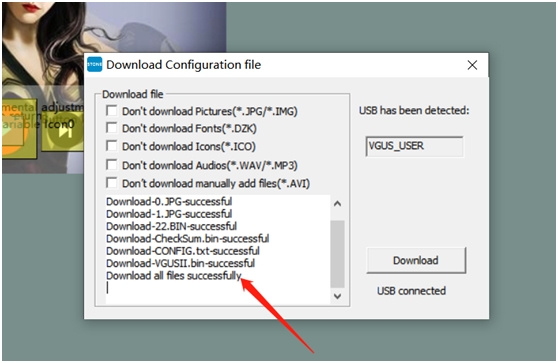
Perform step 1 first, then insert the disk in the computer, the disk symbol will be displayed, then click “Download to U-disk” to Download the configuration file to the disk, then insert the DISK into STVI050WT-01 to complete the upgrade.
In addition, if you can’t use the USB drive to upgrade, you can also directly connect to the USB port of your computer and Micro USB of STONE STVI050WT-01, as shown in the figure below:
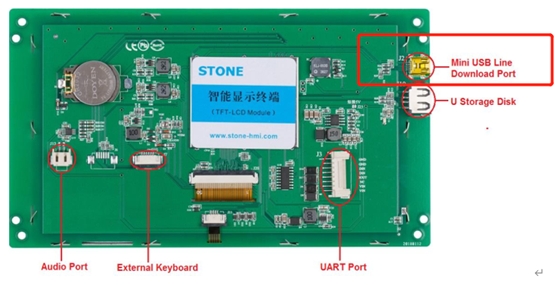
Then click Download Online and follow the prompts to update the configuration file to the STONE display module.

After downloading the configuration file to the STONE display screen, we can start STM32 MCU programming.
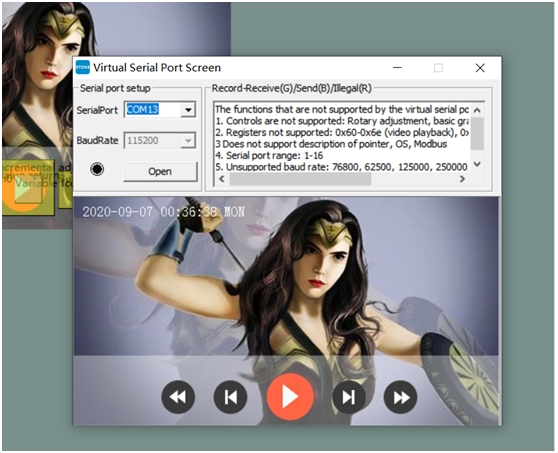
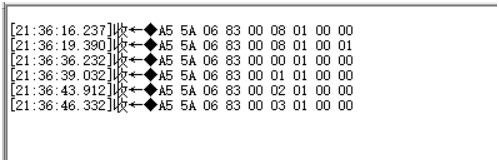
Before this, you can also try the UART serial port assistant of the computer to test whether the data sent by the STONE serial port touch screen is correct:
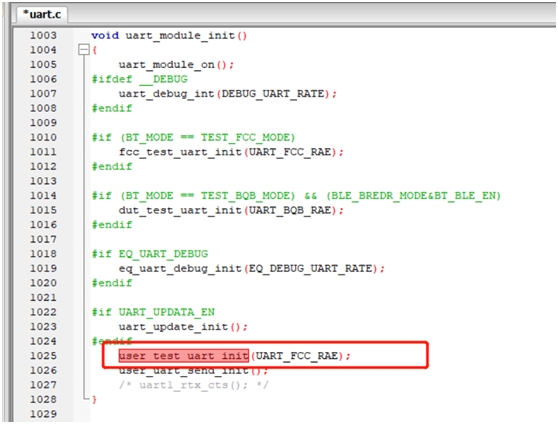
AC692N program development
Now I will start to do the program development of AC692N. First, I will install the development environment and register the development environment. Then, I will open the SDK software, find the code related to serial port, and do the configuration related to serial port initialization.
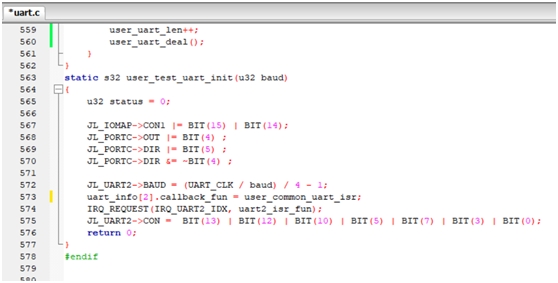
A serial port configuration
In the above code, there is a registered serial port to receive interrupt function,
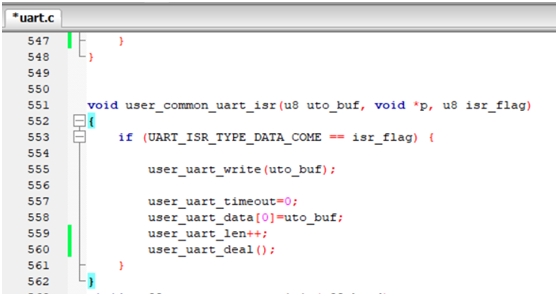
The serial port interrupt receiving function is as follows:
When the button in the STONE serial touch screen is pressed by the user, the data it sends through the UART interface is in a format as follows:
U8 data_send[8]= {0xA5, 0x5A, 0x05, 0x82, 0x00,0x00,0x00,0x00,0x00};
Where, data_send[4] and DATa_send [5] are the addresses of button components. Each button has a unique address. Therefore, in AC692N, we can judge which button is pressed by this unique address.
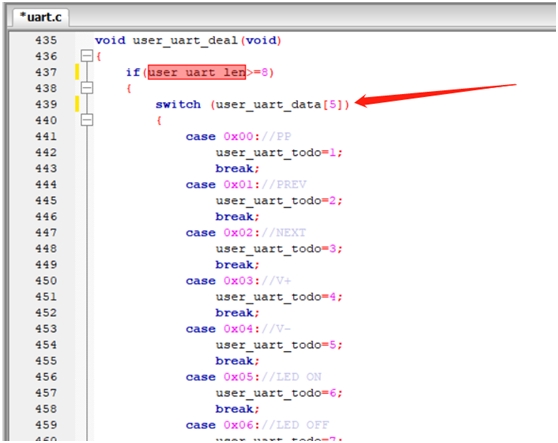
Identifying the fifth bit of received data in your code will tell you which button was pressed by the user, and then act accordingly.
Considering the serial receive timeout and receive error handling issues, I used a timer to process the data:
In this way, we can achieve the function of music control.
However, my project is to play usb flash drive and Bluetooth, so I still need to make a judgment in the code of music control. I will give the complete code later to determine whether it is playing USB flash drive or Bluetooth.
Part of the AC692N code
#if 1 // UART DRIVER FOR JL
void user_uart_write(char a)
{
JL_UART2->BUF = a;
__asm__ volatile(“csync”);
while((JL_UART2->CON & BIT(15)) == 0);//TX IDLE
}
u8 user_uart_data[8]={0x00,0x00,0x00,0x00,0x00,0x00,0x00,0x00};
u8 user_uart_len=0;
u8 user_uart_todo=0;
void user_uart_deal(void)
{
if(user_uart_len>=8)
{
switch (user_uart_data[5])
{
case 0x00://PP
user_uart_todo=1;
break;
case 0x01://PREV
user_uart_todo=2;
break;
case 0x02://NEXT
user_uart_todo=3;
break;
case 0x03://V+
user_uart_todo=4;
break;
case 0x08://PP
user_uart_todo=8;
break;
default:
user_uart_todo=0;
break;
}
user_uart_len=0;
}
}
u8 user_uart_timeout=0;
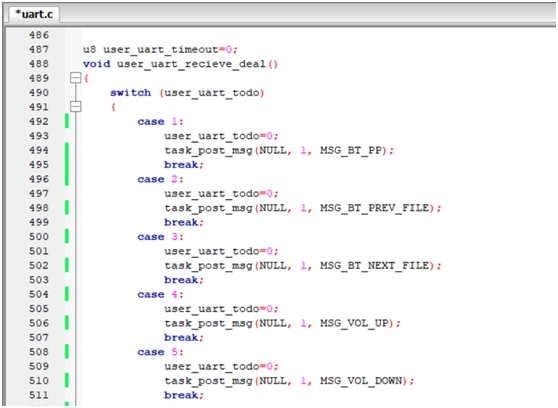
void user_uart_recieve_deal()
{
switch (user_uart_todo)
{
case 1:
user_uart_todo=0;
if (task_get_cur() == TASK_ID_MUSIC) {
task_post_msg(NULL, 1, MSG_MUSIC_FR);
}
break;
case 2:
user_uart_todo=0;
if (task_get_cur() == TASK_ID_BT) {
task_post_msg(NULL, 1, MSG_BT_PREV_FILE);
}
else{
task_post_msg(NULL, 1, MSG_MUSIC_PREV_FILE);
}
break;
case 3:
user_uart_todo=0;
if (task_get_cur() == TASK_ID_BT) {
task_post_msg(NULL, 1, MSG_BT_NEXT_FILE);
}
else{
task_post_msg(NULL, 1, MSG_MUSIC_NEXT_FILE);
}
break;
case 4:
if (task_get_cur() == TASK_ID_MUSIC) {
task_post_msg(NULL, 1, MSG_MUSIC_FR);
}
break;
case 8:
user_uart_todo=0;
if (task_get_cur() == TASK_ID_BT) {
task_post_msg(NULL, 1, MSG_BT_PP);
}
else{
task_post_msg(NULL, 1, MSG_MUSIC_PP);
}
break;
default:
break;
}
user_uart_timeout++;
if(user_uart_timeout>10)
{
user_uart_timeout=0;
user_uart_len=0;
}
}
void user_common_uart_isr(u8 uto_buf, void *p, u8 isr_flag)
{
if (UART_ISR_TYPE_DATA_COME == isr_flag) {
user_uart_timeout=0;
user_uart_data[user_uart_len]=uto_buf;
// user_uart_write(user_uart_data[user_uart_len]);
user_uart_len++;
user_uart_deal();
}
}
static s32 user_test_uart_init(u32 baud)
{
u32 status = 0;
JL_IOMAP->CON1 &= ~(BIT(3) | BIT(2));
JL_IOMAP->CON1 |= BIT(3);
JL_IOMAP->CON3 &= ~BIT(7);
JL_PORTA->OUT |= BIT(1) ;
JL_PORTA->DIR |= BIT(2) ;
JL_PORTA->DIR &= ~BIT(1) ;
JL_UART1->BAUD = (UART_CLK / baud) / 4;
uart_info[1].callback_fun = user_common_uart_isr;
IRQ_REQUEST(IRQ_UART1_IDX, uart1_isr_fun);
JL_UART1->CON0 = BIT(14) | BIT(14) | BIT(13) | BIT(12) | BIT(10) | BIT(3) | BIT(0);
return 0;
}
#endif
The test results

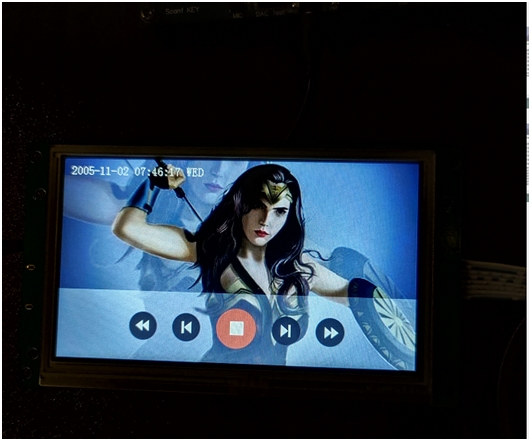
- How does the system play music?
The system plays MP3 files from a USB flash drive or streams music via Bluetooth connection. - What control functions are available on the touch screen?
Users can control music pause, previous song, next song, fast forward 10 seconds, and fast backward 10 seconds. - Which communication method connects the screen to the chip?
The project uses UART-TTL signal communication between the STONE display and the AC692N chip. - What software is required to design the touch screen interface?
You need STONE TOOL 2019 for logic design and PhotoShop or similar software for creating UI images. - How does the MCU identify which button was pressed?
The MCU reads the unique address of the button component found in the fifth and sixth bytes of the received data packet. - Can the baud rate of the STONE display be changed?
Yes, the maximum baud rate is 921,600, and this project uses 115200. - What format must the user interface images be saved as?
User interfaces are loaded and displayed as JPEG images, while icons should be saved in BMP format. - How is the configuration file downloaded to the display?
The file can be downloaded to a USB disk inserted into the computer or directly connected online via Micro USB.