I accumulated several printers, why… because it was cheaper to continuously buy new ones than buy the ink for the old ones. Anyways, I got tired of stacking them up in the corner and decided to pull them apart. They were a treasure trove of parts, including these nifty LED tubes. After closer investigation, I found what appeared to be 3528 RGB LEDs at one end of the tubes. Initially, I had some SN74HC595N laying around and was going to use these in combination with the LEDs. I also happened to have some SK6812 RGBNW LEDs on hand too. I did a dry fit with the SK6812 LEDs and they sorta fit so I decided to use these instead of all the parts associated with the SN74HC595N shift register.
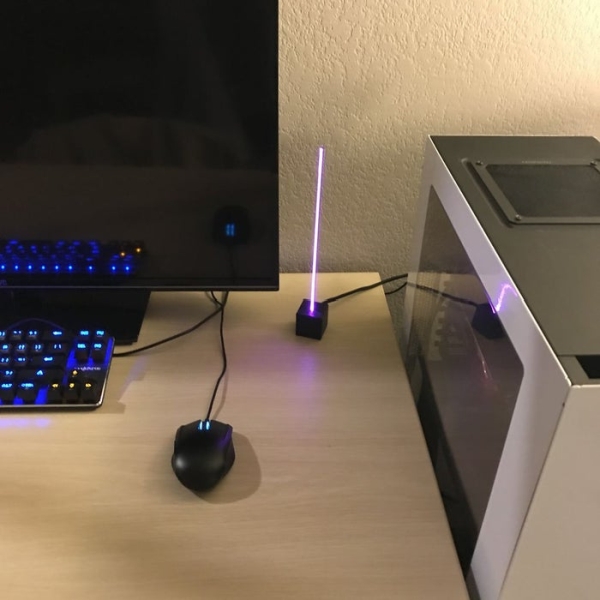
I thought about making a multi-head desk lamp but after testing the tube with full brightness and comparing it to the lamps I already have I figured it would serve as a better desk ornament.
Step 1: PARTS & TOOLS
Parts:
– SK6812 RGB-NW LED or WS2811/WS2812b
– LED tube from a printer with a scanner
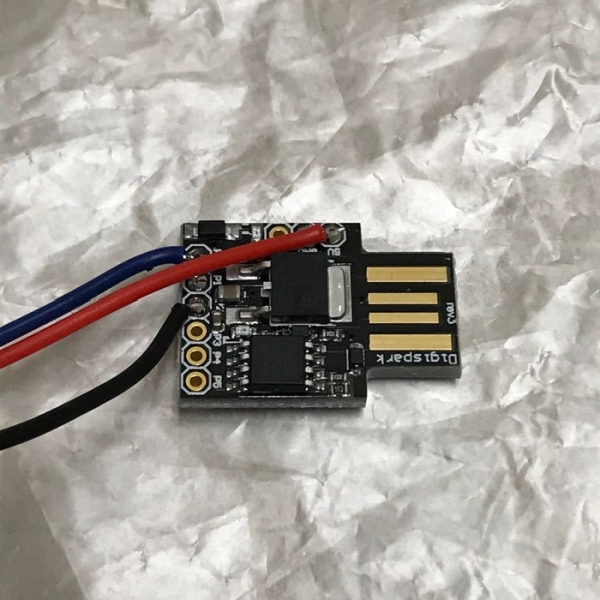
– Digispark (ATtiny85) or Arduino alternative
– 22 ~ 24 AWG wire
– USB male header or USB cable that has a male header already attached.
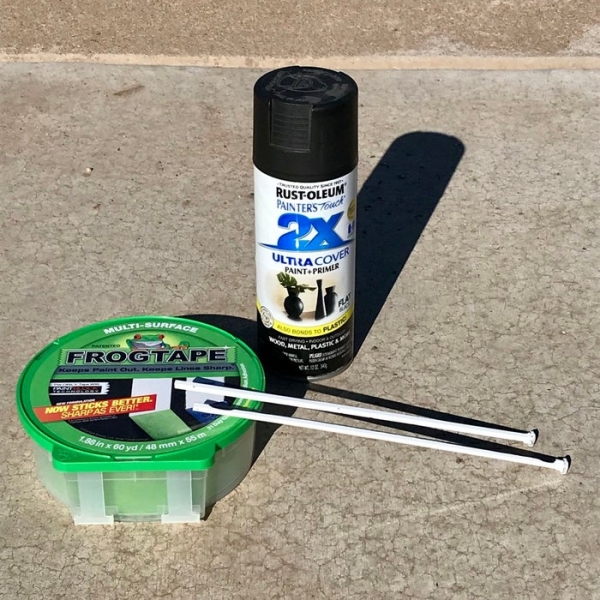
– Black spray paint
– Painters tape
Optional:
– 750 Paracord (550 if you use a smaller gauge wire 24~26 AWG)
– 4″ Zip-Ties
– Heatshrink tubing
Tools:
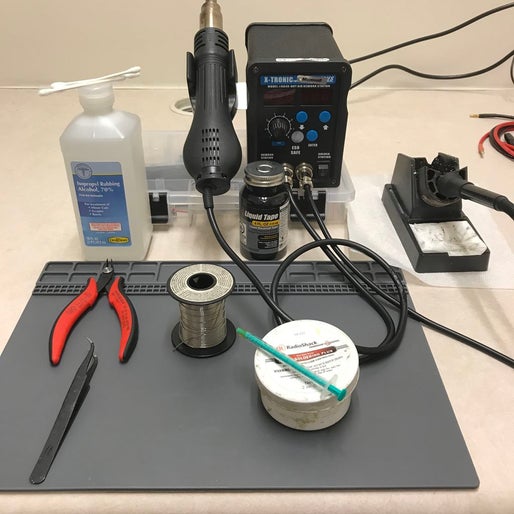
– 3D Printer
– Soldering iron
– Medium/Small D Tip or Small C Tip
– Solder
– Liquid electrical tape (optional, but highly recommended)
– Wire strippers
– Multimeter to verify voltages and check to ensure nothing is connected that shouldn’t be!
– Hot glue gun
Step 2: Prep the Tube
Paint:
I’m not a fan of the aesthetic of the tube in its natural state as it had some sort of remnant of the glue they used to hold it in the printer. I decided to paint it black with some matte black paint I had leftover from some other projects. I’d suggest painting it before you glue on the led. I happened to do it the hard way and glue the LED on before painting so I had some extra paint prep to do. Make sure you don’t paint the wrong side of the tube, that would definitely put a damper on the project.
LED:
I attached the SK6812 LED with some superglue, you don’t have to use superglue, but it did make it easy to attach; hot glue will also work. Let it harden before messing around with it. Make sure not to get glue on the LED face or the face of the tube.
Step 3: Make the Box
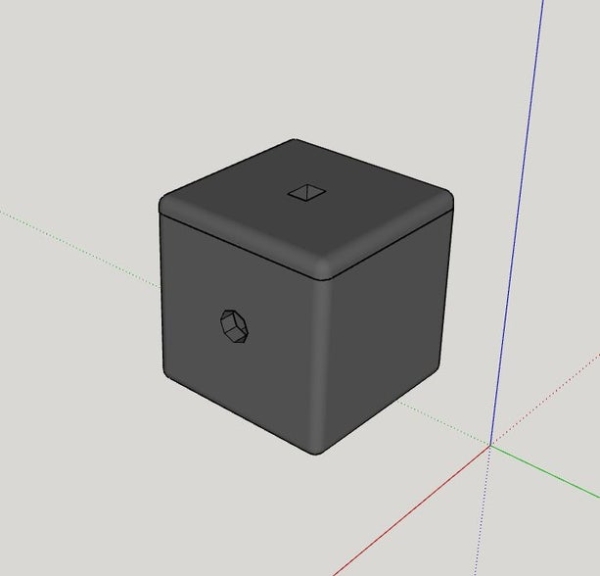
I attached the STL files I designed. The box dimensions are about 35mm x 35mm x 35mm LxWxH, don’t quote me. I had a shop with a Stratasys Mojo print this out for me so I can’t say how well this will print out for others. Once the box is completed hot glue the LED tube through the top. The hole should only be able to fit the tube one of two ways, but that doesn’t matter cause you can turn the lid if you glue it facing the other way. Let the hot glue sit and harden for a while before you start putting pressure on it. Once the hot glue settles you can solder the three wires needed to run the LED, I will go over this in the next step.
Step 4: Put It All Together!
Wiring:
When wiring the SK6812 LED to the Digispark make sure to keep the wires short as they all have to fit in a very small space.
Digispark => SK6812
Pin 0 => Data Pin
Pin 2 => GND Pin
5V Pin => 5V Pin
I made Pin 2 the GND pin so that if you wanted to program this in the future to turn off at a certain time you could by setting it high. I know its not the best method of doing so and in practice, I should have put the 5V Pin of the SK6812 to Pin 2 and setting it high, I think when originally wiring this I was worried about pulling too many mA from the I/O pin of the ATtiny85. I’ll go ahead and do this in the future so the best wiring path should be…
Digispark => SK6812
Pin 0 => Data Pin
Pin 2 => 5V Pin “+”
GND => GND Pin “-“
** Modifying the code will be necessary to make this work now that Pin 2 will be HIGH when on instead of LOW.
Sleeving:
If you happen to like the paracord look this should be done before running and wiring everything up. My only suggestion is to use small gauge wire cause the large gauge wire is a pain to pull through. I tried gluing the bundle of wires together to a single wire to try to make things easier to pull through instead of inch-worming the whole thing; the wire eventually broke 80% of the way there. Luckily, I could inch-worm the rest the few inches I had left. If it was any more than that I would have scrapped the sleeving and found an old USB cable to use instead. After pulling the wire through the paracord, I made a mental note that I would rather go with the option to use a premade USB pigtail for future projects. The USB wires need to run through the hole in the side of the box before you solder it to the digispark otherwise… you’ll figure it out. I used a zip-tie to secure the cable in the box.
Source: USB SK6812 Desk Lamp