
Summary of Twist Shield for the Arduino
This article describes the "Twist Shield," an add-on board designed to rotate existing Arduino shields by 90 degrees, solving orientation issues for components like display shields. The project involves designing a double-sided PCB using Eagle CAD and etching it via a photo-resist method with laser-printed transparencies and glass alignment.
Parts used in the Twist Shield:
- Arduino UNO R3
- Wing Tip Extensions
- Adafruit RGB Display Shield
- Eagle CAD software
- Photo PCB
- Laser printer
- Transparent sheets
- Glass sheets
- Spring clamps
 Twist Shield.brd42 KB
Step 1: The Problem…
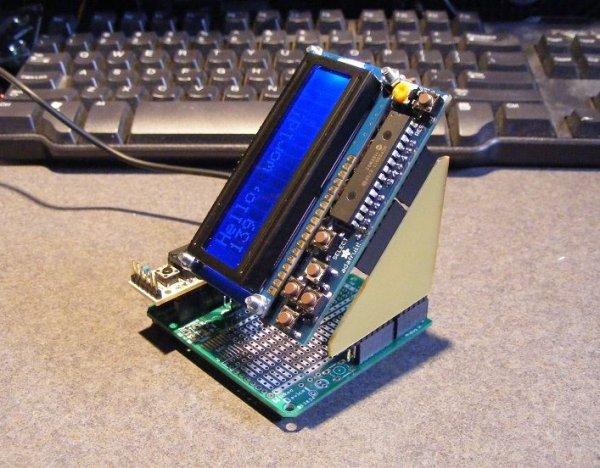
Have you ever finished a project and then realized you stopped one step too soon?
While plugging in various shields I have into the ‘Wing Tip Extensions’ I built I noticed an odd thing…display shields needed to be rotated 90 degrees to be of any real use…case in point the Adafruit RGB Display Shield shown, it works just fine but it’s orientation doesn’t work.
Back to the drawing board…or this case Eagle Cad.
Step 2: The Design…
I couldn’t figure a way to do it with only one side so I made it into a double sided layout.
The via’s are larger than normal to accommodate drilling the holes.
No room for any icons…just a simple layout.
Twist Shield.brd42 KBStep 3: Etching
I’ll be honest here, I’ve never been very successful Etching dual sided PCB’s.
Usually the registration is off and the holes don’t line up…but this time I tried “booking” the PCB and had success.
I laser printed the top and bottom layers on to transparent sheets,
taped the bottom layer to a sheet of glass,
aligned the top layer over the bottom and made sure all the holes lined up. (Take your time)
taped only one edge of the top layer down so I could slip my Photo PCB between the layers like a book.
then placed another sheet of glass on top then using spring clamps I hold the ‘book’ together.
Exposed each side for 8 mins each, develop and etch as normal…I liked the results.
For more detail: Twist Shield for the Arduino
-
What is the purpose of the Twist Shield?
The board allows you to twist an existing Arduino Shield 90 degrees from its original footprint. -
Why was the design created?
It solves the problem where display shields need to be rotated 90 degrees to be of real use when plugged into Wing Tip Extensions. -
How many sides does the PCB layout have?
The design is configured as a double sided layout because the author could not figure out how to do it with only one side. -
What special feature do the via's have?
The via's are larger than normal to accommodate drilling the holes. -
How did the author ensure registration for etching dual sided PCBs?
The author taped the bottom layer to a sheet of glass, aligned the top layer over it, and used spring clamps to hold the layers together like a book. -
What material was used to transfer the circuit layers?
Laser printed transparent sheets were used to expose each side of the Photo PCB. -
How long was each side exposed during the etching process?
Each side was exposed for 8 minutes.
