Summary of Touche for Arduino: Advanced touch sensing
This article details a DIY project adapting Disney Research's Touché technology for the Arduino platform. It explains how to overcome Arduino's square wave limitations by using an LC circuit filter to isolate sine waves, enabling high-resolution touch sensing. The guide covers necessary components, hardware assembly via a shield diagram, uploading custom code, and running a Processing sketch for visualization.
Parts used in the Advanced Touch Sensing Project:
- Arduino board
- USB cable
- Shield
- Pin headers
- Resistors (10k, 1MOhm, 3.3k)
- Capacitors (100pf, 10nf)
- Diode (1N4148)
- Coil / Inductor (10mH or 10000µH)
- Water bottle (sensing object)
Credits: Arduino sensing done by DZL, Processing sketch and Instructable done by Mads Hobye.
Disney Research lab designed a novel way to detect touch. You can see a video of their demo here:
I had the honor to meet them at CHI2012 in Texas and I discussed with them whether it would be possible to convert their system into the Arduino platform. Their immediate reaction was that the Arduino would not be able to generate good enough frequencies. I asked my friend DZL if he could solve this problem and this was his solution to the problem:
The Touché hardware uses a really fancy Direct Digital Synthesizer IC from Analog Devices. It generates a really pure sine wave signal with frequencies between 1kHz and 3.5MHz with high resolution. While the Arduino is capable of generating frequencies in this range the signal is a square wave with lots of harmonic frequency components and really low frequency resolution.
Simply using this signal with the circuit described in the Touché paper result in a really messy frequency graph due to the harmonics from the square wave. The solution is to use the filtering properties of the LC circuit to our advantage. By measuring the signal after the inductor (coil) rather than before we only see a nice sine wave shaped signal free of all the unwanted frequency components. As a result we now see a peak in signal at resonance rather than a notch but the signal contains the same information.
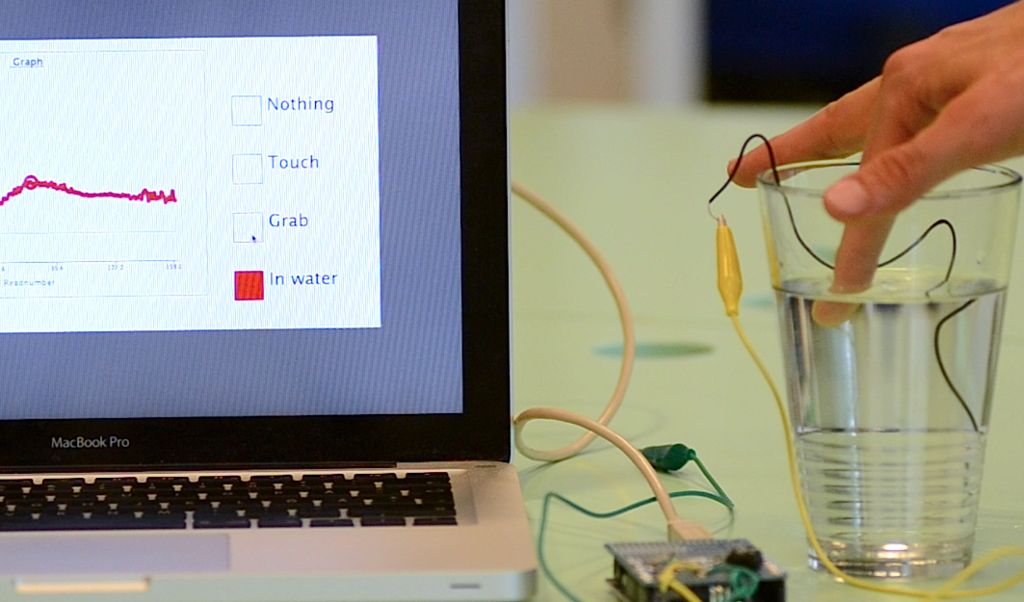
This has resulted in the following sensing capabilities:
Step 1: Components neded
- Arduino
- Usb cable
- Shield
- pin headers
- Resister: 10k, 1MOmh, 3,3k
- Capacitor: 100pf, 10nf
- Diode: 1N4148 diode
- Coil / inductor: 10mH (cypax.dk part no: 07.055.0510)
- Water bottle as sensing object.
If you do not have the inductor, it is basically a coil. You should be able to roll your own. Grab an empty roll of toilet paper wind very thin wire around a couple of hundred times. You have to experiment until you get a peak on the graph.
Or be scientific:
http://www.pronine.ca/coilcal.htm
You want 10000µH
Step 2: Build the hardware
Step 3: Upload code to the Arduino board
- http://arduino.cc/en/Guide/HomePage
- http://www.youtube.com/watch?v=4HqXAmV_Ock
- http://www.ladyada.net/learn/arduino/lesson1.html
The 3 things that usually cause trouble:
- On windows you have to install the proper drivers (sometimes also on mac).
- Remember to select the right serial port in the gui.
- Remember to select the right board in the gui.
Below are the simplified steps to uploading the code to your Arduino board:
- Download Arduino: www.arduino.cc
- Connect the Arduino board to the computer via usb.
- Download the code from github here: https://github.com/Illutron/AdvancedTouchSensing
- Upload the code to the Arduino board.
Step 4: Run the Processing sketch

- Download and install Processing (http://www.processing.org)
- Get the sketch from github (https://github.com/Illutron/AdvancedTouchSensing – same link as the Arduino sketch)
- Open the sketch in processing and run it. You will need to choose the right serial port in setup method. It is usually the lowest number.
- At pointed out in the comments. Arduino uno has problems with high speed serial and you need to reset the board (or unplug) it every time you run the processing sketch. If you get an error please unplug and plug it in again for it to work.
The graphing sketch is a modified version of Bool Scotts graphing example:
http://boolscott.wordpress.com/2010/10/23/sneak-preview-of-my-open-source-project/
Congratulations – you are ready to go!
- How can I solve the frequency resolution problem on Arduino?
Use the filtering properties of an LC circuit to measure the signal after the inductor, which removes unwanted harmonic components. - What happens if I do not have the specific 10mH inductor?
You can roll your own coil using thin wire around an empty toilet paper roll until you get a peak on the graph. - Which software is required to visualize the graph?
You need to download and install Processing to run the provided sketch for visualization. - What are common causes of trouble when uploading code to the Arduino?
Trouble usually stems from missing drivers, selecting the wrong serial port, or choosing the incorrect board in the GUI. - Does the Arduino Uno have issues with high speed serial communication?
Yes, the Arduino Uno has problems with high speed serial, requiring a reset or unplugging every time the processing sketch runs. - Can this system achieve up to 2000 steps like the original demo?
The article states the authors achieved 150 steps in their video, while the original researchers reported getting up to 2000 steps.