This project will help you create a temperature monitor using an ESP8266 SoC and a temperature sensor (DS18B20) with next capabilities:
- Measure Temperature
- Send an email if temperature goes under a threshold
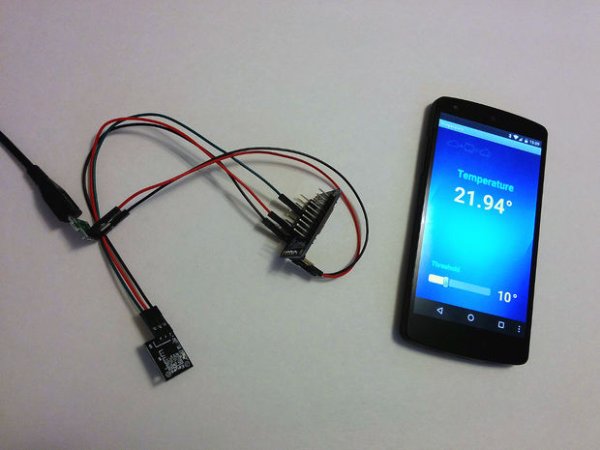
- Monitor temperature and set threshold from a mobile App
To complete this project you will have to create three things
- Hardware – Basically you have to hook up the temperature sensor to the ESP8266 board and upload the Arduino code.
- Cloud device – Create the logic that drives the decision making using the IC2Cloud platform www.ic2cloud.com
- Mobile App – Create the mobile App using AppInventor to monitor and control your temperature appinventor.mit.edu
This project can be easily extended to monitor different thresholds and if combined with an actuator it can control a heating/cooling system.
Step 1: Get Your Materials
To complete this project you need a few things
- A ESP8266 board. I recommend the Adafruit HUZZAH ESP8266 board. The main advantages are:
- You get a FCC certified ESP8266 board
- The ESPB8266 board has multiple pins exposed on the PCB
- It has a voltage regulator on the board
- It has buttons to trigger programming mode
- A temperature sensor. I used a DS18B20 from DealExtreme
- Some female to female cables
- And optional if you want to make the module stand alone a USB connector and a USB power supply….and an enclosure.
- To upload the Arduino code on the ESP8266 board you need a programming cable. I recommend this one from Adafruit.
Step 2: Wiring
The wiring is very simple. You have a TOP VIEW diagram here that shows you how to do it. To be more specific you need to do three connections:
- DS18B20 – Vcc Pin —> HUZZAH ESP8266 – 3V Pin
- DS18B20 – GND Pin —> HUZZAH ESP8266 – GND
- DS18B20 – Data Pin —> HUZZAH ESP8266 – #4 Pin
To be able to program it you need to connect as the programming cable too. If you use the Adafruit cable I recommend then you just plug it in with the black wire to the GND pin as shown in the picture above. For more details how to program HUZZAH board with Arduino please go to Adafruit website.
Read more: Temperature Monitor with ESP8266