Sending temperature from Arduino MKR1000 to Artik Cloud.

Things used in this project
Hardware components |
||||||
 |
|
× | 1 | |||
Software apps and online services |
||||||
|
||||||
 |
|
|||||
Story
Hi,
In this project find temperature using LM35 ic and post data into artik cloud.
The LM35 series are precision integrated-circuit temperature devices with an output voltage linearly-proportional to the Centigrade temperature read more
Artik cloud:
Samsung ARTIK gives you tools to reduce your IoT product development timelines, getting your product to market faster. Our end-to-end ecosystem strategy means you don’t have to develop your own modules, network stack, or cloud on-boarding. for more.
You can find many tutorial about Artik in hackster.io.
Step 1:
First create a free Artik Cloud account .CLICK HERE
- After that Open Developers portal
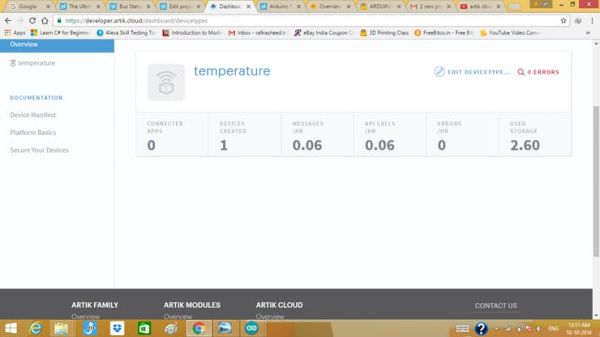
- then Click on Device type from the Dashboard menu
- click Create Device type and Create a new device .
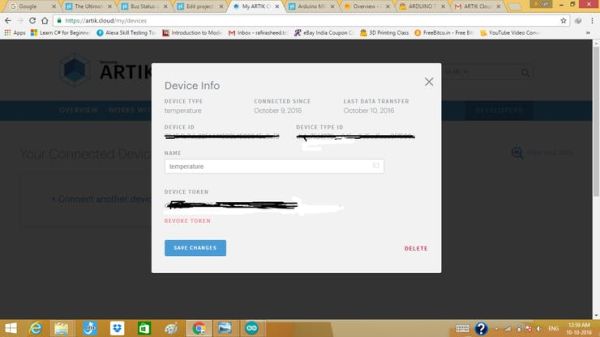
After creating a device we need some information to connect with Artik cloud.
For that click on the small gear (Settings) icon on the near the device name and a pop-up will come. Click ongenerate device token and you will get a token. Copy the Device ID and the Device Token for later use.
Code:
Next we are doing code to Take temperature and post temperature details in ARTIK cloud.
Code to take temperature using LM35:
int val;
int tempPin = 9; // temperature pin
void setup()
{
Serial.begin(9600);
}
void loop()
{
val = analogRead(tempPin); //read analog data
float mv = ( val/1024.0)*;  //FInd temperature
float cel = mv/10;          //convert in to celsius
float farh = (cel*9)/5 + 32; //convert in to fahrenheat (optional)
Serial.print("TEMPRATURE = ");
Serial.print(cel);
Serial.print("*C");
Serial.println();
delay(1000);
}
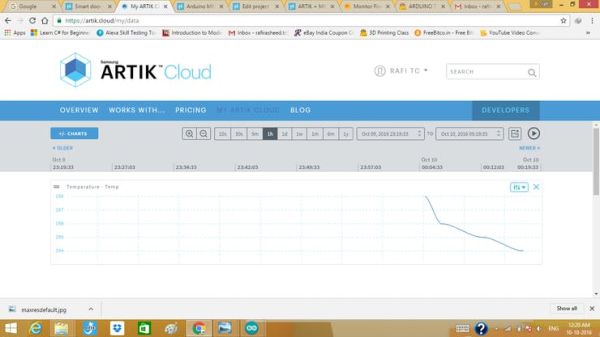
After that we post this data into ARTIK cloud in a fixed interval. For that following have a code please checkout that. After uploading Go to ARTIK cloud and check all is fine.
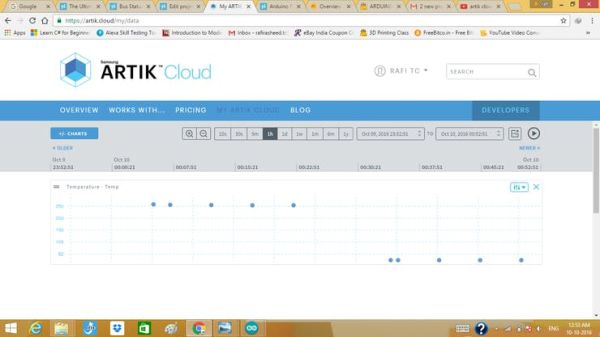
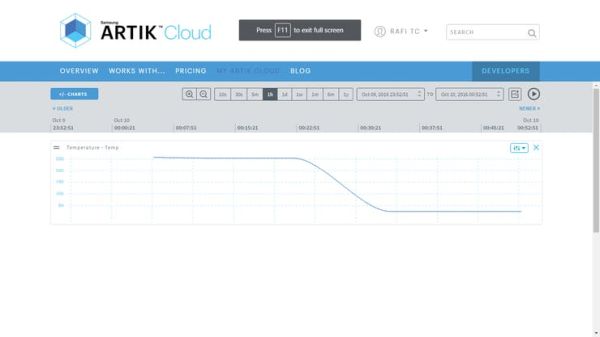
You can find your data by simply go to here.
At last check this working video:
Thank you 🙂 for watching my tutorial!
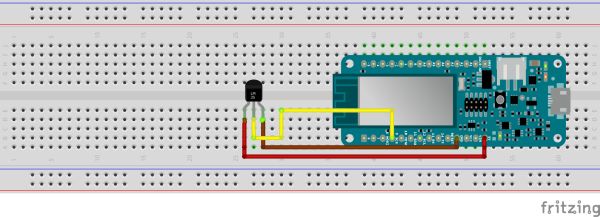
Schematics
Code
Source : Temperature Logger With Arduino And Artik Cloud