Summary of Stop Sweaty Hands and Feet With Sweat Fighter!
This article details the construction of "Sweat Fighter," a DIY iontophoresis machine designed to treat hyperhidrosis (excessive sweating) in hands and feet. The device uses an Arduino Nano, an H-bridge driver, and a custom PCB to deliver controlled electrical current through water pans, featuring automatic polarity reversal and timer functionality. While effective and affordable compared to commercial units, the author advises caution due to potential pain from polarity reversal and recommends using a 12V battery instead of a power supply for safety.
Parts used in the Sweat Fighter:
- Custom Sweat Fighter PCB
- Arduino Nano V3.0 5V
- L298N Dual H-Bridge Motor Driver
- 128x32 I2C SSD1306 OLED Display
- 12V Battery
- 2X Momentary Push Buttons
- Wires
- Header Pins
- Cables with Alligator Clips
- PLA
- Metal Pans
3/1/19 Update: Some people are reporting pain, which is caused by the quick polarity reversal. I will update the code to reduce that problem, but for the time being you should hold off on building this.
Hyperhidrosis is a condition that causes excessive sweating—even when sweating isn’t called for. It can cause sweating anywhere on your body where you have sweat glands, and the exact location just depends on the individual. But, in my case, it’s my hands and feet.
Everyone’s hands and feet sweat, of course. But, with hyperhidrosis, it’s a lot of sweat that doesn’t happen for any real reason. It’s not dependent on temperature or nervousness, though those can increase the severity. As you know if you suffer from this condition too, it’s embarrassing and can make basic tasks like using a touch screen difficult.
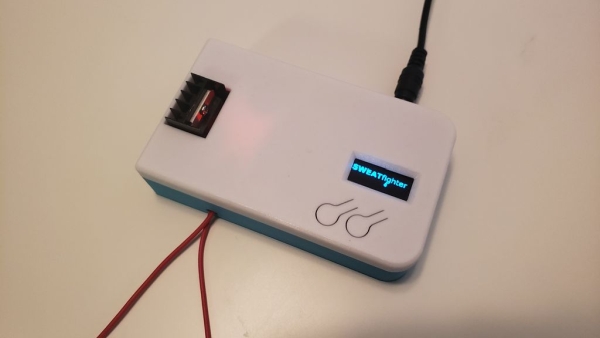
That’s where Sweat Fighter comes in! This is an iontophoresis machine that treats sweaty hands or feet by sending an electrical current into a pan of water, through your body, into a second pan of water, and back to the machine. I know it sounds like hokey pseudo-science, but it’s a real treatment. Commercial iontophoresis machines are just expensive, and Sweat Fighter only costs about $30 at per-unit component prices.
Sweat Fighter has a couple of advantages over traditional DIY iontophoresis machines:
- Easy to use
- Timer functionality
- Automatic polarity reversal
- Looks a bit nicer
Just plug it in, set how long you want the treatment to last, and press start!
Safety Notes:
- I am now recommending you use a 12V battery like this one: https://amzn.to/2SlmIT8 instead of the 12V power supply. This will eliminate any potential risk caused by defective power supplies. Simply connect the battery instead of the DC power supply jack. Don’t recharge the battery while using the device.
- This sends a small amount of electricity through your body. It shouldn’t be painful or harmful at all, but isn’t suitable for people with pacemakers. If you have a heart condition or pacemaker, talk to your doctor before using any iontophoresis device.
- Someone has pointed out that aluminum pans may pose a health risk. I’m unsure of how to verify that, and commercial machines often use aluminum. But, to be on the safe side, you can use food grade stainless steel pans.
Step 1: Parts and Tools
This is a pretty simple device, and only calls for a few components. It does, however, use a custom PCB that I designed. The KiCAD/Gerber files are provided (in the .zip folder) for you to make your own, and should only cost about $6 per unit through a service like OSHPark.
- Custom Sweat Fighter PCB ($6 per unit)
- Arduino Nano V3.0 5V ($4.67 per unit)
- L298N Dual H-Bridge Motor Driver ($2.47 per unit)
- 128×32 I2C SSD1306 OLED Display ($5.49 per unit)
- 12V Battery ($18.21 per unit)
- 2X Momentary Push Buttons
- Wires
- Header Pins
- Cables with Alligator Clips
- PLA
- Metal Pans
Here are the tools you’ll need:
- 3D Printer
- Soldering Iron
- Wire Cutters
- Computer (to upload Arduino code)
Step 2: How It Works
Check out the video for a demonstration!
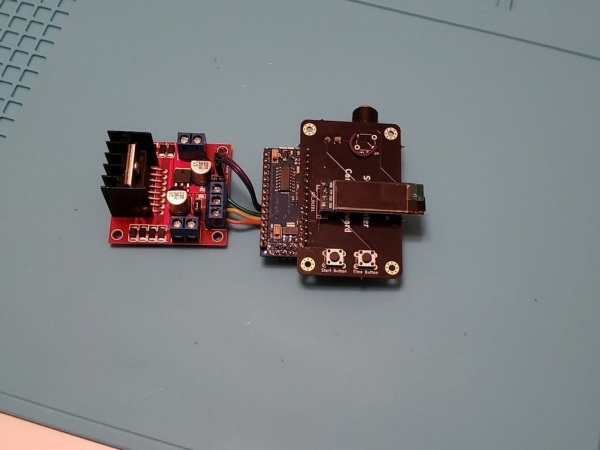
The dual H-bridge motor driver is doing most of the heavy lifting here. The purpose of an H-bridge is modulate the power going to an electric motor, and to reverse it so that the motor will spin in the opposite direction. We’re only using one side of the “dual” part of the H-bridge, and only using it to reverse polarity in the circuit. Reversing the polarity makes it so both hands are being treated.
This particular H-bridge accepts the 12V from the battery, which is what it outputs to the pans. It also has an onboard 5V regulator to provide power to the Arduino.
The Arduino, in turn, tells the H-bridge when to turn on and off, and with what polarity. The provided code lets you switch between treatment times (5, 10, and 15 minutes). The OLED display shows your selection, and a progress bar to let you know how far through the treatment you are.
Finally, the custom PCB ties the rest of the components together, and is where the time and start buttons are located.
Step 3: Print the Enclosure
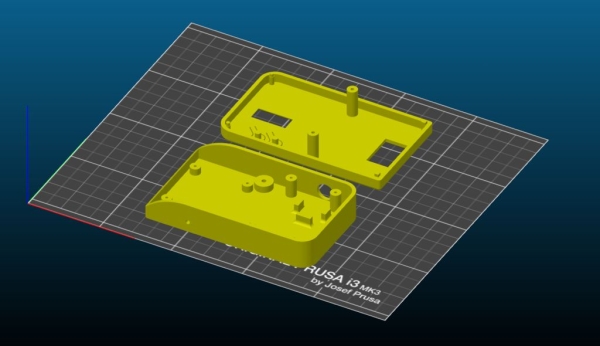
You should start with the enclosure, because it will take some time to print: about 3 hours for the bottom part and 2 hours for the top.
Both parts should be printed in PLA with the following settings:
- 0.15mm layer height
- 20% infill (grid)
- No supports
Step 4: Upload Arduino Code
Before you upload your code, make sure you have the Adafruit GFX libary and the Adafruit SSD1306 library installed.
Some Arduino clones, like the ones are I linked to, have different driver requirements than genuine Arduinos. Be sure to check the manufacturer instructions if you have any issues uploading the code.
Just open the provided code, and upload it. No modifications should be needed.
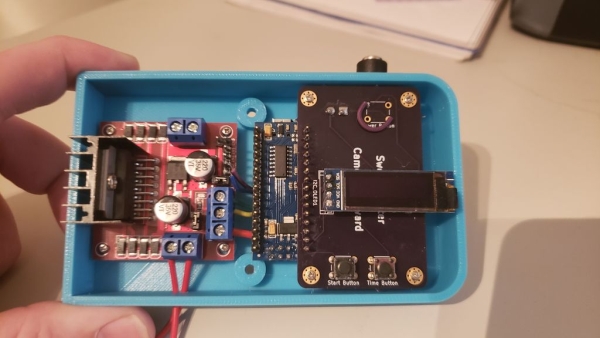
Step 5: Solder Connections
The custom Sweat Fighter PCB is labeled, so soldering the connections should be easy. Components should be placed on the same side as the corresponding label.
When placing the Arduino, make sure the side with the USB port is turned towards the “USB” label on the board—it won’t work if you use the opposite row of pins.
When soldering the OLED display, use four male headers pins, so there will be a space between the custom PCB and the display
The five wires going from the H-bridge to the custom PCB should be just long to reach. Place both boards in the enclosure to get a feel for how long the wires should be. You can remove the “Enable B” jumper from the H-bridge, as we won’t be using the B side of the board.
Two wires should go from the battery, through the hole on the back, and to the custom PCB. Ensure that the polarity is the same as marked on the board.
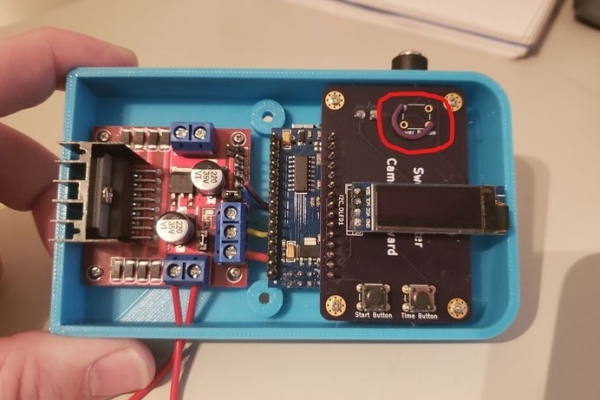
Finally, there is a spot marked “Power Button.” I decided not to use a power button, and so I just bridged that connection (see photo). You could use a power button if you’d like, but you’d need to modify the enclosure.
Step 6: Assemble Everything!
Before you place the boards in the enclosure, take your wire with alligator clips and cut it in half. Feed the two wires through the small hole in the bottom piece of the enclosure, and attach them to the “A Side” screw terminals of the H-Bridge.
Then lay both boards down on the mounts, but take care to make sure none of the wires are binding. Finally, use small screws to anchor them. Place the top half of the enclosure, and place screws on the bottom to secure it.
Step 7: Using Sweat Fighter
To use Sweat Fighter, simply fill the two pans with water and attach the alligator clips to them. Connect the battery, and the device will automatically turn on. Use the button on the right to change the treatment time, and the button on the left to start the treatment cycle.
Once you press the start button, place your hands in the pans of water. Try not to touch the bottom of the pan, as that will make the treatment less effective. You should feel a very slight electrical tingling, but it should not be painful. If you can’t feel the tingling at all, your water may be too soft (not enough minerals), so try adding some Epsom salt.
Then just wait for the treatment to finish, and you’re done!
Source: Stop Sweaty Hands and Feet With Sweat Fighter!
- What is the primary purpose of the Sweat Fighter project?
To treat hyperhidrosis by sending an electrical current through water pans into the body. - How does the device reverse polarity during treatment?
The L298N Dual H-Bridge Motor Driver modulates power to reverse the circuit polarity so both hands are treated. - Can I use a standard 12V power supply for this device?
No, the author now recommends using a 12V battery to eliminate risks associated with defective power supplies. - What should I do if I cannot feel the tingling sensation?
Add Epsom salt to the water to increase mineral content if the water is too soft. - Is it safe to use aluminum pans for this project?
Aluminum may pose health risks; the author suggests using food grade stainless steel pans to be safe. - Who should avoid using this iontophoresis device?
People with pacemakers or heart conditions should not use the device without consulting a doctor. - What are the available treatment time settings?
The code allows switching between treatment times of 5, 10, and 15 minutes. - Why should I not touch the bottom of the pan during treatment?
Touching the bottom will make the treatment less effective.