Building an Arduino project isn’t just about making all the components talk to one another. It’s about creating an actual object or prototype out of your small creation, and giving it that extra touch that makes it unique.
For this next project, we took some very basic components: a one-wire temperature sensor and a 7-segment LCD. For the extra flavoring, we used SUGRU, a really cool material that works great with electronics, and helped us transform this simple project into something with a spark.
Step 1: What You’ll Need for This Project
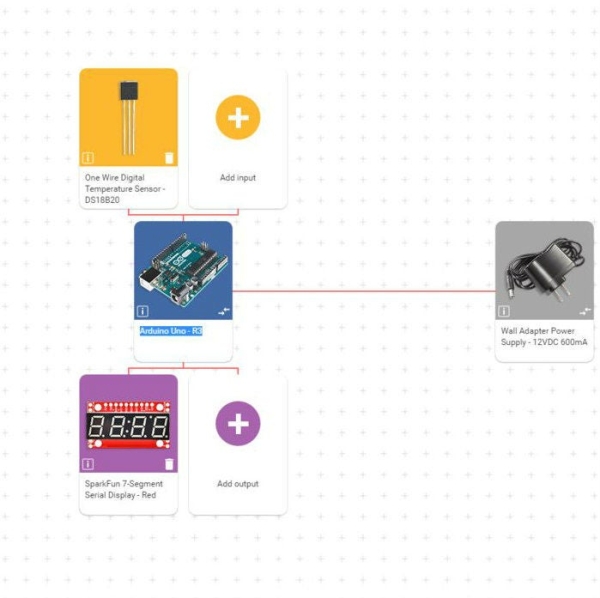
Every project you make has its core parts. In this case:
– Arduino Uno – R3
– One Wire Digital Temperature Sensor – DS18B20
– SparkFun 7-Segment Serial Display
– Wall Adapter Power Supply – 12VDC 600mA
In addition, you’ll also need a breadboard, some jumper cables and a resistor.
Click on this custom link and the components will be automatically selected for you on circuito.io
Step 2: Submitting a Request on Circuito.io
Once you’re done selecting the components, click on Generate. After we’re done processing your request (don’t worry, it’s take less than a minute), click on “open my circuito”. This will open the custom step-by-step guide that will show you a complete tutorial on how to assemble your circuit one cable at a time.
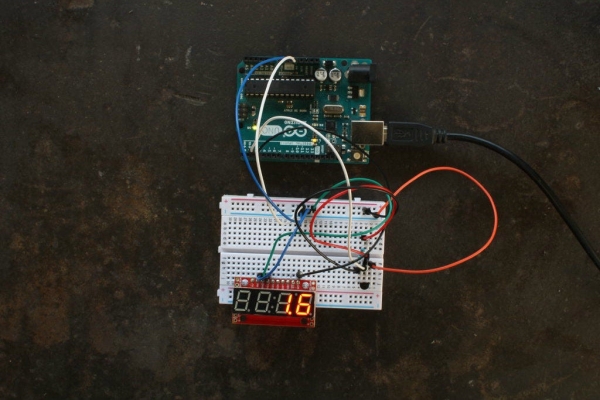
Step 3: Putting Together the Electronics
Before you begin, make sure you have everything you need. See the detailed BoM (bill of materials) at the top of the Step-by-Step guide.
Once you have all the components, start following the step-by-step guide. There are 11 steps in total. The main things you’ll need to do are:
1) Solder male header pins to the 7 segment display.
2) Place all your components on the breadboard in the right direction (exactly as they appear in the diagram)
3) Start connecting them to one another – power, ground, and so on.
You can also download the Fritzing file from there, or you can find it attached here.
Step 4: Coding
Scroll down in Step-by-Step and you’ll find the code section, where you’ll find boiler-plate code that will help you test your project. You can browse through the different code libraries and download them in order to upload them to the Arduino.
To upload the code to your Arduino, downloadArduino IDE version 1.6.7 or higher. You can use the Getting Started Guide to set up your work environment.
Remember: this is a boilerplate code to make sure your circuit was assembled correctly.
The test code is set to write “HI” upon initiation and afterwards, it starts counting.
If the temperature exceeds 28 degrees Celsius – the counter will stop.
If you want the screen to show the temperature all the time, copy the code below to the Firmware.ino library.
 #include "Global.h"

/* This code sets up the essentials for your circuit to work. It runs first every time your circuit is powered with electricity. */
void setup() {
    // Setup Serial which is useful for debugging
    // Use the Serial Monitor to view printed messages
    Serial.begin(9600);
    Serial.println("start");


}

/* This code is the main logic of your circuit. It defines the interaction between the components you selected. After setup, it runs over and over again, in an eternal loop. */
void loop() {


       // The display will show the temperature in C, and wipe it after 1000 milliseconds (1 sec)
        sevenSegment.write(ds18b20.readTempC()); //
<br>
Step 5: Taking Your Project Out of the Breadboard
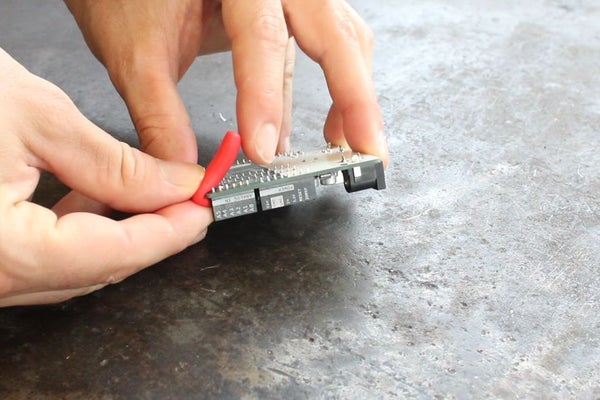
This is where your unique fingerprint comes in. After checking that everything works, you can start designing through your hands with SUGRU. The cool thing about it is that you can play with it until you reach something you like, and leave it to set.
Step 6: You’re All Done!
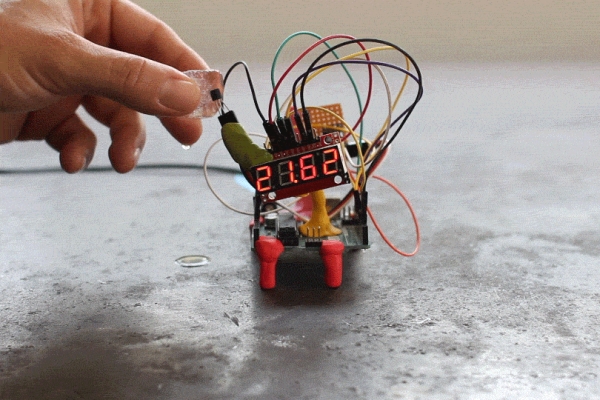
Thanks for taking the time to go over the tutorial.
This is just one example out of the endless combinations you can do with circuito.io.
If you have any questions or feedback you can find us on facebook, twitteror shoot us an email.
Source: Simple Arduino-based Thermometer